—Claude
Story[]
Having gained the support of the Alliance lords, Byleth and Claude learn that the Empire is gathering troops at Fort Merceus, likely under the command of Edelgard. Judith also informs them that a mysterious army marching under the banner of House Blaiddyd passed by the Great Bridge of Myrddin, but headed east upon discovering the bridge was occupied. Claude says that it is likely that the Alliance army will meet their enemies on the field at Gronder, the same site as the Battle of the Eagle and Lion five years before.
Initial Enemies[]
Imperial Army[]
- Edelgard (Armored Lord)
- Hubert (Dark Bishop)
- 5 Paladins
- 6 Fortress Knights
- 2 Dark Bishop
- Bernadetta (Sniper)
- 2 Pegasus Knights
- 2 Demonic Beasts
- Petra (Assassin)
Third Army[]
- Felix (Swordmaster)
- 2 Swordmasters
- 2 Paladins
- Dedue (Fortress Knight)
- 2 Warlocks
- Dimitri (High Lord)
- Mercedes (Bishop)
Reinforcements[]

Enemy Reinforcement Placements
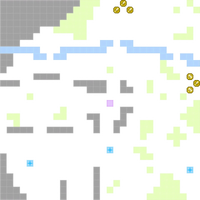
Sylvain and 2 paladins, Ingrid (Pegasus knight) and 2 fortress knights from the other army will join the battle. The paladins will spawn next to your starting point. These enemies will spawn once you attempt to take the center of the map.
Items[]
- Brave Bow
- Chest Key
- Lampos Shield
- Chest: Lampos Shield
Strategy[]
Subjective: The following part of this article is based upon the editor's personal experiences and opinions, and therefore may not be applicable for all readers.
|

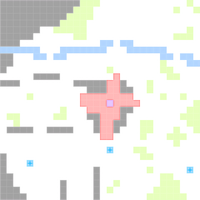
Defeating Petra/Assassin will trigger the Fire attack.
Dimitri's army will prioritize attacking your forces over the Imperials, so its advisable to deal with them first before the latter. They will however, fight the Imperials if no other available enemy is around, so you can use that to your advantage. Edelgard will also set fire to the center of the map if the assassin is defeated.
It is possible to cheese this chapter by baiting the enemy into attacking each other, with a capable flier. First, deal with the nearby fortress knight. Move the rest of your units towards the forest to the east and prepare for the Paladins (both the reinforcements and across the forest). Have your capable flier ready to charge the center.
using a (capable) flier, charge them towards the center of the map (and expect them to fight off some of the Fortress knights). Next, defeat the sniper mounted on the ballista, then end their turn ontop of the rocks (this is just to prevent some excess battles). This will cause the Assassin's party to become active, and will move into the center on their turn. Deal with the paladins as required, while moving through the forest. Dimitri's army should be moving by this point. Because you have your flying unit in the center, his army should charge (slightly) towards the center as well. Next, have your flier flee towards the north, avoiding the danger tiles (enemy attack range). For whatever reason, the assassin will instead focus on securing the middle of the map instead of charging at you. The rest of your forces should be through the forest, but not cross the bridge, and outside of the aggro range for the paladin across the bridge. For the rest of this battle, they pretty much do nothing but wait around that area, dealing with any stray enemies that come near. Aggro'ing the Paladin early on may or may not attract Hubert.
By now, Dimitri's army and the imperials should begin fighting each other in the center of the map, if not already. Edelgard may or may not have set fire to the center already by this point whether the assassin was defeated; if so, Hubert and the nearby imperials will begin moving.. Have your flier aggro the demonic beast near Edelgard by ending their turn 'just' within its reach to bait it out. Fly out of its range (feel free to grab the chest), and Dimitri himself (if the beast is within his attack range) shall deal with the beast for you. Avoid the enemy attack radius as necessary until Dimitri's forces have almost defeated the beast. Around this time, fly across the barricade, towards Edelgard (but outside her attack range). Dimitri and the remaining troops 'should' enter Edelgard's attack radius, and Edelgard will enter the fight. If done correctly by this point, it is just waiting for both armies to decimate each other, all the while avoiding the enemy. Clean up as necessary.
