(changing the quote to a better sentence) |
No edit summary |
||
| (277 intermediate revisions by more than 100 users not shown) | |||
| Line 1: | Line 1: | ||
{{Character |
{{Character |
||
| − | |title |
+ | |title = Dimitri |
| + | |image = <gallery> |
||
| − | |image =<tabber>Part 1 =[[File:Artwork Dimitri.png|280px]]<br>Official artwork of pre-timeskip Dimitri from ''[[Fire Emblem: Three Houses]]''.|-|Part 2 =[[File:Dimitri Artwork 5Years.png|280px]]<br>Official artwork of post-timeskip Dimitri from ''[[Fire Emblem: Three Houses]]''.</tabber> |
||
| + | Artwork Dimitri.png|Part 1 |
||
| − | |name =Dimitri |
||
| + | Dimitri Artwork 5Years.png|Part 2 |
||
| − | |jap_name ={{Hover|ディミトリ|Dimitori}} |
||
| + | Dimitri Artwork Three Hopes.png|FEW3H |
||
| − | |fullname =Dimitri Alexandre Blaiddyd |
||
| + | </gallery> |
||
| − | |jap_fullname ={{Hover|ディミトリ・アレクサンドル・ブレーダッド|Dimitori Arekusandoru Burēdaddo}} |
||
| + | |name = Dimitri |
||
| − | |alias =The Boar Prince<br>Prince/King of Delusion<br>The Tempest King<br>The Savior King<br>Didi |
||
| − | | |
+ | |jpn_name = {{Nihongo|ディミトリ|Dimitori}} |
| + | |fullname = Dimitri Alexandre Blaiddyd |
||
| − | |gender =Male |
||
| + | |jpn_fullname = {{Nihongo|ディミトリ・アレクサンドル・ブレーダッド|Dimitori Arekusandoru Burēdaddo}} |
||
| − | |race =[[Human]] |
||
| + | |alias = The Boar Prince<br>Prince/King of Delusion<br>The Tempest King<br>The Savior King<br>Didi<br>Dee |
||
| − | |birthday =December 20 |
||
| + | |jpn_alias = {{Nihongo|ディミ|Dimi}} |
||
| − | |fod_birth =20th of the Ethereal Moon<br>Imperial Year 1162 |
||
| + | |gender = Male |
||
| − | |relatives =[[Blaiddyd]] (ancestor)<br>[[Loog]] (ancestor)<br>[[Klaus I]] (ancestor)<br>[[Lambert]] (father)<br>Unnamed mother<br>[[Patricia]] (stepmother)<br>[[Rufus]] (paternal uncle)<br>[[Volkhard]] (step-uncle)<br>[[Edelgard]] (stepsister)<br>[[Oswald]] (distant relative)<br>[[Godfrey]] (distant relative)<br>[[Claude]] (distant relative) |
||
| − | | |
+ | |race = [[Human]]<br>[[Emblem]] (Engage) |
| + | |birthday = December 20 |
||
| − | |firstseen =Prologue: [[An Inevitable Encounter]] |
||
| + | |fod_birth = 20th of the Ethereal Moon; Imperial Year 1162 |
||
| − | |class =[[Noble]] |
||
| + | |age = 17-18 (Pre-Timeskip)<br>23 (Post-Timeskip) |
||
| − | |mirage = |
||
| + | |height = 180cm (about 5'11") (Pre-timeskip)<br>188cm (about 6'2") (Post-timeskip)<br>145cm (4'9") (child, according to unused data) |
||
| − | |voiceby =Chris Hackney |
||
| + | |relatives = [[Blaiddyd]] (Ancestor)<br>[[Loog]] (Ancestor)<br>[[Klaus I]] (Ancestor)<br>[[Banfig]] (Ancestor)<br>[[Lambert]] (Father)<br>Unnamed Mother<br>[[Patricia]] (Stepmother)<br>[[Rufus]] (Paternal Uncle)<br>[[Volkhard]] (Stepuncle)<br>[[Edelgard]] (Stepsister)<br>[[Claudia]] (Distant Relative)<br>[[Oswald]] (Distant Relative)<br>[[Godfrey]] (Distant Relative)<br>[[Tiana]] (Distant Relative)<br>[[Judith]] (Distant Relative)<br>[[Claude]] (Distant Relative) |
||
| − | |jap_voiceby =Kaito Ishikawa<br>Mai Nishikawa (young) |
||
| + | |nationality = [[Holy Kingdom of Faerghus]] |
||
| − | |position = |
||
| − | | |
+ | |home = [[Fhirdiad]] |
| − | | |
+ | |residence = [[Garreg Mach Monastery]]<br>[[Fhirdiad]] |
| + | |faction(s) = [[Blue Lions]] |
||
| − | |nationality =[[Holy Kingdom of Faerghus]] |
||
| − | |occupation(s) =Crown Prince of the Holy Kingdom of Faerghus<br> |
+ | |occupation(s) = Crown Prince of the Holy Kingdom of Faerghus<br>Commander in the Holy Kingdom Army (Formerly)<br>Student at the [[Officers Academy]]<br>House leader of the Blue Lions<br>King of the Holy Kingdom of Faerghus (Crimson Flower/Azure Moon) |
| + | |game = [[Fire Emblem: Three Houses]]<br>[[Fire Emblem Heroes]]<br>[[Fire Emblem Warriors: Three Hopes]]<br>[[Fire Emblem Engage]] ([[Bond Ring]] & DLC [[Emblem]]) |
||
| − | |age =17 (pre-timeskip)<br>23 (post-timeskip) |
||
| + | |firstseen = Prologue: [[An Inevitable Encounter]] |
||
| − | |residence =[[Garreg Mach Monastery]] |
||
| − | |firstjoined =Prologue: [[An Inevitable Encounter]] |
+ | |firstjoined = Prologue: [[An Inevitable Encounter]] |
| − | |firstfought =Chapter 1: [[Three Houses (Chapter)|Three Houses]] ( |
+ | |firstfought = Chapter 1: [[Three Houses (Chapter)|Three Houses]] (If the Blue Lions aren't chosen) |
| + | |class = [[Noble]] (White Clouds)<br>[[Paladin]] (Cindered Shadows) |
||
| − | |||
| + | |voiceby = Chris Hackney |
||
| − | {{Quote|I don't believe it's a sign of strength to just keep going forward no matter what. Taking the time to grieve for those we've lost...there's strength in that too. That's what I think, anyway. That said... It's also important to remember that no matter how sad you are, eventually your tears will dry up. That's when you have to figure out what it is you're living for. Then you can cling to that, with all your might, and start moving forward again.|Dimitri to [[Byleth]]}} |
||
| + | |jpn_voiceby = Kaito Ishikawa<br>Mai Nishikawa (young) |
||
| + | }} |
||
| + | {{Quote|Someone must put a stop to this cycle of the strong trampling the weak.|Dimitri to [[Byleth]]}} |
||
| − | '''Dimitri''' is a playable character and one of the protagonists in ''[[Fire Emblem: Three Houses]]''. He is the 17-year-old prince of the [[Holy Kingdom of Faerghus]] and leader of the [[Blue Lions]]. |
+ | '''Dimitri''' is a playable character and one of the main protagonists in ''[[Fire Emblem: Three Houses]]'' and ''[[Fire Emblem Warriors: Three Hopes]]''. He is the 17-year-old prince of the [[Holy Kingdom of Faerghus]] and the house leader of the [[Blue Lions]]. He possesses a Minor [[Crest]] of [[Blaiddyd]] and wields [[Lance (weapon)|Lances]] as his main weapon. |
==Profile== |
==Profile== |
||
| − | ===Early |
+ | ===Early Life=== |
| − | Dimitri is the crown prince of the |
+ | Dimitri is the crown prince of the Holy Kingdom of Faerghus. He was born in Imperial Year 1162 as the eldest son of King [[Lambert]]; his mother, the queen consort, perished in a plague that was later cured by [[Cornelia]]. He befriended [[Edelgard]] during her exile and she taught him how to dance. Dimitri gave her a dagger as a token of affection before she returned to the Adrestian Empire in 1174. |
| + | [[File:Tragedy of Duscur.png|250px|thumb|left|Dimitri witnesses the Tragedy of Duscur.]] |
||
| + | Dimitri was the only surviving royal of the [[Tragedy of Duscur]] in 1176. His uncle and Lambert's elder brother, Grand Duke [[Rufus]] of Itha, ruled as regent in Dimitri's stead. During the Kingdom's retaliatory subjugation of [[Duscur]], he saved and befriended [[Dedue]] who became his vassal. He fought his maiden battle two years later, where he distinguished himself as a commander in quelling a rebellion in western Faerghus. However, a strange bloodlust overtook him during that battle, which strained his relationship with [[Felix]] from that point on. |
||
| + | ===''Three Houses''=== |
||
| − | [[File:Tragedy of Duscur.png|250px|thumb|left|Dimitri survives the Tragedy of Duscur.]] |
||
| + | ====Academy Phase==== |
||
| − | He was the only surviving royal of the [[Tragedy of Duscur]] in 1176. Dimitri's uncle and Lambert's elder brother, Grand Duke [[Rufus]] of Itha, ruled as regent in Dimitri's stead. During the Kingdom's retaliatory subjugation of [[Duscur]], he saved and befriended [[Dedue]] who became his vassal. He fought his maiden battle two years later, where he distinguished himself as a commander in quelling a rebellion in western Faerghus. |
||
| + | In 1180, Dimitri enrolls as a student of the [[Officers Academy]] in [[Garreg Mach Monastery]] and serves as the house leader of the Blue Lions. His childhood friends [[Sylvain]], [[Ingrid]], and Felix are among his classmates. His story changes depending on what class [[Byleth]] chooses to teach. |
||
| − | === |
+ | =====Blue Lions===== |
| − | In 1180, he enrolls as a student of the [[Officers Academy]] in [[Garreg Mach Monastery]] and serves as the house leader of the [[Blue Lions]]. Dimitri's childhood friends [[Sylvain]], [[Ingrid]], and [[Felix]] are among his classmates. His story changes depending on what class [[Byleth]] chooses to teach. |
||
| − | |||
| − | ====Blue Lions==== |
||
Byleth chooses to instruct the Blue Lions house, helping Dimitri grow into a capable leader. During the night of the Academy Ball, the Blue Lions vow to reunite in five years for the Millennium Festival. Dimitri agrees to the reunion and hopes that everyone can make it. |
Byleth chooses to instruct the Blue Lions house, helping Dimitri grow into a capable leader. During the night of the Academy Ball, the Blue Lions vow to reunite in five years for the Millennium Festival. Dimitri agrees to the reunion and hopes that everyone can make it. |
||
{{Spoiler}} |
{{Spoiler}} |
||
| − | However, hostile encounters with the [[Flame Emperor]] and [[Those Who Slither in the Dark]] drive Dimitri to become more ruthless. After the Ball, he confides to Byleth that Edelgard is his stepsister and that he gave her a dagger as a gift during their childhood. Dimitri suddenly hears voices and sees the Flame Emperor conversing with [[Thales]]. Believing that the Flame Emperor was responsible for the Tragedy of Duscur, he confronts them. |
+ | However, hostile encounters with the [[Flame Emperor]] and [[Those Who Slither in the Dark]] slowly drive Dimitri to become more ruthless. After the Ball, he confides to Byleth that Edelgard is his stepsister and that he gave her a dagger as a gift during their childhood. Dimitri suddenly hears voices and sees the Flame Emperor conversing with [[Thales]]. Believing that the Flame Emperor was responsible for the Tragedy of Duscur, he confronts them. However, the Flame Emperor denies involvement and vanishes, leaving behind a dagger which Dimitri recognizes. |
After Byleth merges with [[Sothis]], [[Rhea]] instructs them to descend into the Holy Tomb and claim their power from the throne. The Flame Emperor interferes, seeking to raid the tomb of its Crest Stones, which leads to a skirmish. With most of the Emperor's forces dispatched, Dimitri unmasks their leader. To his shock and dismay, his suspicion that the Flame Emperor is Edelgard is confirmed. Outraged over her perceived involvement in his family's death, Dimitri snaps and slaughters her remaining forces. She is forced to retreat, but not before Dimitri vows to make Edelgard suffer for her crimes and kill her. |
After Byleth merges with [[Sothis]], [[Rhea]] instructs them to descend into the Holy Tomb and claim their power from the throne. The Flame Emperor interferes, seeking to raid the tomb of its Crest Stones, which leads to a skirmish. With most of the Emperor's forces dispatched, Dimitri unmasks their leader. To his shock and dismay, his suspicion that the Flame Emperor is Edelgard is confirmed. Outraged over her perceived involvement in his family's death, Dimitri snaps and slaughters her remaining forces. She is forced to retreat, but not before Dimitri vows to make Edelgard suffer for her crimes and kill her. |
||
| − | Edelgard ascends the [[Adrestian Empire]]'s throne, deposing [[Ionius IX]] and declaring war on the [[Church of Seiros]]. Dimitri fights beside [[Claude]] in the front lines to protect the Monastery from invasion. Although Edelgard and her vanguard are repelled, the invaders are reinforced by a larger army, forcing Rhea to enter the fray as |
+ | Edelgard ascends the [[Adrestian Empire]]'s throne, deposing [[Ionius IX]] and declaring war on the [[Church of Seiros]]. Dimitri fights beside [[Claude]] in the front lines to protect the Monastery from invasion. Although Edelgard and her vanguard are repelled, the invaders are reinforced by a larger army, forcing Rhea to enter the fray as [[The Immaculate One]]. Byleth attempts to aid her, but [[Thales]] sends them plummeting into a ravine. Garreg Mach Monastery eventually falls into Imperial control, scattering the [[Knights of Seiros]] and personnel of the Officers Academy not affiliated with the Empire. |
{{SpoilerEnd}} |
{{SpoilerEnd}} |
||
| − | === |
+ | ====Cindered Shadows==== |
{{Spoiler}} |
{{Spoiler}} |
||
| + | Dimitri is the other Blue Lion besides [[Ashe]] in the party that explores [[Abyss]]. Moved by the pleas of the [[Ashen Wolves]] to aid them in protecting the residents, he is impressed as to how outcasts are able to find sanctuary beneath Garreg Mach. |
||
{{SpoilerEnd}} |
{{SpoilerEnd}} |
||
| − | ===War Phase=== |
+ | ====War Phase==== |
| − | ====Azure Moon==== |
+ | =====Azure Moon===== |
{{Spoiler}} |
{{Spoiler}} |
||
| − | After the fall of Garreg Mach Monastery and Byleth's disappearance, Dimitri is falsely accused of murdering Grand Duke |
+ | After the fall of Garreg Mach Monastery and Byleth's disappearance, Dimitri is falsely accused of murdering Grand Duke Rufus, branded a traitor by Cornelia who declares Faerghus a vassal state of the Empire, and imprisoned for alleged regicide. He is able to escape imprisonment due to Dedue's apparent sacrifice but is presumed dead. At some point, he damages his right eye and is forced to wear an eyepatch. He lives a solitary life as a vagabond. Rumors of a sadistic warrior capable of slaying scores of soldiers begin to propagate throughout the Empire. |
| − | In 1185, Byleth returns after a five year absence and finds Dimitri, now a shell of his former self, alone in the ruins of the Monastery surrounded by fresh corpses of Imperial soldiers. He mistakes them for a ghost but realizes that they are alive. A bandit gang raiding a nearby village spurs the two into combat. During the skirmish, they reunite with other members of the Blue Lions, fulfilling the promise they made as students. Determined to overthrow Cornelia and kill Edelgard, the Blue Lions reclaim the Monastery as their stronghold. |
+ | In 1185, Byleth returns after a five year absence and finds Dimitri, now a shell of his former self, alone in the ruins of the Monastery surrounded by fresh corpses of Imperial soldiers. He mistakes them for a ghost but soon realizes that they are alive. A bandit gang raiding a nearby village spurs the two into combat. During the skirmish, they reunite with other members of the Blue Lions, fulfilling the promise they made as students. Determined to overthrow Cornelia and kill Edelgard, the Blue Lions reclaim the Monastery as their stronghold. |
With the Blue Lions reunited, Dimitri immediately plans on killing Edelgard by mobilizing his allies. The Monastery is suddenly attacked by Imperial forces in response to the Knights of Seiros returning to it. The Imperials are defeated and its leader [[Randolph]] is captured. Dimitri taunts Randolph, mocking his motivations as a general as well as concluding that they are both murderers. While Dimitri intends on slowly torturing the captive general, Byleth interferes and mercy kills Randolph. |
With the Blue Lions reunited, Dimitri immediately plans on killing Edelgard by mobilizing his allies. The Monastery is suddenly attacked by Imperial forces in response to the Knights of Seiros returning to it. The Imperials are defeated and its leader [[Randolph]] is captured. Dimitri taunts Randolph, mocking his motivations as a general as well as concluding that they are both murderers. While Dimitri intends on slowly torturing the captive general, Byleth interferes and mercy kills Randolph. |
||
| − | Acting on Byleth and [[Gilbert]]'s counsel, Dimitri gathers more allies and support from the rebelling Kingdom nobles still loyal to him as the rightful King of Faerghus. In response to [[Rodrigue]]'s pledge of support, they go to [[Ailell]] to link up with soldiers of House Fraldarius. However, they are intercepted by the forces of House [[Rowe]] led by [[Gwendal]]. After vanquishing the enemy, Rodrigue bestows [[Areadbhar]] to Dimitri and joins his crusade. Seeking to secure the Great Bridge of Myrddin, Dimitri faces off against the Empire. If Dedue's |
+ | Acting on Byleth and [[Gilbert]]'s counsel, Dimitri gathers more allies and support from the rebelling Kingdom nobles still loyal to him as the rightful King of Faerghus. In response to [[Rodrigue]]'s pledge of support, they go to [[Ailell]] to link up with soldiers of House Fraldarius. However, they are intercepted by the forces of House [[Rowe]] led by [[Gwendal]]. After vanquishing the enemy, Rodrigue bestows [[Areadbhar]] to Dimitri and joins his crusade. Seeking to secure the Great Bridge of Myrddin, Dimitri faces off against the Empire. If Dedue's Paralogue was completed in the Academy phase, he survives after helping Dimitri escape imprisonment and reunites with his classmates. With the bridge under his control, Dimitri confronts Dedue and is relieved that he survived thanks to the aid of the same Duscur men he saved years prior. Dedue renews his pledge of loyalty to his liege, but Dimitri makes him promise not to throw his life away again. |
| − | Dimitri commands his forces to march into Adrestian territory, leading them to [[Gronder Field]] where the Blue Lions previously emerged victorious in their mock battle five years ago. For the first time since the war began, the three nations meet on the battlefield. The three-way battle is fierce and though Faerghus forces Edelgard to retreat, it is a |
+ | Dimitri commands his forces to march into Adrestian territory, leading them to [[Gronder Field]] where the Blue Lions previously emerged victorious in their mock battle five years ago. For the first time since the war began, the three nations meet on the battlefield. The three-way battle is fierce and though Faerghus forces Edelgard to retreat, it is ultimately a {{w|Pyrrhic victory}}. Dimitri is outraged that she has escaped his grasp once more, but he is fatigued from the battle and urged by his allies to not pursue Edelgard due to Imperial reinforcements. |
[[File:Dimitri Rodrigue.png|200px|thumb|Rodrigue absolves Dimitri of guilt.|right]] |
[[File:Dimitri Rodrigue.png|200px|thumb|Rodrigue absolves Dimitri of guilt.|right]] |
||
| − | Suddenly [[Fleche]], a young maiden they encountered on the Great Bridge of Myrddin, appears on the battlefield and manages to wound Dimitri with her sword. Before she can land the final blow, Rodrigue shields Dimitri which allows Byleth to |
+ | Suddenly, [[Fleche]], a young maiden they encountered on the Great Bridge of Myrddin, appears on the battlefield and manages to wound Dimitri with her sword. Before she can land the final blow, Rodrigue shields Dimitri, which allows Byleth to cut her down. Rodrigue's sacrifice finally reawakens Dimitri's conscience, and he realizes that his lust for vengeance has not only consumed himself, but affected others as well. Rodrigue absolves him of any responsibility for his death and tells Dimitri that he should live for his ideals rather than stay shackled by ghosts of the past. With his dying breath, Rodrigue remarks that Dimitri resembles his late father [[Lambert]]. As a heavy downpour begins to fall, Byleth offers their hand to Dimitri and promises that they will continue to guide him. The other Blue Lions also vow to continue fighting alongside him. |
| − | [[File:King Dimitri.png|200px|thumb|Dimitri greets his subjects after liberating Fhirdiad.|left]] Afterwards, Dimitri apologizes to his allies for his foolishness. While not giving up on his quest to kill Edelgard, he declares his intent to liberate and reunite the Kingdom. Marching to [[Fhirdiad]] for the first time since his exile, Dimitri marshals his forces into the capital. Dimitri and his allies are able to |
+ | [[File:King Dimitri.png|200px|thumb|Dimitri greets his subjects after liberating Fhirdiad.|left]] Afterwards, Dimitri apologizes to his allies for his foolishness. While not giving up on his quest to kill Edelgard, he declares his intent to liberate and reunite the Kingdom. Marching to [[Fhirdiad]] for the first time since his exile, Dimitri marshals his forces into the capital. Dimitri and his allies are able to overrun Cornelia's fortifications and retake the city. When Dimitri confronts Cornelia, she reveals that his stepmother Patricia instigated the Tragedy of Duscur in order to be reunited with Edelgard. Dimitri is shocked by this claim but returns to the task at hand after she dies. With Cornelia ousted, Dimitri reluctantly walks out onto the castle balcony to find the people of Faerghus cheering his return. Dimitri takes his rightful place as King of Faerghus and continues his campaign against Edelgard. |
| − | A messenger from the [[Leicester Alliance]] arrives in Faerghus with dire news that [[Volkhard]] is spearheading an Imperial invasion of Alliance territory. Dimitri and Byleth heed Claude's plea for assistance. They arrive in [[Derdriu]] with the assault already underway, but the Alliance has fortified the city and stalled the Empire's advance with skirmishes. The Kingdom's |
+ | A messenger from the [[Leicester Alliance]] arrives in Faerghus with dire news that [[Volkhard]] is spearheading an Imperial invasion of Alliance territory. Dimitri and Byleth heed Claude's plea for assistance. They arrive in [[Derdriu]] with the assault already underway, but the Alliance has fortified the city and stalled the Empire's advance with skirmishes. The Kingdom's {{w|Pincer movement|pincer attack}} turns the tide of battle and Volkhard's forces are defeated. Volkhard is mortally wounded, he evades Dimitri's questions concerning The Tragedy of Duscur and instead goads him to kill Edelgard before dying. Claude confesses that he gambled the Alliance's survival on Dimitri before he even retook Fhirdiad. He then hands Dimitri [[Failnaught]] and announces that he is abdicating as leader of the Alliance since the lords of the roundtable conference unanimously voted to accede into the Kingdom. After informing them of [[Rhea|Rhea's]] imprisonment in [[Enbarr]], Claude departs Fódlan on a personal mission. |
| − | With the combined might of Faerghus and the former Alliance now at his disposal, Dimitri launches a proper invasion |
+ | With the combined might of Faerghus and the former Alliance now at his disposal, Dimitri launches a proper invasion of the Empire. His army routs the garrison of [[Fort Merceus]], slaying the [[Jeritza|Death Knight]] and securing a foothold in Imperial territory. A messenger from Margrave Gautier informs them that Faerghus has been pacified and will join forces with the Alliance army marching south. Dimitri briefly returns to Garreg Mach Monastery to interrogate a prisoner, who confesses that House Kleiman was a conspirator in the Tragedy of Duscur. Although disturbed by the revelation, he promptly returns to the front lines. As his forces approach Enbarr, Dimitri attempts to parley with Edelgard to learn her motivations for starting the war. She accepts on a whim and remembers her childhood in Faerghus after Dimitri returns her dagger, but the two are unable to compromise their world views. |
[[File:Dimitri ending.png|200px|thumb|Dimitri tries to reconcile with Edelgard.|right]] |
[[File:Dimitri ending.png|200px|thumb|Dimitri tries to reconcile with Edelgard.|right]] |
||
| Line 83: | Line 87: | ||
{{SpoilerEnd}} |
{{SpoilerEnd}} |
||
| − | ====Silver Snow==== |
+ | =====Silver Snow===== |
{{Spoiler}} |
{{Spoiler}} |
||
| − | Dimitri is hiding in the Dukedom of Fraldarius after Dedue helped him escape execution in Fhirdiad. When the |
+ | Dimitri is hiding in the Dukedom of Fraldarius after Dedue helped him escape execution in Fhirdiad. When the [[Resistance Army]] takes the Great Bridge of Myrddin, [[Gilbert]] is sent as an envoy to propose cooperation with Faerghus. [[Seteth]] allows them safe passage across the bridge, but declines to join them as he believes their advance towards Enbarr is reckless. Subsequently, news reaches Garreg Mach Monastery that Dimitri has died after his forces were decimated routing the Imperial Army at the Battle of Gronder Field. During that night, Byleth sees Dimitri. He laments the deaths of Rodrigue, Gilbert, and Dedue as well as his inability to restore the Kingdom or defeat the Empire. Before Dimitri is able to finish, Byleth is woken up by Seteth and the prince is nowhere to be seen. While several of his former classmates mourn Dimitri's death, [[Ferdinand]] speculates on whether he could still be alive when Byleth tells him about their dream. Overall, it is left ambiguous whether it was all a dream in Byleth's head, if he was a ghost, or if Dimitri survived the Battle of Gronder Field. |
{{SpoilerEnd}} |
{{SpoilerEnd}} |
||
| − | ====Verdant Wind==== |
+ | =====Verdant Wind===== |
{{Spoiler}} |
{{Spoiler}} |
||
| − | Dimitri is able to escape execution in Fhirdiad thanks to Dedue's help and raises an army in secret. After the Alliance army secures the Great Bridge of Myrddin, [[Judith]] declares that an army flying the banners of House Blaiddyd has marched through Alliance territory unopposed and is rushing towards Gronder Field. Rather than sending envoys to negotiate safe passage through the Great Bridge of Myrddin, the unknown army instead heads further east into Ordelia territory and frees the bridges from Imperial control. |
+ | Dimitri is able to escape execution in Fhirdiad thanks to Dedue's help and raises an army in secret. After the Alliance army secures the Great Bridge of Myrddin, [[Judith]] declares that an army flying the banners of House Blaiddyd has marched through Alliance territory unopposed and is rushing towards Gronder Field. Rather than sending envoys to negotiate safe passage through the Great Bridge of Myrddin, the unknown army instead heads further east into Ordelia territory and frees the bridges from Imperial control. |
| + | |||
| + | Dimitri arrives on Gronder Field with his Kingdom Army, resulting in a three way battle between against Edelgard's army and the [[Leicester Alliance]]'s army. The fierce battle that unfolds consumes the three armies, but the Alliance's army ultimately emerges victorious. Consumed by his quest for vengeance, Dimitri ignores his fatigue and chases after Edelgard, only to collapse from exhaustion. Left vulnerable, the Empire's army surrounds Dimitri and brutally executes him. Dedue, however, survives the fight and then vows to avenge him. |
||
{{SpoilerEnd}} |
{{SpoilerEnd}} |
||
| − | ====Crimson Flower==== |
+ | =====Crimson Flower===== |
{{Spoiler}} |
{{Spoiler}} |
||
Dimitri ascends the throne of Faerghus and consolidates his power throughout the Kingdom by swearing fealty to the Church of Seiros. He gives asylum to Rhea and the Knights of Seiros in Fhirdiad, exiles Cornelia to prevent intrigue in the capital, and has Rodrigue escort her to [[Arianrhod]] and garrison the city with Fraldarius soldiers to ensure the loyalty of House Rowe. After the fall of the Leicester Alliance, the remnants of the Eastern Church flee to Fhirdiad. When Arianrhod is destroyed by javelins of light, Dimitri swears to avenge the fallen. |
Dimitri ascends the throne of Faerghus and consolidates his power throughout the Kingdom by swearing fealty to the Church of Seiros. He gives asylum to Rhea and the Knights of Seiros in Fhirdiad, exiles Cornelia to prevent intrigue in the capital, and has Rodrigue escort her to [[Arianrhod]] and garrison the city with Fraldarius soldiers to ensure the loyalty of House Rowe. After the fall of the Leicester Alliance, the remnants of the Eastern Church flee to Fhirdiad. When Arianrhod is destroyed by javelins of light, Dimitri swears to avenge the fallen. |
||
| − | As the Black Eagle Strike Force marches towards the Kingdom capital, Dimitri tells Rhea that his heir will continue the Blaiddyd bloodline and directs her to position the Knights of Seiros to flank Edelgard's forces before he intercepts them at the [[Tailtean Plains]]. The rain delays Rhea's advance, forcing the Kingdom to make first contact with the Empire. [[Hubert]] notes that Dimitri has grown shrewd, as his younger self would have simply charged the front lines rather than adopt a defensive formation in anticipation of Rhea's maneuver. Dimitri is distraught when some of his soldiers willingly turn themselves into |
+ | As the Black Eagle Strike Force marches towards the Kingdom capital, Dimitri tells Rhea that his heir will continue the Blaiddyd bloodline and directs her to position the Knights of Seiros to flank Edelgard's forces before he intercepts them at the [[Tailtean Plains]]. The rain delays Rhea's advance, forcing the Kingdom to make first contact with the Empire. [[Hubert]] notes that Dimitri has grown shrewd, as his younger self would have simply charged the front lines rather than adopt a defensive formation in anticipation of Rhea's maneuver. Dimitri is distraught when some of his soldiers willingly turn themselves into [[Demonic Beast|Demonic Beasts]], and chides Dedue for giving them [[Crest Stone|Crest Stones]] without his knowledge and consent. Should Byleth face him, Dimitri will express horror that the professor sided with Edelgard and shows regret that he has to kill them. Dimitri is eventually defeated and slain by Edelgard. If Dedue is defeated before transforming into a [[Giant Demonic Beast]], Dimitri will instead pass peacefully in his vassal's arms. |
{{SpoilerEnd}} |
{{SpoilerEnd}} |
||
| + | ===''Warriors: Three Hopes''=== |
||
| − | ==Personality== |
||
| + | After [[Monica (Three Houses)|Monica]] is rescued and "[[Solon|Tomas]]" is driven out of the monastery, Dimitri is summoned by Rhea, and informed by Rodrigue that Dimitri's uncle Rufus has seized control of Fhirdiad and is orchestrating a purge of House Fraldarius under the pretense of trying to stop them from installing Dimitri as a puppet. Together with Rodrigue, Gilbert and the Blue Lions save [[Annette]] (who remains behind to avoid a conflict with House Dominic's neighbors), and Dimitri returns to Fhirdiad. |
||
| − | Dimitri is a sincere young man who seems like the embodiment of chivalry, but a shade of darkness lies beneath his cheerful demeanor. Despite being a royal, he dislikes formality and pretentious people, preferring his allies to be frank. |
||
| + | As Dimitri's attempts to convince Rufus to stand down fall on deaf ears, the Blue Lions arrive at Fhirdiad, rout Rufus' troops, arrest him, and force Cornelia to flee. In the aftermath, Dimitri publicly executes Rufus for treason. When [[Matthias|Margrave Gautier]] reports on his and the western lords' complicity in the Tragedy of Duscur, Dimitri decides to publicly admit the truth to the people of Faerghus and that it is time for him to formally take the throne. He convinces Gilbert to retake his birth identity of Gustave and have both him and [[Shez]] accept posts in the Kingdom army (If the latter is part of the Blue Lions). |
||
| − | Dimitri has a strange sense of humor, which is evident by his fondness for [[Alois]]'s corny jokes. By his own admission, he finds them humorous precisely because they are terrible. His personality is nearly identical to his stepmother [[Patricia]]. According to [[Hapi]], there is an uncanny resemblance in the way they interact with people and show anger. He enjoys combat training, weapon repair, and long rides but dislikes fragile objects and delicate work as he is unable to control his prodigious strength. Despite this, he is agile and became a capable dancer under [[Edelgard]]'s tutelage. Like Edelgard, he is uncomfortable with scorching heat. |
||
| + | |||
| + | Two years after the succession crisis, while Dimitri has kept Faerghus neutral on Adrestia's war on the Church, Seteth directly petitions for Kingdom aid. As the Faerghus royal family's legitimacy stems from the Church's support, the debt owned to Church's previous aid in the succession crisis, and the fact that the Empire may obtain undue influence over the Kingdom if left unchecked, Dimitri agrees to the request and orders his knights to prepare for battle with the Empire. With the odds of the Church holding Garreg Mach Monastery against the Empire grim, Dimitri and his troops make for Ailell, the Valley of Torment, to meet with Rhea and escort her to Fhirdiad. |
||
| + | |||
| + | If Byleth was recruited, Dimitri, Felix, and Dedue are seen together wondering where the two mercenaries are. Rodrigue reports that mages from Those Who Slither In The Dark in the forest. But before they could act, a Kingdom General reports that Shez is attacking Byleth. Upon defeating Shez and saving Byleth, Dimitri and the rest of the army face off against Solon. However during the battle Shez escapes. After Solon retreats, he meets up with Claude and Edelgard, who was acting strange before all three were transported to [[Zahras]] by Epimenides. Upon arriving there, he finds Edelgard back to normal and realizes that she was under some sort of spell the entire time. He agrees to team up with Edelgard to escape Zahras. After Shez teleports everyone back, he and Claude wonder what Zahras was and realized that Edelgard is gone. But they put that aside as they prepare to march towards Garreg Mach. |
||
| + | |||
| + | ==Personality== |
||
| + | A sincere young man who seems like the embodiment of chivalry, Dimitri has a shade of darkness lying beneath his cheerful demeanor. Despite being a royal, he dislikes formality and pretentiousness, preferring his allies to be frank. |
||
| + | Dimitri has a strange sense of humor, which is evident by his fondness for [[Alois]]' corny jokes. By his own admission, he finds them humorous precisely because they are terrible. According to [[Hapi]], there is an uncanny resemblance to his stepmother [[Patricia]] in terms of personality, such as the way they interact with people and show anger. He enjoys combat training, weapon repair, and long rides, but dislikes fragile objects and delicate work, as he is unable to control his prodigious strength. Despite this, he is agile and became a capable dancer under Edelgard's tutelage. Like Edelgard, he is uncomfortable with scorching heat. |
||
| − | Dimitri suffers from [[wikipedia:Ageusia|ageusia]] and [[wikipedia:Survivor guilt|survivor's guilt]] as a result of the slaughter in the [[Tragedy of Duscur]]. The former leaves him as the only person able to stomach [[Flayn]]'s food and the latter causes him to see apparitions of the dead. He is close to Dedue and admits that being able to save someone gave him a reason to live. He also dismisses the Crest system and [[wikipedia:Noblesse oblige|noblesse oblige]] as excuses used by the aristocracy to oppress the weak. While disdainful of the status quo, he believes that overthrowing the prevailing social order would be more detrimental; instead preferring to reform society through a war of position, by gaining control of corrupt institutions and purging them from within. |
||
| + | Dimitri suffers from [[wikipedia:Ageusia|ageusia]] and [[wikipedia:Survivor guilt|survivor's guilt]] as a result of the slaughter in the Tragedy of Duscur. The former leaves him as the only person able to stomach [[Flayn]]'s food and the latter causes him to see and hear apparitions of the dead. He is close to Dedue and admits that being able to save someone gave him a reason to live. In regards to the Crest System, Dimitri holds somewhat of a mixed stance towards it. While he believes that the system can be cruel for those like [[Miklan]] where it overlooks his own merits in favor of those with Crests, he maintains the stance that discarding such beliefs would cause greater problems. He overall believes that the two sides must reach an understanding with one another. |
||
{{Spoiler}} |
{{Spoiler}} |
||
| − | Near the end of his academic year in |
+ | Near the end of his academic year in ''Azure Moon'', Dimitri develops an obsessive hatred of Edelgard after discovering she is the Flame Emperor and is determined to kill her personally. The series of tragedies that follow Edelgard's revelation and declaration of war takes a heavy toll on his psyche. By the time he reunites with Byleth, Dimitri has lost any semblance of happiness and composure he had as a student, becoming brooding, cynical, and ruthless. When reunited with his former classmates, he is brusque and coldly dismisses them as mere tools to exact his revenge. Dimitri's five years of isolation have also exacerbated his survivor's guilt. He openly converses with apparitions of his deceased parents and [[Glenn]], promising to appease them with Edelgard's death. His indignation blinds him to the needs of others and he demonstrates a reckless disregard for his own well-being. Despite this, he still shows empathy to those orphaned by war. |
| − | Dimitri is unable to justify killing for one's ideals, and so he rejects the notion of taking up arms for a higher cause as sophistry. Thus, he dehumanizes all killers as monsters and is not above maiming and torturing his captive foes. This disdain extends to himself, as shown by his willingness to be wounded and disfigured by his enemies. However, he is oddly sympathetic to those who are also motivated by revenge, and was willing to die by |
+ | Dimitri is unable to justify killing for one's ideals, and so he rejects the notion of taking up arms for a higher cause as sophistry. Thus, he dehumanizes all killers as monsters and is not above maiming and torturing his captive foes. This disdain extends to himself, as shown by his willingness to be wounded and disfigured by his enemies. However, he is oddly sympathetic to those who are also motivated by revenge, and was willing to die by Fleche's hands as atonement for her brother's death. |
| − | Byleth's influence determines Dimitri's fate. In the routes where |
+ | Byleth's influence determines Dimitri's fate. In the routes where they do not instruct him, Dimitri will die consumed by vengeance or peacefully in ''Crimson Flower'', but solely if [[Dedue]] is defeated before he transforms into a demonic beast. If he is Byleth's chosen house leader, his obsession with appeasing the dead finally fades after Rodrigue sacrifices himself to thwart Fleche's assassination attempt. This event restores Dimitri's sanity and he resolves to fight for his beliefs together with his allies, unburdened by the ghosts of his past. Reflecting on his exile, Dimitri would later confess to Byleth that experiencing poverty during his life in the slums deeply affected him; the plight of the poor inspired him to change Fódlan from the ground up. Though unsure of his fitness to be king, the people's support upon liberating [[Fhirdiad]] bolsters his desire to serve them. After the war, Dimitri becomes a benevolent king beloved by the masses for his societal reforms and participatory form of government. |
{{SpoilerEnd}} |
{{SpoilerEnd}} |
||
| + | Dimitri's ''Three Hopes'' counterpart retains his sanity but still has survivor's guilt. He hesitates with certain tasks like killing his uncle and accepting [[Areadbhar]]. He will do anything to keep his people and friends safe, including surrendering to Cornelia or fighting a possessed Shez. |
||
| − | == |
+ | ==In-Game== |
===''[[Fire Emblem: Three Houses]]''=== |
===''[[Fire Emblem: Three Houses]]''=== |
||
====Base Stats==== |
====Base Stats==== |
||
| Line 123: | Line 138: | ||
|game = fe16 |
|game = fe16 |
||
|image = [[File:FE16 Noble Dimitri Icon.gif]][[Noble]] |
|image = [[File:FE16 Noble Dimitri Icon.gif]][[Noble]] |
||
| − | |Crest = [[File:Crest of Blaiddyd.png| |
+ | |Crest = [[File:Minor Crest of Blaiddyd Icon.png|30px|Minor Crest of Blaiddyd]] |
|Abilities = [[File:Royal Bloodline.png|20px]][[Royal Lineage]]<br>[[File:Sword Prowess Lv 1.png|20px]][[Sword Prowess|Sword Prowess Lv 1]]<br>[[File:Lance Prowess Lv 2.png|20px]][[Lance Prowess|Lance Prowess Lv 2]]<br>[[File:Authority Lv 1.png|20px]][[Authority Prowess|Authority Lv 1]] |
|Abilities = [[File:Royal Bloodline.png|20px]][[Royal Lineage]]<br>[[File:Sword Prowess Lv 1.png|20px]][[Sword Prowess|Sword Prowess Lv 1]]<br>[[File:Lance Prowess Lv 2.png|20px]][[Lance Prowess|Lance Prowess Lv 2]]<br>[[File:Authority Lv 1.png|20px]][[Authority Prowess|Authority Lv 1]] |
||
|Item = [[File:FE16 Lance Weapon Icon.png|20px]][[Iron Lance]]<br>[[File:FE16 Potion Icon.png|20px]][[Vulnerary]] |
|Item = [[File:FE16 Lance Weapon Icon.png|20px]][[Iron Lance]]<br>[[File:FE16 Potion Icon.png|20px]][[Vulnerary]] |
||
| Line 140: | Line 155: | ||
}} |
}} |
||
{{SkillLevel |
{{SkillLevel |
||
| − | |level = E+ / D+ / E / E / E / E / E / D / E / D / E |
+ | |level = E+ / D+ / E / E / E / E / E / D / E / D / E |
| − | |start = ^ / ^ / . / / / . / / ^ / / * / |
+ | |start = ^ / ^ / . / / / . / / ^ / / * / |
}} |
}} |
||
|-|Cindered Shadows= |
|-|Cindered Shadows= |
||
| Line 147: | Line 162: | ||
|game = fe16 |
|game = fe16 |
||
|image = [[File:FE16 Paladin Dimitri Icon.gif]][[Paladin]] |
|image = [[File:FE16 Paladin Dimitri Icon.gif]][[Paladin]] |
||
| − | |Crest = [[File:Crest of Blaiddyd.png| |
+ | |Crest = [[File:Minor Crest of Blaiddyd Icon.png|30px|Minor Crest of Blaiddyd]] |
|Abilities = [[File:Royal Bloodline.png|20px]][[Royal Lineage]]<br>[[File:Canto FE16.png|20px]][[Canto]]<br>[[File:Lancefaire FE16.png|20px]][[Lancefaire]]<br>[[File:Terrain Resistance FE16.png|20px]][[Absolve|Terrain Resistance]]<br>[[File:Lance Prowess Lv 3.png|20px]][[Lance Prowess|Lance Prowess Lv 3]]<br>[[File:Authority Lv 3.png|20px]][[Authority Prowess|Authority Lv 3]]<br>[[File:Resistance 2 FE16.png|20px]][[Resistance +|Resistance +2]]<br>[[File:Swordbreaker FE16.png|20px]][[Swordbreaker]]<br>[[File:Battalion Wrath FE16.png|20px]][[Battalion Wrath]] |
|Abilities = [[File:Royal Bloodline.png|20px]][[Royal Lineage]]<br>[[File:Canto FE16.png|20px]][[Canto]]<br>[[File:Lancefaire FE16.png|20px]][[Lancefaire]]<br>[[File:Terrain Resistance FE16.png|20px]][[Absolve|Terrain Resistance]]<br>[[File:Lance Prowess Lv 3.png|20px]][[Lance Prowess|Lance Prowess Lv 3]]<br>[[File:Authority Lv 3.png|20px]][[Authority Prowess|Authority Lv 3]]<br>[[File:Resistance 2 FE16.png|20px]][[Resistance +|Resistance +2]]<br>[[File:Swordbreaker FE16.png|20px]][[Swordbreaker]]<br>[[File:Battalion Wrath FE16.png|20px]][[Battalion Wrath]] |
||
|Item = [[File:FE16 Lance Weapon Icon.png|20px]][[Steel Lance]]<br>[[File:FE16 Lance Weapon Icon.png|20px]][[Iron Lance]]<br>[[File:FE16 Lance Weapon Icon.png|20px]][[Javelin]]<br>[[File:FE16 Potion Icon.png|20px]][[Concoction]] |
|Item = [[File:FE16 Lance Weapon Icon.png|20px]][[Steel Lance]]<br>[[File:FE16 Lance Weapon Icon.png|20px]][[Iron Lance]]<br>[[File:FE16 Lance Weapon Icon.png|20px]][[Javelin]]<br>[[File:FE16 Potion Icon.png|20px]][[Concoction]] |
||
| Line 164: | Line 179: | ||
}} |
}} |
||
{{SkillLevel |
{{SkillLevel |
||
| − | |level = C / B / D / E / E / E / E / C+ / E / C / E |
+ | |level = C / B / D / E / E / E / E / C+ / E / C / E |
| − | |start = ^ / ^ / . / / / . / / ^ / / * / |
+ | |start = ^ / ^ / . / / / . / / ^ / / * / |
}} |
}} |
||
</tabber> |
</tabber> |
||
| Line 175: | Line 190: | ||
{{CharStat |
{{CharStat |
||
|game = fe16 |
|game = fe16 |
||
| − | |image = [[File:FE16 Noble Dimitri Icon.gif]][[Noble]] |
+ | |image = [[File:FE16 Noble Enemy Dimitri Icon.gif]][[Noble]] |
| − | |Crest = [[File:Crest of Blaiddyd.png| |
+ | |Crest = [[File:Minor Crest of Blaiddyd Icon.png|30px|Minor Crest of Blaiddyd]] |
|Abilities = [[File:Royal Bloodline.png|20px]][[Royal Lineage|Royal Lineage]] |
|Abilities = [[File:Royal Bloodline.png|20px]][[Royal Lineage|Royal Lineage]] |
||
| − | |Item = [[File:FE16 Lance Weapon Icon.png|20px]][[Training Lance]]<br>[[File:FE16 Potion Icon.png|20px]][[Vulnerary |
+ | |Item = [[File:FE16 Lance Weapon Icon.png|20px]][[Training Lance]]<br>[[File:FE16 Potion Icon.png|20px]][[Vulnerary]] |
|Magic = - |
|Magic = - |
||
|Combat Arts = - |
|Combat Arts = - |
||
| − | |Level = |
+ | |Level = 3 |
|HP = 29 |
|HP = 29 |
||
|Str = 13 |
|Str = 13 |
||
| Line 195: | Line 210: | ||
{{CharStat |
{{CharStat |
||
|game = fe16 |
|game = fe16 |
||
| − | |image = [[File:FE16 Noble Dimitri Icon.gif]][[Noble]] |
+ | |image = [[File:FE16 Noble Enemy Dimitri Icon.gif]][[Noble]] |
| − | |Crest = [[File:Crest of Blaiddyd.png| |
+ | |Crest = [[File:Minor Crest of Blaiddyd Icon.png|30px|Minor Crest of Blaiddyd]] |
|Abilities = [[File:Royal Bloodline.png|20px]][[Royal Lineage|Royal Lineage]] |
|Abilities = [[File:Royal Bloodline.png|20px]][[Royal Lineage|Royal Lineage]] |
||
| − | |Item = [[File:FE16 Lance Weapon Icon.png|20px]][[Training Lance]]<br>[[File:FE16 Potion Icon.png|20px]][[Vulnerary |
+ | |Item = [[File:FE16 Lance Weapon Icon.png|20px]][[Training Lance]]<br>[[File:FE16 Potion Icon.png|20px]][[Vulnerary]] |
|Magic = - |
|Magic = - |
||
|Combat Arts = - |
|Combat Arts = - |
||
| Line 215: | Line 230: | ||
{{CharStat |
{{CharStat |
||
|game = fe16 |
|game = fe16 |
||
| − | |image = [[File:FE16 Noble Dimitri Icon.gif]][[Noble]] |
+ | |image = [[File:FE16 Noble Enemy Dimitri Icon.gif]][[Noble]] |
| − | |Crest = [[File:Crest of Blaiddyd.png| |
+ | |Crest = [[File:Minor Crest of Blaiddyd Icon.png|30px|Minor Crest of Blaiddyd]] |
|Abilities = [[File:Royal Bloodline.png|20px]][[Royal Lineage|Royal Lineage]]<br>[[File:Dexterity +4 FE16.png|20px]][[Skill +|Dexterity +4]] |
|Abilities = [[File:Royal Bloodline.png|20px]][[Royal Lineage|Royal Lineage]]<br>[[File:Dexterity +4 FE16.png|20px]][[Skill +|Dexterity +4]] |
||
| − | |Item = [[File:FE16 Lance Weapon Icon.png|20px]][[Training Lance]]<br>[[File:FE16 Potion Icon.png|20px]][[Vulnerary |
+ | |Item = [[File:FE16 Lance Weapon Icon.png|20px]][[Training Lance]]<br>[[File:FE16 Potion Icon.png|20px]][[Vulnerary]] |
|Magic = - |
|Magic = - |
||
|Combat Arts = - |
|Combat Arts = - |
||
| Line 225: | Line 240: | ||
|Str = 17 |
|Str = 17 |
||
|Mag = 6 |
|Mag = 6 |
||
| + | |Dex = 12{{Hover|+4|Granted by Dexterity +4}} |
||
| − | |Dex = 16 |
||
|Spd = 12 |
|Spd = 12 |
||
|Lck = 8 |
|Lck = 8 |
||
| Line 234: | Line 249: | ||
</tabber> |
</tabber> |
||
{{SkillLevel |
{{SkillLevel |
||
| − | |level = E / E / E / E / E / E / E / E / |
+ | |level = E / E / E / E / E / E / E / E / - / - / - |
| − | |start = |
+ | |start = / / / / / / / / / / |
}} |
}} |
||
| − | |||
=====[[Field of the Eagle and Lion|Battle of the Eagle and Lion]]===== |
=====[[Field of the Eagle and Lion|Battle of the Eagle and Lion]]===== |
||
| Line 244: | Line 258: | ||
{{CharStat |
{{CharStat |
||
|game = fe16 |
|game = fe16 |
||
| − | |image = [[File:FE16 Lord Dimitri Icon.gif]][[Lord]] |
+ | |image = [[File:FE16 Lord Enemy Dimitri Icon.gif]][[File:FE16 Lord Other Dimitri Icon.gif]][[Lord]] |
| − | |Crest = [[File:Crest of Blaiddyd.png| |
+ | |Crest = [[File:Minor Crest of Blaiddyd Icon.png|30px|Minor Crest of Blaiddyd]] |
|Abilities = [[File:Royal Bloodline.png|20px]][[Royal Lineage|Royal Lineage]]<br>[[File:Charm FE16.png|20px]][[Charm]]<br>[[File:General skill FE16.png|20px]][[General (skill)|General]]<br>[[File:Defiant Str FE16.png|20px]][[Defiant Strength]]<br>[[File:Lance Prowess Lv 3.png|20px]][[Lance Prowess|Lance Prowess Lv 3]]<br>[[File:Authority Lv 2.png|20px]][[Authority Prowess|Authority Lv 2]] |
|Abilities = [[File:Royal Bloodline.png|20px]][[Royal Lineage|Royal Lineage]]<br>[[File:Charm FE16.png|20px]][[Charm]]<br>[[File:General skill FE16.png|20px]][[General (skill)|General]]<br>[[File:Defiant Str FE16.png|20px]][[Defiant Strength]]<br>[[File:Lance Prowess Lv 3.png|20px]][[Lance Prowess|Lance Prowess Lv 3]]<br>[[File:Authority Lv 2.png|20px]][[Authority Prowess|Authority Lv 2]] |
||
|Item = [[File:FE16 Lance Weapon Icon.png|20px]][[Spear]]<br>[[File:FE16 Ring Icon.png|20px]][[Evasion Ring]]<br>[[File:FE16 Lance Weapon Icon.png|20px]][[Steel Lance]] |
|Item = [[File:FE16 Lance Weapon Icon.png|20px]][[Spear]]<br>[[File:FE16 Ring Icon.png|20px]][[Evasion Ring]]<br>[[File:FE16 Lance Weapon Icon.png|20px]][[Steel Lance]] |
||
| Line 264: | Line 278: | ||
{{CharStat |
{{CharStat |
||
|game = fe16 |
|game = fe16 |
||
| − | |image = [[File:FE16 Lord Dimitri Icon.gif]][[Lord]] |
+ | |image = [[File:FE16 Lord Enemy Dimitri Icon.gif]][[File:FE16 Lord Other Dimitri Icon.gif]][[Lord]] |
| − | |Crest = [[File:Crest of Blaiddyd.png| |
+ | |Crest = [[File:Minor Crest of Blaiddyd Icon.png|30px|Minor Crest of Blaiddyd]] |
|Abilities = [[File:Royal Bloodline.png|20px]][[Royal Lineage|Royal Lineage]]<br>[[File:Charm FE16.png|20px]][[Charm]]<br>[[File:General skill FE16.png|20px]][[General (skill)|General]]<br>[[File:Defiant Str FE16.png|20px]][[Defiant Strength]]<br>[[File:Lance Prowess Lv 3.png|20px]][[Lance Prowess|Lance Prowess Lv 3]]<br>[[File:Authority Lv 2.png|20px]][[Authority Prowess|Authority Lv 2]] |
|Abilities = [[File:Royal Bloodline.png|20px]][[Royal Lineage|Royal Lineage]]<br>[[File:Charm FE16.png|20px]][[Charm]]<br>[[File:General skill FE16.png|20px]][[General (skill)|General]]<br>[[File:Defiant Str FE16.png|20px]][[Defiant Strength]]<br>[[File:Lance Prowess Lv 3.png|20px]][[Lance Prowess|Lance Prowess Lv 3]]<br>[[File:Authority Lv 2.png|20px]][[Authority Prowess|Authority Lv 2]] |
||
|Item = [[File:FE16 Lance Weapon Icon.png|20px]][[Spear]]<br>[[File:FE16 Ring Icon.png|20px]][[Evasion Ring]]<br>[[File:FE16 Lance Weapon Icon.png|20px]][[Steel Lance]] |
|Item = [[File:FE16 Lance Weapon Icon.png|20px]][[Spear]]<br>[[File:FE16 Ring Icon.png|20px]][[Evasion Ring]]<br>[[File:FE16 Lance Weapon Icon.png|20px]][[Steel Lance]] |
||
| Line 284: | Line 298: | ||
{{CharStat |
{{CharStat |
||
|game = fe16 |
|game = fe16 |
||
| − | |image = [[File:FE16 Lord Dimitri Icon.gif]][[Lord]] |
+ | |image = [[File:FE16 Lord Enemy Dimitri Icon.gif]][[File:FE16 Lord Other Dimitri Icon.gif]][[Lord]] |
| − | |Crest = [[File:Crest of Blaiddyd.png| |
+ | |Crest = [[File:Minor Crest of Blaiddyd Icon.png|30px|Minor Crest of Blaiddyd]] |
|Abilities = [[File:Royal Bloodline.png|20px]][[Royal Lineage|Royal Lineage]]<br>[[File:Charm FE16.png|20px]][[Charm]]<br>[[File:General skill FE16.png|20px]][[General (skill)|General]]<br>[[File:Defiant Str FE16.png|20px]][[Defiant Strength]]<br>[[File:Lance Prowess Lv 3.png|20px]][[Lance Prowess|Lance Prowess Lv 3]]<br>[[File:Authority Lv 2.png|20px]][[Authority Prowess|Authority Lv 2]] |
|Abilities = [[File:Royal Bloodline.png|20px]][[Royal Lineage|Royal Lineage]]<br>[[File:Charm FE16.png|20px]][[Charm]]<br>[[File:General skill FE16.png|20px]][[General (skill)|General]]<br>[[File:Defiant Str FE16.png|20px]][[Defiant Strength]]<br>[[File:Lance Prowess Lv 3.png|20px]][[Lance Prowess|Lance Prowess Lv 3]]<br>[[File:Authority Lv 2.png|20px]][[Authority Prowess|Authority Lv 2]] |
||
|Item = [[File:FE16 Lance Weapon Icon.png|20px]][[Spear]]<br>[[File:FE16 Ring Icon.png|20px]][[Evasion Ring]]<br>[[File:FE16 Lance Weapon Icon.png|20px]][[Steel Lance]] |
|Item = [[File:FE16 Lance Weapon Icon.png|20px]][[Spear]]<br>[[File:FE16 Ring Icon.png|20px]][[Evasion Ring]]<br>[[File:FE16 Lance Weapon Icon.png|20px]][[Steel Lance]] |
||
| Line 303: | Line 317: | ||
</tabber> |
</tabber> |
||
{{SkillLevel |
{{SkillLevel |
||
| − | |level = D+ / B / E / E / E / E / E / C / |
+ | |level = D+ / B / E / E / E / E / E / C / - / - / - |
| − | |start = |
+ | |start = / / / / / / / / / / |
}} |
}} |
||
| − | |||
=====[[Blood of the Eagle and Lion (Verdant Wind)|To War at Gronder (Verdant Wind)]]===== |
=====[[Blood of the Eagle and Lion (Verdant Wind)|To War at Gronder (Verdant Wind)]]===== |
||
| Line 313: | Line 326: | ||
{{CharStat |
{{CharStat |
||
|game = fe16 |
|game = fe16 |
||
| − | |image = [[File:FE16 High Lord Dimitri Icon.gif]][[High Lord]] |
+ | |image = [[File:FE16 High Lord Other Dimitri Icon.gif]][[High Lord]] |
| − | |Crest = [[File:Crest of Blaiddyd.png| |
+ | |Crest = [[File:Minor Crest of Blaiddyd Icon.png|30px|Minor Crest of Blaiddyd]] |
|Abilities = [[File:Royal Lineage+.png|20px]][[Royal Lineage|Royal Lineage+]]<br>[[File:Charm FE16.png|20px]][[Charm]]<br>[[File:Lancefaire FE16.png|20px]][[Lancefaire]]<br>[[File:Commander FE16.png|20px]][[General (skill)|Commander]]<br>[[File:Counterattack.png|20px]][[Distant Counter|Counterattack]]<br>[[File:Lance Prowess Lv 4.png|20px]][[Lance Prowess|Lance Prowess Lv 4]]<br>[[File:Defensive Tactics FE16.png|20px]][[Defensive Tactics]] |
|Abilities = [[File:Royal Lineage+.png|20px]][[Royal Lineage|Royal Lineage+]]<br>[[File:Charm FE16.png|20px]][[Charm]]<br>[[File:Lancefaire FE16.png|20px]][[Lancefaire]]<br>[[File:Commander FE16.png|20px]][[General (skill)|Commander]]<br>[[File:Counterattack.png|20px]][[Distant Counter|Counterattack]]<br>[[File:Lance Prowess Lv 4.png|20px]][[Lance Prowess|Lance Prowess Lv 4]]<br>[[File:Defensive Tactics FE16.png|20px]][[Defensive Tactics]] |
||
| − | |Item = [[File:FE16 Relic Lance Weapon Icon.png|20px]][[Areadbhar]]<br>[[File:FE16 Potion Icon.png|20px]][[Concoction]]<br>[[File:FE16 Seal Icon.png|20px]][[Master Seal]] |
+ | |Item = [[File:FE16 Relic Lance Weapon Icon.png|20px]][[Areadbhar]]<br>[[File:FE16 Potion Icon.png|20px]][[Concoction]]<br>[[File:FE16 Seal Icon.png|20px]][[Master Seal]] |
|Magic = - |
|Magic = - |
||
| − | |Combat Arts = [[File:Icon Combat Art FE16 Lance.png|20px]][[Atrocity]] |
+ | |Combat Arts = [[File:Icon Combat Art FE16 Lance.png|20px]][[Atrocity]]{{Hover|*|Granted by Areadbhar}} |
|Level = 35 |
|Level = 35 |
||
|HP = 51 |
|HP = 51 |
||
| Line 333: | Line 346: | ||
{{CharStat |
{{CharStat |
||
|game = fe16 |
|game = fe16 |
||
| − | |image = [[File:FE16 High Lord Dimitri Icon.gif]][[High Lord]] |
+ | |image = [[File:FE16 High Lord Other Dimitri Icon.gif]][[High Lord]] |
| − | |Crest = [[File:Crest of Blaiddyd.png| |
+ | |Crest = [[File:Minor Crest of Blaiddyd Icon.png|30px|Minor Crest of Blaiddyd]] |
|Abilities = [[File:Royal Lineage+.png|20px]][[Royal Lineage|Royal Lineage+]]<br>[[File:Charm FE16.png|20px]][[Charm]]<br>[[File:Lancefaire FE16.png|20px]][[Lancefaire]]<br>[[File:Commander FE16.png|20px]][[General (skill)|Commander]]<br>[[File:Counterattack.png|20px]][[Distant Counter|Counterattack]]<br>[[File:Lance Prowess Lv 4.png|20px]][[Lance Prowess|Lance Prowess Lv 4]]<br>[[File:Defensive Tactics FE16.png|20px]][[Defensive Tactics]] |
|Abilities = [[File:Royal Lineage+.png|20px]][[Royal Lineage|Royal Lineage+]]<br>[[File:Charm FE16.png|20px]][[Charm]]<br>[[File:Lancefaire FE16.png|20px]][[Lancefaire]]<br>[[File:Commander FE16.png|20px]][[General (skill)|Commander]]<br>[[File:Counterattack.png|20px]][[Distant Counter|Counterattack]]<br>[[File:Lance Prowess Lv 4.png|20px]][[Lance Prowess|Lance Prowess Lv 4]]<br>[[File:Defensive Tactics FE16.png|20px]][[Defensive Tactics]] |
||
| − | |Item = [[File:FE16 Relic Lance Weapon Icon.png|20px]][[Areadbhar]]<br>[[File:FE16 Potion Icon.png|20px]][[Concoction]]<br>[[File:FE16 Seal Icon.png|20px]][[Master Seal]] |
+ | |Item = [[File:FE16 Relic Lance Weapon Icon.png|20px]][[Areadbhar]]<br>[[File:FE16 Potion Icon.png|20px]][[Concoction]]<br>[[File:FE16 Seal Icon.png|20px]][[Master Seal]] |
|Magic = - |
|Magic = - |
||
| − | |Combat Arts = [[File:Icon Combat Art FE16 Lance.png|20px]][[Atrocity]] |
+ | |Combat Arts = [[File:Icon Combat Art FE16 Lance.png|20px]][[Atrocity]]{{Hover|*|Granted by Areadbhar}} |
|Level = 36 |
|Level = 36 |
||
|HP = 57 |
|HP = 57 |
||
| Line 353: | Line 366: | ||
{{CharStat |
{{CharStat |
||
|game = fe16 |
|game = fe16 |
||
| − | |image = [[File:FE16 High Lord Dimitri Icon.gif]][[High Lord]] |
+ | |image = [[File:FE16 High Lord Other Dimitri Icon.gif]][[High Lord]] |
| − | |Crest = [[File:Crest of Blaiddyd.png| |
+ | |Crest = [[File:Minor Crest of Blaiddyd Icon.png|30px|Minor Crest of Blaiddyd]] |
|Abilities = [[File:Royal Lineage+.png|20px]][[Royal Lineage|Royal Lineage+]]<br>[[File:Charm FE16.png|20px]][[Charm]]<br>[[File:Lancefaire FE16.png|20px]][[Lancefaire]]<br>[[File:Commander FE16.png|20px]][[General (skill)|Commander]]<br>[[File:Counterattack.png|20px]][[Distant Counter|Counterattack]]<br>[[File:Lance Prowess Lv 4.png|20px]][[Lance Prowess|Lance Prowess Lv 4]]<br>[[File:Defensive Tactics FE16.png|20px]][[Defensive Tactics]] |
|Abilities = [[File:Royal Lineage+.png|20px]][[Royal Lineage|Royal Lineage+]]<br>[[File:Charm FE16.png|20px]][[Charm]]<br>[[File:Lancefaire FE16.png|20px]][[Lancefaire]]<br>[[File:Commander FE16.png|20px]][[General (skill)|Commander]]<br>[[File:Counterattack.png|20px]][[Distant Counter|Counterattack]]<br>[[File:Lance Prowess Lv 4.png|20px]][[Lance Prowess|Lance Prowess Lv 4]]<br>[[File:Defensive Tactics FE16.png|20px]][[Defensive Tactics]] |
||
| − | |Item = [[File:FE16 Relic Lance Weapon Icon.png|20px]][[Areadbhar]]<br>[[File:FE16 Potion Icon.png|20px]][[Concoction]]<br>[[File:FE16 Seal Icon.png|20px]][[Master Seal]] |
+ | |Item = [[File:FE16 Relic Lance Weapon Icon.png|20px]][[Areadbhar]]<br>[[File:FE16 Potion Icon.png|20px]][[Concoction]]<br>[[File:FE16 Seal Icon.png|20px]][[Master Seal]] |
|Magic = - |
|Magic = - |
||
| − | |Combat Arts = [[File:Icon Combat Art FE16 Lance.png|20px]][[Atrocity]] |
+ | |Combat Arts = [[File:Icon Combat Art FE16 Lance.png|20px]][[Atrocity]]{{Hover|*|Granted by Areadbhar}} |
|Level = 42 |
|Level = 42 |
||
|HP = 68 |
|HP = 68 |
||
| Line 372: | Line 385: | ||
</tabber> |
</tabber> |
||
{{SkillLevel |
{{SkillLevel |
||
| − | |level = B / B / D+ / C / C+ / E+ / E+ / B / |
+ | |level = B / B / D+ / C / C+ / E+ / E+ / B / - / - / - |
| − | |start = |
+ | |start = / / / / / / / / / / |
}} |
}} |
||
| − | <nowiki>*</nowiki>Drops upon defeat |
||
=====[[Field of Revenge|Combat at Tailtean Plains]]===== |
=====[[Field of Revenge|Combat at Tailtean Plains]]===== |
||
| Line 382: | Line 394: | ||
{{CharStat |
{{CharStat |
||
|game = fe16 |
|game = fe16 |
||
| − | |image = [[File:FE16 Great Lord Dimitri Icon.gif]][[Great Lord]] |
+ | |image = [[File:FE16 Great Lord Enemy Dimitri Icon.gif]][[Great Lord]] |
| − | |Crest = [[File:Crest of Blaiddyd.png| |
+ | |Crest = [[File:Minor Crest of Blaiddyd Icon.png|30px|Minor Crest of Blaiddyd]] |
|Abilities = [[File:Royal Lineage+.png|20px]][[Royal Lineage|Royal Lineage+]]<br>[[File:Charm FE16.png|20px]][[Charm]]<br>[[File:Lancefaire FE16.png|20px]][[Lancefaire]]<br>[[File:Commander FE16.png|20px]][[General (skill)|Commander]]<br>[[File:Counterattack.png|20px]][[Distant Counter|Counterattack]]<br>[[File:Defiant Str FE16.png|20px]][[Defiant Strength]]<br>[[File:Lance Prowess Lv 5.png|20px]][[Lance Prowess|Lance Prowess Lv 5]]<br>[[File:Authority Lv 5.png|20px]][[Authority Prowess|Authority Lv 5]] |
|Abilities = [[File:Royal Lineage+.png|20px]][[Royal Lineage|Royal Lineage+]]<br>[[File:Charm FE16.png|20px]][[Charm]]<br>[[File:Lancefaire FE16.png|20px]][[Lancefaire]]<br>[[File:Commander FE16.png|20px]][[General (skill)|Commander]]<br>[[File:Counterattack.png|20px]][[Distant Counter|Counterattack]]<br>[[File:Defiant Str FE16.png|20px]][[Defiant Strength]]<br>[[File:Lance Prowess Lv 5.png|20px]][[Lance Prowess|Lance Prowess Lv 5]]<br>[[File:Authority Lv 5.png|20px]][[Authority Prowess|Authority Lv 5]] |
||
|Item = [[File:FE16 Relic Lance Weapon Icon.png|20px]][[Areadbhar]]<br>[[File:FE16 Potion Icon.png|20px]][[Vulnerary]] |
|Item = [[File:FE16 Relic Lance Weapon Icon.png|20px]][[Areadbhar]]<br>[[File:FE16 Potion Icon.png|20px]][[Vulnerary]] |
||
|Magic = - |
|Magic = - |
||
| − | |Combat Arts = [[File:Icon Combat Art FE16 Lance.png|20px]][[Atrocity]] |
+ | |Combat Arts = [[File:Icon Combat Art FE16 Lance.png|20px]][[Atrocity]]{{Hover|*|Granted by Areadbhar}} |
|Level = 37 |
|Level = 37 |
||
|HP = 58 |
|HP = 58 |
||
| Line 402: | Line 414: | ||
{{CharStat |
{{CharStat |
||
|game = fe16 |
|game = fe16 |
||
| − | |image = [[File:FE16 Great Lord Dimitri Icon.gif]][[Great Lord]] |
+ | |image = [[File:FE16 Great Lord Enemy Dimitri Icon.gif]][[Great Lord]] |
| − | |Crest = [[File:Crest of Blaiddyd.png| |
+ | |Crest = [[File:Minor Crest of Blaiddyd Icon.png|30px|Minor Crest of Blaiddyd]] |
|Abilities = [[File:Royal Lineage+.png|20px]][[Royal Lineage|Royal Lineage+]]<br>[[File:Charm FE16.png|20px]][[Charm]]<br>[[File:Lancefaire FE16.png|20px]][[Lancefaire]]<br>[[File:Commander FE16.png|20px]][[General (skill)|Commander]]<br>[[File:Counterattack.png|20px]][[Distant Counter|Counterattack]]<br>[[File:Defiant Str FE16.png|20px]][[Defiant Strength]]<br>[[File:Lance Prowess Lv 5.png|20px]][[Lance Prowess|Lance Prowess Lv 5]]<br>[[File:Authority Lv 5.png|20px]][[Authority Prowess|Authority Lv 5]] |
|Abilities = [[File:Royal Lineage+.png|20px]][[Royal Lineage|Royal Lineage+]]<br>[[File:Charm FE16.png|20px]][[Charm]]<br>[[File:Lancefaire FE16.png|20px]][[Lancefaire]]<br>[[File:Commander FE16.png|20px]][[General (skill)|Commander]]<br>[[File:Counterattack.png|20px]][[Distant Counter|Counterattack]]<br>[[File:Defiant Str FE16.png|20px]][[Defiant Strength]]<br>[[File:Lance Prowess Lv 5.png|20px]][[Lance Prowess|Lance Prowess Lv 5]]<br>[[File:Authority Lv 5.png|20px]][[Authority Prowess|Authority Lv 5]] |
||
|Item = [[File:FE16 Relic Lance Weapon Icon.png|20px]][[Areadbhar]]<br>[[File:FE16 Potion Icon.png|20px]][[Vulnerary]] |
|Item = [[File:FE16 Relic Lance Weapon Icon.png|20px]][[Areadbhar]]<br>[[File:FE16 Potion Icon.png|20px]][[Vulnerary]] |
||
|Magic = - |
|Magic = - |
||
| − | |Combat Arts = [[File:Icon Combat Art FE16 Lance.png|20px]][[Atrocity]] |
+ | |Combat Arts = [[File:Icon Combat Art FE16 Lance.png|20px]][[Atrocity]]{{Hover|*|Granted by Areadbhar}} |
|Level = 38 |
|Level = 38 |
||
|HP = 64 |
|HP = 64 |
||
| Line 422: | Line 434: | ||
{{CharStat |
{{CharStat |
||
|game = fe16 |
|game = fe16 |
||
| − | |image = [[File:FE16 Great Lord Dimitri Icon.gif]][[Great Lord]] |
+ | |image = [[File:FE16 Great Lord Enemy Dimitri Icon.gif]][[Great Lord]] |
| − | |Crest = [[File:Crest of Blaiddyd.png| |
+ | |Crest = [[File:Minor Crest of Blaiddyd Icon.png|30px|Minor Crest of Blaiddyd]] |
|Abilities = [[File:Royal Lineage+.png|20px]][[Royal Lineage|Royal Lineage+]]<br>[[File:Charm FE16.png|20px]][[Charm]]<br>[[File:Lancefaire FE16.png|20px]][[Lancefaire]]<br>[[File:Commander FE16.png|20px]][[General (skill)|Commander]]<br>[[File:Counterattack.png|20px]][[Distant Counter|Counterattack]]<br>[[File:Defiant Str FE16.png|20px]][[Defiant Strength]]<br>[[File:Lance Prowess Lv 5.png|20px]][[Lance Prowess|Lance Prowess Lv 5]]<br>[[File:Authority Lv 5.png|20px]][[Authority Prowess|Authority Lv 5]] |
|Abilities = [[File:Royal Lineage+.png|20px]][[Royal Lineage|Royal Lineage+]]<br>[[File:Charm FE16.png|20px]][[Charm]]<br>[[File:Lancefaire FE16.png|20px]][[Lancefaire]]<br>[[File:Commander FE16.png|20px]][[General (skill)|Commander]]<br>[[File:Counterattack.png|20px]][[Distant Counter|Counterattack]]<br>[[File:Defiant Str FE16.png|20px]][[Defiant Strength]]<br>[[File:Lance Prowess Lv 5.png|20px]][[Lance Prowess|Lance Prowess Lv 5]]<br>[[File:Authority Lv 5.png|20px]][[Authority Prowess|Authority Lv 5]] |
||
|Item = [[File:FE16 Relic Lance Weapon Icon.png|20px]][[Areadbhar]]<br>[[File:FE16 Potion Icon.png|20px]][[Vulnerary]] |
|Item = [[File:FE16 Relic Lance Weapon Icon.png|20px]][[Areadbhar]]<br>[[File:FE16 Potion Icon.png|20px]][[Vulnerary]] |
||
|Magic = - |
|Magic = - |
||
| − | |Combat Arts = [[File:Icon Combat Art FE16 Lance.png|20px]][[Atrocity]] |
+ | |Combat Arts = [[File:Icon Combat Art FE16 Lance.png|20px]][[Atrocity]]{{Hover|*|Granted by Areadbhar}} |
|Level = 44 |
|Level = 44 |
||
|HP = 76 |
|HP = 76 |
||
| Line 441: | Line 453: | ||
</tabber> |
</tabber> |
||
{{SkillLevel |
{{SkillLevel |
||
| − | |level = B / A / C / C+ / B / D / D / A / |
+ | |level = B / A / C / C+ / B / D / D / A / - / - / - |
| − | |start = |
+ | |start = / / / / / / / / / / |
}} |
}} |
||
====Growth Rates==== |
====Growth Rates==== |
||
| + | Class: {{Selector}} |
||
| + | {{Field|Default}} |
||
{{CharGrowth|game = fe16}} |
{{CharGrowth|game = fe16}} |
||
|55% |
|55% |
||
| Line 457: | Line 471: | ||
|55% |
|55% |
||
|} |
|} |
||
| + | {{Field/end}} |
||
| + | {{Field|Noble}} |
||
| + | {{CharGrowth|game = fe16}} |
||
| + | |55% |
||
| + | |60% |
||
| + | |20% |
||
| + | |50% |
||
| + | |50% |
||
| + | |25% |
||
| + | |40% |
||
| + | |20% |
||
| + | |60% |
||
| + | |} |
||
| + | {{Field/end}} |
||
| + | {{Field|Dancer}} |
||
| + | {{CharGrowth|game = fe16}} |
||
| + | |75% |
||
| + | |55% |
||
| + | |20% |
||
| + | |50% |
||
| + | |50% |
||
| + | |25% |
||
| + | |35% |
||
| + | |15% |
||
| + | |65% |
||
| + | |} |
||
| + | {{Field/end}} |
||
| + | {{Field|High Lord}} |
||
| + | {{CharGrowth|game = fe16}} |
||
| + | |75% |
||
| + | |65% |
||
| + | |20% |
||
| + | |55% |
||
| + | |50% |
||
| + | |25% |
||
| + | |45% |
||
| + | |20% |
||
| + | |65% |
||
| + | |} |
||
| + | {{Field/end}} |
||
| + | {{Field|Great Lord}} |
||
| + | {{CharGrowth|game = fe16}} |
||
| + | |85% |
||
| + | |70% |
||
| + | |20% |
||
| + | |60% |
||
| + | |50% |
||
| + | |25% |
||
| + | |45% |
||
| + | |20% |
||
| + | |65% |
||
| + | |} |
||
| + | {{Field/end}} |
||
| + | {{Field|Myrmidon}} |
||
| + | {{CharGrowth|game = fe16}} |
||
| + | |65% |
||
| + | |60% |
||
| + | |20% |
||
| + | |50% |
||
| + | |55% |
||
| + | |25% |
||
| + | |40% |
||
| + | |15% |
||
| + | |60% |
||
| + | |} |
||
| + | {{Field/end}} |
||
| + | {{Field|Soldier}} |
||
| + | {{CharGrowth|game = fe16}} |
||
| + | |65% |
||
| + | |60% |
||
| + | |20% |
||
| + | |55% |
||
| + | |50% |
||
| + | |25% |
||
| + | |40% |
||
| + | |15% |
||
| + | |60% |
||
| + | |} |
||
| + | {{Field/end}} |
||
| + | {{Field|Fighter}} |
||
| + | {{CharGrowth|game = fe16}} |
||
| + | |65% |
||
| + | |65% |
||
| + | |20% |
||
| + | |50% |
||
| + | |50% |
||
| + | |25% |
||
| + | |40% |
||
| + | |15% |
||
| + | |60% |
||
| + | |} |
||
| + | {{Field/end}} |
||
| + | {{Field|Monk}} |
||
| + | {{CharGrowth|game = fe16}} |
||
| + | |60% |
||
| + | |60% |
||
| + | |20% |
||
| + | |50% |
||
| + | |50% |
||
| + | |25% |
||
| + | |40% |
||
| + | |25% |
||
| + | |60% |
||
| + | |} |
||
| + | {{Field/end}} |
||
| + | {{Field|Lord}} |
||
| + | {{CharGrowth|game = fe16}} |
||
| + | |75% |
||
| + | |60% |
||
| + | |20% |
||
| + | |60% |
||
| + | |50% |
||
| + | |25% |
||
| + | |40% |
||
| + | |20% |
||
| + | |65% |
||
| + | |} |
||
| + | {{Field/end}} |
||
| + | {{Field|Mercenary}} |
||
| + | {{CharGrowth|game = fe16}} |
||
| + | |75% |
||
| + | |65% |
||
| + | |20% |
||
| + | |55% |
||
| + | |50% |
||
| + | |25% |
||
| + | |40% |
||
| + | |15% |
||
| + | |60% |
||
| + | |} |
||
| + | {{Field/end}} |
||
| + | {{Field|Thief}} |
||
| + | {{CharGrowth|game = fe16}} |
||
| + | |75% |
||
| + | |60% |
||
| + | |20% |
||
| + | |60% |
||
| + | |60% |
||
| + | |25% |
||
| + | |40% |
||
| + | |20% |
||
| + | |60% |
||
| + | |} |
||
| + | {{Field/end}} |
||
| + | {{Field|Armored Knight}} |
||
| + | {{CharGrowth|game = fe16}} |
||
| + | |75% |
||
| + | |60% |
||
| + | |20% |
||
| + | |50% |
||
| + | |40% |
||
| + | |25% |
||
| + | |50% |
||
| + | |15% |
||
| + | |60% |
||
| + | |} |
||
| + | {{Field/end}} |
||
| + | {{Field|Cavalier}} |
||
| + | {{CharGrowth|game = fe16}} |
||
| + | |75% |
||
| + | |65% |
||
| + | |20% |
||
| + | |55% |
||
| + | |40% |
||
| + | |25% |
||
| + | |45% |
||
| + | |20% |
||
| + | |60% |
||
| + | |} |
||
| + | {{Field/end}} |
||
| + | {{Field|Brigand}} |
||
| + | {{CharGrowth|game = fe16}} |
||
| + | |85% |
||
| + | |70% |
||
| + | |20% |
||
| + | |50% |
||
| + | |50% |
||
| + | |25% |
||
| + | |40% |
||
| + | |15% |
||
| + | |60% |
||
| + | |} |
||
| + | {{Field/end}} |
||
| + | {{Field|Archer}} |
||
| + | {{CharGrowth|game = fe16}} |
||
| + | |60% |
||
| + | |60% |
||
| + | |20% |
||
| + | |60% |
||
| + | |50% |
||
| + | |30% |
||
| + | |40% |
||
| + | |20% |
||
| + | |60% |
||
| + | |} |
||
| + | {{Field/end}} |
||
| + | {{Field|Brawler}} |
||
| + | {{CharGrowth|game = fe16}} |
||
| + | |85% |
||
| + | |60% |
||
| + | |10% |
||
| + | |60% |
||
| + | |60% |
||
| + | |25% |
||
| + | |40% |
||
| + | |10% |
||
| + | |60% |
||
| + | |} |
||
| + | {{Field/end}} |
||
| + | {{Field|Mage}} |
||
| + | {{CharGrowth|game = fe16}} |
||
| + | |60% |
||
| + | |55% |
||
| + | |30% |
||
| + | |55% |
||
| + | |50% |
||
| + | |25% |
||
| + | |35% |
||
| + | |25% |
||
| + | |60% |
||
| + | |} |
||
| + | {{Field/end}} |
||
| + | {{Field|Dark Mage}} |
||
| + | {{CharGrowth|game = fe16}} |
||
| + | |60% |
||
| + | |55% |
||
| + | |30% |
||
| + | |55% |
||
| + | |50% |
||
| + | |25% |
||
| + | |35% |
||
| + | |25% |
||
| + | |55% |
||
| + | |} |
||
| + | {{Field/end}} |
||
| + | {{Field|Priest}} |
||
| + | {{CharGrowth|game = fe16}} |
||
| + | |60% |
||
| + | |55% |
||
| + | |25% |
||
| + | |55% |
||
| + | |50% |
||
| + | |25% |
||
| + | |35% |
||
| + | |30% |
||
| + | |65% |
||
| + | |} |
||
| + | {{Field/end}} |
||
| + | {{Field|Hero}} |
||
| + | {{CharGrowth|game = fe16}} |
||
| + | |85% |
||
| + | |70% |
||
| + | |20% |
||
| + | |50% |
||
| + | |60% |
||
| + | |25% |
||
| + | |40% |
||
| + | |15% |
||
| + | |60% |
||
| + | |} |
||
| + | {{Field/end}} |
||
| + | {{Field|Swordmaster}} |
||
| + | {{CharGrowth|game = fe16}} |
||
| + | |80% |
||
| + | |70% |
||
| + | |20% |
||
| + | |50% |
||
| + | |70% |
||
| + | |25% |
||
| + | |40% |
||
| + | |15% |
||
| + | |60% |
||
| + | |} |
||
| + | {{Field/end}} |
||
| + | {{Field|Assassin}} |
||
| + | {{CharGrowth|game = fe16}} |
||
| + | |75% |
||
| + | |60% |
||
| + | |20% |
||
| + | |70% |
||
| + | |70% |
||
| + | |25% |
||
| + | |40% |
||
| + | |20% |
||
| + | |55% |
||
| + | |} |
||
| + | {{Field/end}} |
||
| + | {{Field|Fortress Knight}} |
||
| + | {{CharGrowth|game = fe16}} |
||
| + | |85% |
||
| + | |70% |
||
| + | |20% |
||
| + | |50% |
||
| + | |40% |
||
| + | |25% |
||
| + | |55% |
||
| + | |20% |
||
| + | |60% |
||
| + | |} |
||
| + | {{Field/end}} |
||
| + | {{Field|Paladin}} |
||
| + | {{CharGrowth|game = fe16}} |
||
| + | |85% |
||
| + | |70% |
||
| + | |20% |
||
| + | |55% |
||
| + | |40% |
||
| + | |30% |
||
| + | |45% |
||
| + | |25% |
||
| + | |60% |
||
| + | |} |
||
| + | {{Field/end}} |
||
| + | {{Field|Wyvern Rider}} |
||
| + | {{CharGrowth|game = fe16}} |
||
| + | |85% |
||
| + | |70% |
||
| + | |15% |
||
| + | |50% |
||
| + | |50% |
||
| + | |25% |
||
| + | |45% |
||
| + | |15% |
||
| + | |60% |
||
| + | |} |
||
| + | {{Field/end}} |
||
| + | {{Field|Warrior}} |
||
| + | {{CharGrowth|game = fe16}} |
||
| + | |95% |
||
| + | |75% |
||
| + | |15% |
||
| + | |50% |
||
| + | |50% |
||
| + | |25% |
||
| + | |40% |
||
| + | |20% |
||
| + | |60% |
||
| + | |} |
||
| + | {{Field/end}} |
||
| + | {{Field|Sniper}} |
||
| + | {{CharGrowth|game = fe16}} |
||
| + | |65% |
||
| + | |65% |
||
| + | |20% |
||
| + | |70% |
||
| + | |50% |
||
| + | |35% |
||
| + | |40% |
||
| + | |20% |
||
| + | |60% |
||
| + | |} |
||
| + | {{Field/end}} |
||
| + | {{Field|Grappler}} |
||
| + | {{CharGrowth|game = fe16}} |
||
| + | |95% |
||
| + | |70% |
||
| + | |20% |
||
| + | |60% |
||
| + | |60% |
||
| + | |25% |
||
| + | |40% |
||
| + | |20% |
||
| + | |60% |
||
| + | |} |
||
| + | {{Field/end}} |
||
| + | {{Field|Warlock}} |
||
| + | {{CharGrowth|game = fe16}} |
||
| + | |65% |
||
| + | |60% |
||
| + | |30% |
||
| + | |50% |
||
| + | |50% |
||
| + | |25% |
||
| + | |35% |
||
| + | |25% |
||
| + | |60% |
||
| + | |} |
||
| + | {{Field/end}} |
||
| + | {{Field|Dark Bishop}} |
||
| + | {{CharGrowth|game = fe16}} |
||
| + | |65% |
||
| + | |60% |
||
| + | |30% |
||
| + | |50% |
||
| + | |50% |
||
| + | |25% |
||
| + | |35% |
||
| + | |25% |
||
| + | |55% |
||
| + | |} |
||
| + | {{Field/end}} |
||
| + | {{Field|Bishop}} |
||
| + | {{CharGrowth|game = fe16}} |
||
| + | |65% |
||
| + | |60% |
||
| + | |30% |
||
| + | |50% |
||
| + | |50% |
||
| + | |35% |
||
| + | |35% |
||
| + | |25% |
||
| + | |65% |
||
| + | |} |
||
| + | {{Field/end}} |
||
| + | {{Field|Trickster}} |
||
| + | {{CharGrowth|game = fe16}} |
||
| + | |75% |
||
| + | |60% |
||
| + | |20% |
||
| + | |65% |
||
| + | |70% |
||
| + | |35% |
||
| + | |40% |
||
| + | |25% |
||
| + | |55% |
||
| + | |} |
||
| + | {{Field/end}} |
||
| + | {{Field|War Monk}} |
||
| + | {{CharGrowth|game = fe16}} |
||
| + | |95% |
||
| + | |70% |
||
| + | |25% |
||
| + | |60% |
||
| + | |50% |
||
| + | |25% |
||
| + | |40% |
||
| + | |25% |
||
| + | |60% |
||
| + | |} |
||
| + | {{Field/end}} |
||
| + | {{Field|Wyvern Lord}} |
||
| + | {{CharGrowth|game = fe16}} |
||
| + | |85% |
||
| + | |75% |
||
| + | |15% |
||
| + | |50% |
||
| + | |60% |
||
| + | |25% |
||
| + | |45% |
||
| + | |20% |
||
| + | |60% |
||
| + | |} |
||
| + | {{Field/end}} |
||
| + | {{Field|Mortal Savant}} |
||
| + | {{CharGrowth|game = fe16}} |
||
| + | |75% |
||
| + | |70% |
||
| + | |30% |
||
| + | |50% |
||
| + | |40% |
||
| + | |35% |
||
| + | |40% |
||
| + | |20% |
||
| + | |60% |
||
| + | |} |
||
| + | {{Field/end}} |
||
| + | {{Field|Great Knight}} |
||
| + | {{CharGrowth|game = fe16}} |
||
| + | |85% |
||
| + | |70% |
||
| + | |20% |
||
| + | |50% |
||
| + | |40% |
||
| + | |25% |
||
| + | |45% |
||
| + | |15% |
||
| + | |60% |
||
| + | |} |
||
| + | {{Field/end}} |
||
| + | {{Field|Bow Knight}} |
||
| + | {{CharGrowth|game = fe16}} |
||
| + | |65% |
||
| + | |60% |
||
| + | |20% |
||
| + | |50% |
||
| + | |45% |
||
| + | |25% |
||
| + | |40% |
||
| + | |20% |
||
| + | |60% |
||
| + | |} |
||
| + | {{Field/end}} |
||
| + | {{Field|Dark Knight}} |
||
| + | {{CharGrowth|game = fe16}} |
||
| + | |65% |
||
| + | |65% |
||
| + | |30% |
||
| + | |50% |
||
| + | |45% |
||
| + | |25% |
||
| + | |45% |
||
| + | |30% |
||
| + | |60% |
||
| + | |} |
||
| + | {{Field/end}} |
||
| + | {{Field|Holy Knight}} |
||
| + | {{CharGrowth|game = fe16}} |
||
| + | |65% |
||
| + | |60% |
||
| + | |30% |
||
| + | |50% |
||
| + | |45% |
||
| + | |35% |
||
| + | |45% |
||
| + | |30% |
||
| + | |65% |
||
| + | |} |
||
| + | {{Field/end}} |
||
| + | {{Field|War Master}} |
||
| + | {{CharGrowth|game = fe16}} |
||
| + | |95% |
||
| + | |75% |
||
| + | |20% |
||
| + | |50% |
||
| + | |60% |
||
| + | |25% |
||
| + | |40% |
||
| + | |20% |
||
| + | |60% |
||
| + | |} |
||
| + | {{Selector/end}} |
||
| + | {{Field/end}} |
||
| + | |||
====Maximum Stats==== |
====Maximum Stats==== |
||
| + | {{Selector}} |
||
| + | {{Field|Default}} |
||
{{CharGrowth|game = fe16}} |
{{CharGrowth|game = fe16}} |
||
|99 |
|99 |
||
| Line 469: | Line 1,008: | ||
|77 |
|77 |
||
|} |
|} |
||
| + | {{Field/end}} |
||
| + | {{Field|With all saint statue bonuses activated}} |
||
| + | {{CharGrowth|game = fe16}} |
||
| + | |99 |
||
| + | |92 |
||
| + | |43 |
||
| + | |74 |
||
| + | |74 |
||
| + | |47 |
||
| + | |62 |
||
| + | |41 |
||
| + | |82 |
||
| + | |} |
||
| + | {{Selector/end}} |
||
| + | {{Field/end}} |
||
| + | |||
====Learnt Magic==== |
====Learnt Magic==== |
||
{{LearntMagic|game=fe16}} |
{{LearntMagic|game=fe16}} |
||
| Line 501: | Line 1,056: | ||
|A+ |
|A+ |
||
| - |
| - |
||
| + | | - |
||
| + | |} |
||
| + | |||
| + | ====Learnt Abilities==== |
||
| + | {{LearntAbilities|game=fe16}} |
||
| + | | [[File:Sword Prowess Lv 1.png|20px]] [[Sword Prowess|Sword Prowess Lv 1]] |
||
| + | | Innate |
||
| + | | - |
||
| + | |- |
||
| + | |[[File:Sword Prowess Lv 2.png|20px]] [[Sword Prowess|Sword Prowess Lv 2]] |
||
| + | | [[File:FE16 sword icon.png|20px]] D+ |
||
| + | | Replaces Sword Prowess Lv 2 |
||
| + | |- |
||
| + | |[[File:Sword Prowess Lv 3.png|20px]] [[Sword Prowess|Sword Prowess Lv 3]] |
||
| + | |[[File:FE16 sword icon.png|20px]] C+ |
||
| + | |Replaces Sword Prowess Lv 2 |
||
| + | |- |
||
| + | |[[File:Sword Prowess Lv 4.png|20px]] [[Sword Prowess|Sword Prowess Lv 4]] |
||
| + | |[[File:FE16 sword icon.png|20px]] B+ |
||
| + | |Replaces Sword Prowess Lv 3 |
||
| + | |- |
||
| + | |[[File:Sword Prowess Lv 5.png|20px]] [[Sword Prowess|Sword Prowess Lv 5]] |
||
| + | |[[File:FE16 sword icon.png|20px]] A+ |
||
| + | |Replaces Sword Prowess Lv 4 |
||
| + | |- |
||
| + | |[[File:Icon Combat Art FE16 Sword.png|20px]] [[Wrath Strike]] |
||
| + | |[[File:FE16 sword icon.png|20px]] D |
||
| + | | - |
||
| + | |- |
||
| + | |[[File:Icon Combat Art FE16 Sword.png|20px]] [[Grounder]] |
||
| + | |[[File:FE16 sword icon.png|20px]] C |
||
| + | | - |
||
| + | |- |
||
| + | |[[File:Icon Combat Art FE16 Sword.png|20px]] [[Sunder]] |
||
| + | |[[File:FE16 sword icon.png|20px]] C+ |
||
| + | | - |
||
| + | |- |
||
| + | |[[File:Axebreaker FE16.png|20px]] [[Axebreaker]] |
||
| + | |[[File:FE16 sword icon.png|20px]] B |
||
| + | | - |
||
| + | |- |
||
| + | |[[File:Icon Combat Art FE16 Sword.png|20px]] [[Windsweep]] |
||
| + | |[[File:FE16 sword icon.png|20px]] A |
||
| + | | - |
||
| + | |- |
||
| + | |[[File:Sword Crit +10 FE16.png|20px]] [[Sword Critical +10|Sword Crit +10]] |
||
| + | |[[File:FE16 sword icon.png|20px]] S |
||
| + | | - |
||
| + | |- |
||
| + | |[[File:Swordfaire FE16.png|20px]] [[Swordfaire]] |
||
| + | |[[File:FE16 sword icon.png|20px]] S+ |
||
| + | | - |
||
| + | |- |
||
| + | |[[File:Lance Prowess Lv 2.png|20px]] [[Lance Prowess|Lance Prowess Lv 2]] |
||
| + | | Innate |
||
| + | | - |
||
| + | |- |
||
| + | |[[File:Lance Prowess Lv 3.png|20px]] [[Lance Prowess|Lance Prowess Lv 3]] |
||
| + | |[[File:FE16 lance icon.png|20px]] C+ |
||
| + | |Replaces Lance Prowess Lv 2 |
||
| + | |- |
||
| + | |[[File:Lance Prowess Lv 4.png|20px]] [[Lance Prowess|Lance Prowess Lv 4]] |
||
| + | |[[File:FE16 lance icon.png|20px]] B+ |
||
| + | |Replaces Lance Prowess Lv 3 |
||
| + | |- |
||
| + | |[[File:Lance Prowess Lv 5.png|20px]] [[Lance Prowess|Lance Prowess Lv 5]] |
||
| + | |[[File:FE16 lance icon.png|20px]] A+ |
||
| + | |Replaces Lance Prowess Lv 4 |
||
| + | |- |
||
| + | |[[File:Icon Combat Art FE16 Lance.png|20px]] [[Tempest Lance]] |
||
| + | |Innate |
||
| + | | - |
||
| + | |- |
||
| + | |[[File:Icon Combat Art FE16 Lance.png|20px]] [[Knightkneeler]] |
||
| + | |[[File:FE16 lance icon.png|20px]] C |
||
| + | | - |
||
| + | |- |
||
| + | |[[File:Icon Combat Art FE16 Lance.png|20px]] [[Monster Piercer]] |
||
| + | |[[File:FE16 lance icon.png|20px]] C+ |
||
| + | | - |
||
| + | |- |
||
| + | |[[File:Swordbreaker FE16.png|20px]] [[Swordbreaker]] |
||
| + | |[[File:FE16 lance icon.png|20px]] B |
||
| + | | - |
||
| + | |- |
||
| + | |[[File:Icon Combat Art FE16 Lance.png|20px]] [[Glowing Ember]] |
||
| + | |[[File:FE16 lance icon.png|20px]] A |
||
| + | | - |
||
| + | |- |
||
| + | |[[File:Lance Crit +10 FE16.png|20px]] [[Lance Critical +10|Lance Crit +10]] |
||
| + | |[[File:FE16 lance icon.png|20px]] S |
||
| + | | - |
||
| + | |- |
||
| + | |[[File:Lancefaire FE16.png|20px]] [[Lancefaire]] |
||
| + | |[[File:FE16 lance icon.png|20px]] S+ |
||
| + | | - |
||
| + | |- |
||
| + | |[[File:Axe Prowess Lv 1.png|20px]] [[Axe Prowess|Axe Prowess Lv 1]] |
||
| + | |[[File:FE16 axe icon.png|20px]] E+ |
||
| + | | - |
||
| + | |- |
||
| + | |[[File:Axe Prowess Lv 2.png|20px]] [[Axe Prowess|Axe Prowess Lv 2]] |
||
| + | |[[File:FE16 axe icon.png|20px]] D+ |
||
| + | |Replaces Axe Prowess Lv 1 |
||
| + | |- |
||
| + | |[[File:Axe Prowess Lv 3.png|20px]] [[Axe Prowess|Axe Prowess Lv 3]] |
||
| + | |[[File:FE16 axe icon.png|20px]] C+ |
||
| + | |Replaces Axe Prowess Lv 2 |
||
| + | |- |
||
| + | |[[File:Axe Prowess Lv 4.png|20px]] [[Axe Prowess|Axe Prowess Lv 4]] |
||
| + | |[[File:FE16 axe icon.png|20px]] B+ |
||
| + | |Replaces Axe Prowess Lv 3 |
||
| + | |- |
||
| + | |[[File:Axe Prowess Lv 5.png|20px]] [[Axe Prowess|Axe Prowess Lv 5]] |
||
| + | |[[File:FE16 axe icon.png|20px]] A+ |
||
| + | |Replaces Axe Prowess Lv 4 |
||
| + | |- |
||
| + | |[[File:Icon Combat Art FE16 Axe.png|20px]] [[Smash]] |
||
| + | |[[File:FE16 axe icon.png|20px]] D |
||
| + | | - |
||
| + | |- |
||
| + | |[[File:Icon Combat Art FE16 Axe.png|20px]] [[Helm Splitter]] |
||
| + | |[[File:FE16 axe icon.png|20px]] C |
||
| + | | - |
||
| + | |- |
||
| + | |[[File:Lancebreaker FE16.png|20px]] [[Lancebreaker]] |
||
| + | |[[File:FE16 axe icon.png|20px]] B |
||
| + | | - |
||
| + | |- |
||
| + | |[[File:Axe Crit +10 FE16.png|20px]] [[Axe Critical +10|Axe Crit +10]] |
||
| + | |[[File:FE16 axe icon.png|20px]] S |
||
| + | | - |
||
| + | |- |
||
| + | |[[File:Axefaire FE16.png|20px]] [[Axefaire]] |
||
| + | |[[File:FE16 axe icon.png|20px]] S+ |
||
| + | | - |
||
| + | |- |
||
| + | |[[File:Bow Prowess Lv 1 FE16.png|20px]] [[Bow Prowess|Bow Prowess Lv 1]] |
||
| + | |[[File:FE16 bow icon.png|20px]] E+ |
||
| + | | - |
||
| + | |- |
||
| + | |[[File:Bow Prowess Lv 2 FE16.png|20px]] [[Bow Prowess|Bow Prowess Lv 2]] |
||
| + | |[[File:FE16 bow icon.png|20px]] D+ |
||
| + | |Replaces Bow Prowess Lv 1 |
||
| + | |- |
||
| + | |[[File:Bow Prowess Lv 3 FE16.png|20px]] [[Bow Prowess|Bow Prowess Lv 3]] |
||
| + | |[[File:FE16 bow icon.png|20px]] C+ |
||
| + | |Replaces Bow Prowess Lv 2 |
||
| + | |- |
||
| + | |[[File:Bow Prowess Lv 4 FE16.png|20px]] [[Bow Prowess|Bow Prowess Lv 4]] |
||
| + | |[[File:FE16 bow icon.png|20px]] B+ |
||
| + | |Replaces Bow Prowess Lv 3 |
||
| + | |- |
||
| + | |[[File:Bow Prowess Lv 5.png|20px]] [[Bow Prowess|Bow Prowess Lv 5]] |
||
| + | |[[File:FE16 bow icon.png|20px]] A+ |
||
| + | |Replaces Bow Prowess Lv 4 |
||
| + | |- |
||
| + | |[[File:Icon Combat Art FE16 Bow.png|20px]] [[Curved Shot]] |
||
| + | |[[File:FE16 bow icon.png|20px]] D |
||
| + | | - |
||
| + | |- |
||
| + | |[[File:Close Counter FE16.png|20px]] [[Close Counter]] |
||
| + | |[[File:FE16 bow icon.png|20px]] C |
||
| + | | - |
||
| + | |- |
||
| + | |[[File:Bow Crit +10 FE16.png|20px]] [[Bow Critical +10|Bow Crit +10]] |
||
| + | |[[File:FE16 bow icon.png|20px]] S |
||
| + | | - |
||
| + | |- |
||
| + | |[[File:Bowfaire FE16.png|20px]] [[Bowfaire]] |
||
| + | |[[File:FE16 bow icon.png|20px]] S+ |
||
| + | | - |
||
| + | |- |
||
| + | |[[File:Brawling Prowess Lv 1 FE16.png|20px]] [[Brawling Prowess|Brawling Prowess Lv 1]] |
||
| + | | [[File:FE16 brawl icon.png|20px]] E+ |
||
| + | | - |
||
| + | |- |
||
| + | |[[File:Brawling Prowess Lv 2 FE16.png|20px]] [[Brawling Prowess|Brawling Prowess Lv 2]] |
||
| + | |[[File:FE16 brawl icon.png|20px]] D+ |
||
| + | |Replaces Brawling Prowess Lv 1 |
||
| + | |- |
||
| + | |[[File:Brawling Prowess Lv 3 FE16.png|20px]] [[Brawling Prowess|Brawling Prowess Lv 3]] |
||
| + | |[[File:FE16 brawl icon.png|20px]] C+ |
||
| + | |Replaces Brawling Prowess Lv 2 |
||
| + | |- |
||
| + | |[[File:Brawling Prowess Lv 4 FE16.png|20px]] [[Brawling Prowess|Brawling Prowess Lv 4]] |
||
| + | |[[File:FE16 brawl icon.png|20px]] B+ |
||
| + | |Replaces Brawling Prowess Lv 3 |
||
| + | |- |
||
| + | |[[File:Brawling Prowess Lv 5 FE16.png|20px]] [[Brawling Prowess|Brawling Prowess Lv 5]] |
||
| + | |[[File:FE16 brawl icon.png|20px]] A+ |
||
| + | |Replaces Brawling Prowess Lv 4 |
||
| + | |- |
||
| + | |[[File:Icon Combat Art FE16 Brawl.png|20px]] [[Fading Blow]] |
||
| + | |[[File:FE16 brawl icon.png|20px]] D |
||
| + | | - |
||
| + | |- |
||
| + | |[[File:Icon Combat Art FE16 Brawl.png|20px]] [[Rushing Blow]] |
||
| + | |[[File:FE16 brawl icon.png|20px]] C |
||
| + | | - |
||
| + | |- |
||
| + | |[[File:Combat Art Icon FE16 Special.png|20px]] [[Healing Focus]] |
||
| + | |[[File:FE16 brawl icon.png|20px]] B |
||
| + | | - |
||
| + | |- |
||
| + | |[[File:Brawl Crit +10 FE16.png|20px]] [[Brawl Critical +10|Brawl Crit +10]] |
||
| + | |[[File:FE16 brawl icon.png|20px]] S |
||
| + | | - |
||
| + | |- |
||
| + | |[[File:Fistfaire FE16.png|20px]] [[Fistfaire]] |
||
| + | |[[File:FE16 brawl icon.png|20px]] S+ |
||
| + | | - |
||
| + | |- |
||
| + | |[[File:Reason Lv 1 FE16.png|20px]] [[Reason Prowess|Reason Lv 1]] |
||
| + | |[[File:FE16 reason icon.png|20px]] E+ |
||
| + | | - |
||
| + | |- |
||
| + | |[[File:Reason Lv 2 FE16.png|20px]] [[Reason Prowess|Reason Lv 2]] |
||
| + | |[[File:FE16 reason icon.png|20px]] D+ |
||
| + | |Replaces Reason Lv 1 |
||
| + | |- |
||
| + | |[[File:Reason Lv 3 FE16.png|20px]] [[Reason Prowess|Reason Lv 3]] |
||
| + | |[[File:FE16 reason icon.png|20px]] C+ |
||
| + | |Replaces Reason Lv 2 |
||
| + | |- |
||
| + | |[[File:Reason Lv 4 FE16.png|20px]] [[Reason Prowess|Reason Lv 4]] |
||
| + | |[[File:FE16 reason icon.png|20px]] B+ |
||
| + | |Replaces Reason Lv 3 |
||
| + | |- |
||
| + | |[[File:Reason Lv 5 FE16.png|20px]] [[Reason Prowess|Reason Lv 5]] |
||
| + | |[[File:FE16 reason icon.png|20px]] A+ |
||
| + | |Replaces Reason Lv 4 |
||
| + | |- |
||
| + | |[[File:Black Magic Range +1 FE16.png|20px]] [[Black Magic Range +1]] |
||
| + | |[[File:FE16 reason icon.png|20px]] S |
||
| + | | - |
||
| + | |- |
||
| + | |[[File:Black Tomefaire FE16.png|20px]] [[Tomefaire|Black Tomefaire]] |
||
| + | |[[File:FE16 reason icon.png|20px]] S+ |
||
| + | | - |
||
| + | |- |
||
| + | |[[File:Faith Lv 1.png|20px]] [[Faith Prowess|Faith Lv 1]] |
||
| + | |[[File:FE16 faith icon.png|20px]] E+ |
||
| + | | - |
||
| + | |- |
||
| + | |[[File:Faith Lv 2.png|20px]] [[Faith Prowess|Faith Lv 2]] |
||
| + | |[[File:FE16 faith icon.png|20px]] D+ |
||
| + | |Replaces Faith Lv 1 |
||
| + | |- |
||
| + | |[[File:Faith Lv 3.png|20px]] [[Faith Prowess|Faith Lv 3]] |
||
| + | |[[File:FE16 faith icon.png|20px]] C+ |
||
| + | |Replaces Faith Lv 2 |
||
| + | |- |
||
| + | |[[File:Faith Lv 4.png|20px]] [[Faith Prowess|Faith Lv 4]] |
||
| + | |[[File:FE16 faith icon.png|20px]] B+ |
||
| + | |Replaces Faith Lv 3 |
||
| + | |- |
||
| + | |[[File:Faith Lv 5.png|20px]] [[Faith Prowess|Faith Lv 5]] |
||
| + | |[[File:FE16 faith icon.png|20px]] A+ |
||
| + | |Replaces Faith Lv 4 |
||
| + | |- |
||
| + | |[[File:White Magic Range +1 FE16.png|20px]] [[White Magic Range +1]] |
||
| + | |[[File:FE16 faith icon.png|20px]] S |
||
| + | | - |
||
| + | |- |
||
| + | |[[File:White Tomefaire FE16.png|20px]] [[Tomefaire|White Tomefaire]] |
||
| + | |[[File:FE16 faith icon.png|20px]] S+ |
||
| + | | - |
||
| + | |- |
||
| + | |[[File:Authority Lv 1.png|20px]] [[Authority Prowess|Authority Lv 1]] |
||
| + | |Innate |
||
| + | | - |
||
| + | |- |
||
| + | |[[File:Authority Lv 2.png|20px]] [[Authority Prowess|Authority Lv 2]] |
||
| + | |[[File:FE16 authority icon.png|20px]] D+ |
||
| + | |Replaces Authority Lv 1 |
||
| + | |- |
||
| + | |[[File:Authority Lv 3.png|20px]] [[Authority Prowess|Authority Lv 3]] |
||
| + | |[[File:FE16 authority icon.png|20px]] C+ |
||
| + | |Replaces Authority Lv 2 |
||
| + | |- |
||
| + | |[[File:Authority Lv 4.png|20px]] [[Authority Prowess|Authority Lv 4]] |
||
| + | |[[File:FE16 authority icon.png|20px]] B+ |
||
| + | |Replaces Authority Lv 3 |
||
| + | |- |
||
| + | |[[File:Authority Lv 5.png|20px]] [[Authority Prowess|Authority Lv 5]] |
||
| + | |[[File:FE16 authority icon.png|20px]] A+ |
||
| + | |Replaces Authority Lv 4 |
||
| + | |- |
||
| + | |[[File:Battalion Wrath FE16.png|20px]] [[Battalion Wrath]] |
||
| + | |[[File:FE16 authority icon.png|20px]] C |
||
| + | | - |
||
| + | |- |
||
| + | |[[File:Sacred Power FE16.png|20px]] [[Model Leader]] |
||
| + | |[[File:FE16 authority icon.png|20px]] C+ |
||
| + | | - |
||
| + | |- |
||
| + | |[[File:Defensive Tactics FE16.png|20px]] [[Defensive Tactics]] |
||
| + | |[[File:FE16 authority icon.png|20px]] B |
||
| + | | - |
||
| + | |- |
||
| + | |[[File:Battalion Vantage FE16.png|20px]][[Battalion Vantage]] |
||
| + | |[[File:FE16 authority icon.png|20px]] A |
||
| + | | - |
||
| + | |- |
||
| + | |[[File:Rally Charm FE16.png|20px]] [[Rally Charm]] |
||
| + | |[[File:FE16 authority icon.png|20px]] S |
||
| + | | - |
||
| + | |- |
||
| + | |[[File:Offensive Tactics FE16.png|20px]] [[Offensive Tactics]] |
||
| + | |[[File:FE16 authority icon.png|20px]] S+ |
||
| + | | - |
||
| + | |- |
||
| + | |[[File:Weight -3 FE16.png|20px]] [[Weight -|Weight -3]] |
||
| + | |[[File:FE16 heavy armor icon.png|20px]] C |
||
| + | | - |
||
| + | |- |
||
| + | |[[File:Combat Art Icon FE16 Special.png|20px]] [[Smite]] |
||
| + | |[[File:FE16 heavy armor icon.png|20px]] B |
||
| + | | - |
||
| + | |- |
||
| + | |[[File:Weight -5 FE16.png|20px]] [[Weight -|Weight -5]] |
||
| + | |[[File:FE16 heavy armor icon.png|20px]] A+ |
||
| + | | Replaces Weight -3 |
||
| + | |- |
||
| + | |[[File:Armored Effect Null FE16.png|20px]] [[Armored Effect Null]] |
||
| + | |[[File:FE16 heavy armor icon.png|20px]] S+ |
||
| + | | - |
||
| + | |- |
||
| + | |[[File:Seal Movement FE16.png|20px]] [[Seal Movement]] |
||
| + | |[[File:FE16 riding icon.png|20px]] [[File:FE16 hidden talent icon.png|20px]] |
||
| + | |Unlocked after twelve tutoring sessions in Riding |
||
| + | |- |
||
| + | |[[File:Dexterity +4 FE16.png|20px]] [[Skill +|Dexterity +4]] |
||
| + | |[[File:FE16 riding icon.png|20px]] C |
||
| + | | - |
||
| + | |- |
||
| + | |[[File:Movement +1 FE16.png|20px]] [[Movement +1]] |
||
| + | |[[File:FE16 riding icon.png|20px]] A+ |
||
| + | | - |
||
| + | |- |
||
| + | |[[File:Cavalry Effect Null FE16.png|20px]] [[Cavalry Effect Null]] |
||
| + | |[[File:FE16 riding icon.png|20px]] S+ |
||
| + | | - |
||
| + | |- |
||
| + | |[[File:Alert Stance FE16.png|20px]] [[Alert Stance]] |
||
| + | |[[File:FE16 flying icon.png|20px]] B |
||
| + | | - |
||
| + | |- |
||
| + | |[[File:Alert Stance+ FE16.png|20px]] [[Alert Stance|Alert Stance+]] |
||
| + | |[[File:FE16 flying icon.png|20px]] A+ |
||
| + | |Replaces Alert Stance |
||
| + | |- |
||
| + | |[[File:Flying Effect Null FE16.png|20px]] [[Flying Effect Null]] |
||
| + | |[[File:FE16 flying icon.png|20px]] S+ |
||
| - |
| - |
||
|} |
|} |
||
| Line 509: | Line 1,419: | ||
====Overall==== |
====Overall==== |
||
{{Subjective}} |
{{Subjective}} |
||
| − | As the main [[Lord]] of |
+ | As the main [[Lord]] of ''Azure Moon'', Dimitri can be deployed on almost every map. Of the Lord trio, he is the most durable with a high HP growth and good Defense growth and boasts the highest Strength growth in the game, making him an excellent front line unit capable of taking punishment from enemies. His only downsides are his mediocre Resistance and Luck growths, leaving him vulnerable to [[Mage]]s and susceptible to critical hits as well as slightly lowering his critical hit and magical avoid. |
| − | As a bearer of the minor Crest of [[Blaiddyd]], he can double his damage output when using |
+ | As a bearer of the minor Crest of [[Blaiddyd]], he can double his damage output when using Combat Arts at the cost of more weapon durability; while it is useful in dire situations, it has a very low activation rate and will require some equipment management. |
| − | Given his skill levels, Dimitri will have easy access to the Myrmidon |
+ | Given his skill levels, Dimitri will have easy access to the Myrmidon line ([[Myrmidon]], [[Mercenary]], [[Thief]], [[Swordmaster]]), Soldier line ([[Soldier]], [[Cavalier]], [[Paladin]]), and his exclusive Lord line ([[Lord]], [[High Lord]], [[Great Lord]]). However, his class repertoire lacks versatility compared to the other main characters. Dimitri should also be prioritized for Tutoring during the Academy Phase, as he cannot be Tutored nor affected by Goals and Group Tasks from chapters [[Reunion at Dawn (Azure Moon)|13]] to [[Blood of the Eagle and Lion (Azure Moon)|17]]. Compared to the other lords, he only has four in-game months of Tutoring and Goal experience during the War Phase (while Edelgard also has only four months of Tutoring available in the War Phase, this is simply because her route is shorter than the other Lords). |
| − | Specifically, his affinity for Lances and budding talent in Riding encourage Dimitri to progress through the cavalry class line. Although mastery of this class progression is not necessary, they do offer useful abilities such as [[Desperation (skill)|Desperation]] from Cavalier. In terms of master class, while [[Wyvern Lord]] is tempting due to its high statline, Dimitri has low starting levels for Flying and Axes as well as a bane in the latter. A suitable alternative would be [[Bow Knight]], as this class avoid his banes and +2 Bow Range synergizes well with his [[Seal Movement]] budding talent and [[Canto]]. Despite his bane in Axes, it is worthwhile to class him into [[Brigand]] to acquire [[Death Blow]], which will provide a damage boost to player phase attacks. Advancing Dimitri to [[War Master]] will require diligence, but learning [[Quick Riposte]] will allow him to double while preventing follow- |
+ | Specifically, his affinity for Lances and budding talent in Riding encourage Dimitri to progress through the cavalry class line. Although mastery of this class progression is not necessary, they do offer useful abilities such as [[Desperation (skill)|Desperation]] from [[Cavalier]], but care should be taken in regards to the Speed growth penalty applied by [[Cavalier]] and [[Paladin]]. In terms of master class, while [[Wyvern Lord]] is tempting due to its high statline, Dimitri has low starting levels for Flying and Axes as well as a bane in the latter. A suitable alternative would be [[Bow Knight]], as this class avoid his banes and +2 Bow Range synergizes well with his [[Seal Movement]] budding talent and [[Canto]]. Despite his bane in Axes, it is worthwhile to class him into [[Brigand]] to acquire [[Death Blow]], which will provide a damage boost to player phase attacks. Advancing Dimitri to [[War Master]] will require diligence, but learning [[Quick Riposte]] will allow him to double while preventing follow-ups on enemy phase if his HP is above 50%. Flying is also worth investing in for [[Alert Stance|Alert Stance+]], which combines well with Dimitri's post-timeskip personal skill, giving him excellent Avoid chance on enemy phase if he has full HP. However, these skills may require New Game+ or grinding unlimited auxiliary battles on Normal difficulty. |
| − | Dimitri excels in utilizing battalion skills as he is the only unit in the game that can access both Battalion Vantage and Battalion Wrath. When using these skills with a weapon like [[Wo Dao]] or [[Killer Lance]] equipped, a high Dexterity Dimitri can easily achieve 100% critical chance during the enemy phase and kill |
+ | Dimitri excels in utilizing battalion skills as he is the only unit in the game that can access both Battalion Vantage and Battalion Wrath. When using these skills with a weapon like a [[Wo Dao]] or [[Killer Lance]] equipped, a high Dexterity Dimitri can easily achieve 100% critical chance during the enemy phase and kill enemies before they can retaliate. If [[Quick Riposte]] is acquired, this combination will let Dimitri inflict two critical hits before the enemy can counter. After the timeskip, Dimitri receives the [[King of Lions Corps]] battalion, whose Wave Attack gambit is effective against Armored foes. He receives the Hero's Relic [[Areadbhar]] after [[Valley of Torment (Azure Moon)|Chapter 15]], which grants him the combat art [[Atrocity]], allowing Dimitri to deal effective damage to every enemy type as well as +15 Might and +20 Hit at the cost of -3 weapon durability. If triggered alongside his [[Crest|Minor Crest of Blaiddyd]], Dimitri is very likely to kill whatever he is attacking in one hit unless the enemy has multiple HP bars, though this will also result in a greater cost in weapon durability. |
| + | |||
| + | Overall, Dimitri is perhaps the most powerful physical offensive unit available to the player. While Claude is faster and more accurate, and Edelgard is more adept with magic, Dimitri can dish out more punishment than either of them while being able to take a significant beating. The only things that will hold him back are magic (which can deal serious damage to him) and his below-par Luck. |
||
| + | |||
| + | ====Gift List==== |
||
| + | {| class="article-table" |
||
| + | !Gift Name |
||
| + | !Type of Gift |
||
| + | !Description |
||
| + | !Rank |
||
| + | |- |
||
| + | |Whetstone |
||
| + | |Favorite |
||
| + | |A stone used to sharpen the blades of swords or lances. Appreciated by those who enjoy weapon maintenance. |
||
| + | |★★ |
||
| + | |- |
||
| + | |Owl Feather |
||
| + | |Favorite |
||
| + | |A feather from a messenger owl that can be used in a variety of ways. Appreciated by everyone. |
||
| + | |★★★ |
||
| + | |- |
||
| + | |Riding Boots |
||
| + | |Favorite |
||
| + | |Boots specially made for mastering the equestrian arts. Appreciated by those who enjoy horseback riding. |
||
| + | |★★★ |
||
| + | |- |
||
| + | |Training Weight |
||
| + | |Favorite |
||
| + | |A weight that you can strap to your back to build muscle. Appreciated by those who enjoy weight training. |
||
| + | |★★★ |
||
| + | |- |
||
| + | |Ceremonial Sword |
||
| + | |Favorite |
||
| + | |A beautiful ceremonial sword with a mangled blade. Appreciated by weapon collectors. |
||
| + | |★★★★ |
||
| + | |- |
||
| + | |Book of Sheet Music |
||
| + | |Dislike |
||
| + | |An old collection of sheet music filled with hymns and pastoral songs. Appreciated by those who enjoy music. |
||
| + | |★★★ |
||
| + | |- |
||
| + | |Armored Bear Stuffy |
||
| + | |Dislike |
||
| + | |A fluffy stuffed bear wearing distinguished armor. Appreciated by those who love animals or cute things. |
||
| + | |★★★ |
||
| + | |- |
||
| + | |Gemstone Beads |
||
| + | |Dislike |
||
| + | |Small, sparkling beads for sewing into fabric. Appreciated by fans of embroidery and handicraft. |
||
| + | |★ |
||
| + | |} |
||
| + | |||
| + | ====Share a Meal List==== |
||
| + | {| class="article-table" |
||
| + | !Meal Name |
||
| + | !Type of Meal |
||
| + | !Description |
||
| + | |- |
||
| + | |Saghert and Cream |
||
| + | |Favorite |
||
| + | |A baked confection coated with Noa fruit cream and a currant reduction, often enjoyed as a dessert at family gatherings. |
||
| + | |- |
||
| + | |Sautéed Jerky |
||
| + | |Favorite |
||
| + | |Jerky aged in the monastery and sautéed for a delightfully salty flavor. A perfect snack to go with your favorite drink. |
||
| + | |- |
||
| + | |Onion Gratin Soup |
||
| + | |Favorite |
||
| + | |Onions stewed with white trout and baked with a layer of cheese on top. Will warm you up from the inside out. |
||
| + | |- |
||
| + | |Sweet Bun Trio |
||
| + | |Favorite |
||
| + | |Traditional pastries from Faerghus, known for their subtle sweetness. The dough is made with eggs and sugar. |
||
| + | |- |
||
| + | |Cheesy Verona Stew |
||
| + | |Favorite |
||
| + | |A rich dish consisting of verona and sautéed Teutates loach. These ingredients are boiled and served with two kinds of melted cheese. |
||
| + | |- |
||
| + | |Gautier Cheese Gratin |
||
| + | |Favorite |
||
| + | |A gratin of bird meat topped with heaps of Gautier cheese, which is famous for its low fat content. It has a unique flavor. |
||
| + | |- |
||
| + | |Peach Sorbet |
||
| + | |Dislike |
||
| + | |A sorbet made with thin slices of magically frozen peach, dusted with bean flour. |
||
| + | |} |
||
| + | |||
| + | ====Lost Items==== |
||
| + | {| class="article-table" |
||
| + | !Lost Item |
||
| + | !Description |
||
| + | |- |
||
| + | |Black Leather Gloves |
||
| + | |High-quality leather gloves for wearing under gauntlets. They probably belong to someone picky about armor. |
||
| + | |- |
||
| + | |Training Logbook |
||
| + | |A detailed record of someone’s combat training. It probably belongs to someone who trains relentlessly. |
||
| + | |- |
||
| + | |Dulled Longsword |
||
| + | |A worn iron longsword that feels quite heavy. It seems like something Dimitri would own. |
||
| + | |} |
||
====Tea Party Conversations==== |
====Tea Party Conversations==== |
||
| Line 539: | Line 1,549: | ||
*[[Catherine]] |
*[[Catherine]] |
||
*[[Hapi]] |
*[[Hapi]] |
||
| + | |||
| + | ===''[[Fire Emblem Engage]]''=== |
||
| + | :''Known as the Emblem of Rivals. The wise and virtuous prince of a nation of knights.'' |
||
| + | ====Emblem Skills==== |
||
| + | {{EmblemStat |
||
| + | |Ring = [[File:DimitriFE17Sprite.png]][[Bracelet of the Three Houses]] |
||
| + | |HP = |
||
| + | |Str = ◎ |
||
| + | |Mag = |
||
| + | |Def = ◎ |
||
| + | |Res = |
||
| + | |Dex = ◎ |
||
| + | |Spd = |
||
| + | |Lck = |
||
| + | |Bld = |
||
| + | |Mov = |
||
| + | |Sync = [[File:FE17 Friendly Rivalry Icon.png|20px]][[Friendly Rivalry]]<br>[[File:FE17 Gambit Icon.png|20px]][[Gambit (skill)|Gambit]]<br><small>([[Sacred Shield|Shield Gambit]])</small><br>[[File:FE17 Lineage Icon.png|20px]][[Lineage]]<br>[[File:FE17 Weapon Sync Icon.png|20px]][[Weapon Sync]] |
||
| + | |EWeapons = [[File:EdelgardAymrFE17Sprite.png|20px]][[Aymr]]<br>[[File:DimitriAreadbharFE17Sprite.png|20px]][[Areadbhar]]<br>[[File:ClaudeFailnaughtFE17Sprite.png|20px]][[Failnaught]] |
||
| + | |ESkill = [[File:FE17 Combat Arts Icon.png|20px]][[Combat Arts (skill)|Combat Arts]] |
||
| + | |EAttack = [[File:FE17 Houses Unite Icon.png|20px]][[Houses Unite]] |
||
| + | }} |
||
| + | |||
| + | ====[[Bond Ring]]==== |
||
| + | :''Crown prince of the Holy Kingdom of Faerghus, a land in another world. Leader of the Blue Lion House at Garreg Mach Monastery. He is courteous and sincere, but he hides darkness deep in his heart.'' |
||
| + | {{BondRing |
||
| + | |Character = [[File:Bond Ring Dimitri.png|100x100px]] |
||
| + | |World = [[File:Byleth Emblem Ring.png|20px]] Instructor |
||
| + | |C Rank = Str +1 |
||
| + | |B Rank = Str +1 Dex +1 |
||
| + | |A Rank = HP +2 Str +1 Dex +1 |
||
| + | |S Rank = HP +2 Str +2 Dex +1<br>[[File:FE17 Paraselene Icon.png|20px]][[Paraselene]] |
||
| + | }} |
||
===''[[Fire Emblem Heroes]]''=== |
===''[[Fire Emblem Heroes]]''=== |
||
| Line 551: | Line 1,593: | ||
{{CharStat |
{{CharStat |
||
|game=feh |
|game=feh |
||
| − | |image=[[File:Heroes Dimitri Sprite.png |
+ | |image=[[File:Heroes Dimitri Sprite.png]]<br>The Protector |
|Group=[[File:Heroes Cavalry.png|25px]] Cavalry |
|Group=[[File:Heroes Cavalry.png|25px]] Cavalry |
||
|Level=1<br>40 |
|Level=1<br>40 |
||
| Line 583: | Line 1,625: | ||
{{Subjective}} |
{{Subjective}} |
||
=====Base Set===== |
=====Base Set===== |
||
| − | Dimitri is similar to many Lance |
+ | Dimitri is similar to many Lance Cavaliers, which tend to have physical bulk and high Atk. His middling Spd makes him susceptible to follow-up attacks and low Res leaves him vulnerable to Mages and Dragons. However, these glaring weaknesses are mitigated by his base kit. |
| − | [[Noble Lance]] grants +3 |
+ | [[Noble Lance]] grants +3 Atk augmenting Dimitri's base stats to an impressive 55 at neutral IV. His weapon's unique effect ameliorates his Spd issue. If both he and his opponent are at 100% HP or both have HP less than 100%, he is guaranteed a follow-up. This synergizes well with his high Atk, allowing him to deal massive damage to his enemies so long as he maintains the threshold to utilize its effect. While it requires some coordination, the output is worth it. |
| − | [[Vengeance (Skill)|Vengeance]] takes 50% of Dimitri's current damage and adds it to his |
+ | [[Vengeance (Skill)|Vengeance]] takes 50% of Dimitri's current damage and adds it to his Atk. Since the special is dependent on HP, it can be devastating or inconsequential. Dimitri has [[Death Blow|Death Blow 4]], giving him a solid +8 Atk when he initiates, bringing his Atk to 63 at neutral IV upon initiation. [[Lull Attack Defense]] neutralizes any visible Atk/Def buff his opponent has and inflicts a -3 Atk/Def debuff on them during combat, further enhancing his damage and bulk. |
=====Counters===== |
=====Counters===== |
||
| − | Dimitri is weak to |
+ | Dimitri is weak to Mages as his neutral 18 Res is too low to resist magic attacks, even from those at weapon disadvantage. His cavalry status is a double-edged sword, while it gives him excellent movement, he is vulnerable to cavalry effective weapons like [[Zanbato]] or [[Ridersbane]]. All three forms of [[Micaiah]] can easily nuke him, even without their cavalry effective weapons, negating the use of [[Grani's Shield]]. Dragons can deal heavy damage as well as Staff units with [[Dazzling Staff|Dazzling]]/[[Wrathful Staff]] who can engage him without fear of retaliation. Otherwise, standard bulky Greens like [[Surtr]] and [[Hector]] can tank him and retaliate with weapon advantage. |
=====Skill Inheritance===== |
=====Skill Inheritance===== |
||
As with most cavalry units, [[Reposition]] is recommended as a standard positioning skill. |
As with most cavalry units, [[Reposition]] is recommended as a standard positioning skill. |
||
| − | + | Dimitri's remaining kit is flexible, [[Bonfire]] or [[Luna (Skill)|Luna]] can deal greater and more consistent damage boosts when his special procs. He can also make great use of [[Galeforce]] as it will help him maneuver across the map, especially if used in tandem with a [[Heavy Blade]] seal. Movement skills such as [[Wings of Mercy]], [[Hit and Run]], and [[Drag Back]] are suggested as a B Skill. The C Skill is best suited for cavalry support skills as he can benefit from his allies' cavalry buffs while benefiting them in return. [[Savage Blow]] is an excellent alternative, as it is unlikely for Dimitri to escape all battles unscathed and will allow him to continue utilizing Noble Lance's effect with a Dancer on standby or Galeforce active. |
|
| + | |||
| + | ====Meet Some of the Heroes==== |
||
| + | {{MeetHero |
||
| + | |Hero = The Protector Dimitri |
||
| + | |Pop1 = [[File:Dimitri of blue lions pop01.png|100px]] |
||
| + | |Text1 = The [[Blue Lions]] is one of the houses that make up the [[Officers Academy]] in central [[Fódlan]]. This house is where students from the [[Holy Kingdom of Faerghus]] gather, and it's led by none other than the kingdom's prince and future king, Dimitri! |
||
| + | |Pop2 = [[File:Dimitri of blue lions pop02.png|100px]] |
||
| + | |Text2 = Dimitri is chivalrous and kind, and he has a good reputation for his strong sense of duty and responsibility. People also like him because he doesn't let his royal standing come between him and others! |
||
| + | |Pop3 = [[File:Dimitri of blue lions pop03.png|100px]] |
||
| + | |Text3 = With outstanding skills like his, he truly deserves his leadership of the Blue Lions. He's an expert with lances in particular! |
||
| + | |Pop4 = [[File:Dimitri of blue lions pop04.png|100px]] |
||
| + | |Text4 = Sometimes, Dimitri seems to have a lot on his mind. But even so, I'm sure that won't stop him from being a great friend to the [[Order of Heroes]]! |
||
| + | |Char1 = [[Edelgard]] |
||
| + | |CharText1 = The heir apparent of the [[Adrestian Empire]]. She's dignified, refined, and self-confident—traits that mask her raw ambition. She leads the [[Black Eagles|Black Eagle House]], making her Dimitri's peer. |
||
| + | |Char2 = [[Claude]] |
||
| + | |CharText2 = The heir of Duke Riegan, head of the [[Leicester Alliance]]. He's a hard man to get a grasp of, and employs means both fair and foul to get his way. Leader of the [[Golden Deer|Golden Deer House]] and Dimitri's arch-rival. |
||
| + | }} |
||
| + | |||
| + | |-|A New Future= |
||
| + | ;King of Faerghus |
||
| + | :''King of the Holy Kingdom of Faerghus. Although he lost himself for a time, he now walks the path of a great ruler. Appears in Fire Emblem: Three Houses.'' |
||
| + | |||
| + | ====Base Stats==== |
||
| + | Rarity: ✯✯✯✯✯ |
||
| + | |||
| + | {{CharStat |
||
| + | |game=feh |
||
| + | |image=[[File:Dimitri King of Faerghus Heroes sprite.png]]<br>King of Faerghus |
||
| + | |Group=[[File:Heroes Infantry.png|25px]] Infantry |
||
| + | |Level=1<br>40 |
||
| + | |HP=18/19/20<br>37/41/44 |
||
| + | |Atk=9/10/11<br>37/40/44 |
||
| + | |Spd=7/8/9<br>33/36/39 |
||
| + | |Def=9/10/11<br>37/40/44 |
||
| + | |Res=5/6/7<br>15/19/22 |
||
| + | |Weapon={{Weapon|feh|lance}} [[Lance (weapon)|Lance]] |
||
| + | |Skill=[[File:FEH skill offense.png|20px]] [[Gradivus|Moon Gradivus]]<br>[[File:FEH skill special.png|20px]] [[Daylight]] |
||
| + | }} |
||
| + | |||
| + | ====Skills==== |
||
| + | {{CharSkills |
||
| + | |weapon 1 = [[Iron Lance]] * - * - * - |
||
| + | |weapon 2 = [[Steel Lance]] * - * 3 * - |
||
| + | |weapon 3 = [[Silver Lance]] * [[Steel Lance]] * 4 * 3 |
||
| + | |weapon 4 = [[Gradivus|Moon Gradivus]] * [[Silver Lance]] * - * 5 |
||
| + | |special 1 = [[Daylight]] * - * - * - |
||
| + | |special 2 = [[Noontime]] * [[Daylight]] * - * 5 |
||
| + | |passive A 1 = [[Attack Defense Bond|Atk/Def Bond 1]] * - * - * - |
||
| + | |passive A 2 = [[Attack Defense Bond|Atk/Def Bond 2]] * [[Attack Defense Bond|Atk/Def Bond 1]] * - * 3 |
||
| + | |passive A 3 = [[Attack Defense Bond|Atk/Def Bond 3]] * [[Attack Defense Bond|Atk/Def Bond 2]] * - * 4 |
||
| + | |passive A 4 = [[Attack Defense Unity|Atk/Def Unity]] * [[Attack Defense Bond|Atk/Def Bond 3]] * - * 5 |
||
| + | |passive B 1 = [[Blue Lion Rule|Blue Lion Rule]] * - * - * 5 |
||
| + | |passive C 1 = [[Hone Attack|Hone Atk 1]] * - * - * - |
||
| + | |passive C 2 = [[Hone Attack|Hone Atk 2]] * [[Hone Attack|Hone Atk 1]] * - * - |
||
| + | |passive C 3 = [[Hone Attack|Hone Atk 3]] * [[Hone Attack|Hone Atk 2]] * - * 5 |
||
| + | |passive C 4 = [[Joint Hone Attack|Joint Hone Atk]] * [[Hone Attack|Hone Atk 3]] * - * 5 |
||
| + | }} |
||
| + | |||
| + | ====Overall==== |
||
| + | {{Subjective}} |
||
| + | =====Base Set===== |
||
| + | Winner of the Choose Your Legends Round 4 for the men's division, Brave Dimitri does not disappoint. He has an excelled offensive spread at 40 Atk and 36 Spd with a strong 81 physical bulk. Brave Dimitri can hit incredibly hard and can easily double a huge portion of the cast, especially with a Spd asset. His only downside is his low Res, which can leave him vulnerable to Mages. Still, he has plenty in his base kit that makes him a punishing unit to face and can easily clear a field of enemies with ease. Choosing Brave Dimitri as a free Brave Hero leads to excellent results even with a neutral spread version.<br> |
||
| + | [[Gradivus|Moon Gradivus]] allows Brave Dimitri to counterattack from range and hastens his special cooldown when his opponent hits him. While mainly built with defense in mind, the acceleration still works offensively and thus, he can unleash his Special virtually during every single round of combat.<br> |
||
| + | Brave Dimitri's unique Brave Skill is [[Blue Lion Rule]]. If his Def is greater than his foe's, he reduces damage from incoming AOE damage specials and in-combat damage from his foe based on the difference of the stats x4 (maximizing at 40%). Brave Dimitri becomes incredibly bulky and can even take some hard hitting mage attacks with relative ease due to the common low bulk of them. Additionally he makes a guaranteed follow-up under the same activation requirement if his opponent initiates. While he has solid enough Spd to not need this for most matchups, it does give him a leg against many of the top tier offensive Spd units.<br> |
||
| + | [[Noontime]] grants him a sustain special that heals him for 30% of the damage he deals when it activates. He hits hard enough that he will get a sizeable return on his regeneration. [[Attack Defense Unity]] is a new Skill A that he introduced and if he is within two spaces of an ally, he gains +5 Atk/Def and also gains an additional bonus to his Atk/Def if he has a penalty inflicted on him such as through [[Threaten Attack]] or [[Chill Defense]]. Both stats independently gain stats during combat based on the penalized amount x2. This makes trying to deal with him with such skills futile as he will merely turn them in to bonuses so long as he stays relatively near his allies. Finally [[Joint Hone Attack]] grants himself and his adjacent allies +5 Atk at the start of his turn if he is adjacent to at least one foe. |
||
| + | =====Counters===== |
||
| + | As mentioned above, trying to depower Brave Dimitri through debuffs to his Atk and Def are ill advised as he will merely turn them into strengths. However, his Spd can still be affected without penalty as well as his Res. While he has enough Spd, he does not nearly have enough to avoid punishment from perhaps two of his strongest counters, [[Celica|Legendary Celica]] and [[Thrasir]], who outspeed and can even outright destroy him in a single round of combat due to color advantage, superior Spd, and targeting his magical bulk. Even [[Nino]] under the right circumstances can achieve this. [[Dazzling Staff|Dazzling]]/[[Wrathful Staff]] also works well as Brave Dimitri is unable to run [[Null C-Disrupt]] without forfeiting his strong Blue Lion Rule skill, thus leaving him unable to counterattack the uncontested chip damage. |
||
| + | =====Skill Inheritance===== |
||
| + | Brave Dimitri's base kit is perfectly tailored for success and really he only requires a Positional Assist skill, namely [[Reposition]] as a superior movement option for pulling allies out of danger. [[Pulse Smoke]] can be considered for an alternative Skill C just to slow down his enemy's special cooldown charge. |
||
| + | If an alternate special is desired, [[Dragon Fang]] is an option considering how his high Atk will allow for a great deal of extra damage to be added on every time. [[Bonfire]] is also an option, taking his high Def into account, but it is overshadowed by specials that calculate extra damage using his Atk. |
||
| + | |||
| + | ====Meet Some of the Heroes==== |
||
| + | {{MeetHero |
||
| + | |Hero = King of Faerghus Dimitri |
||
| + | |Pop1 = [[File:Dimitri king of faerghus pop01.png|100px]] |
||
| + | |Text1 = The [[Holy Kingdom of Faerghus]] is one of the three great powers of [[Fódlan]]. And now Dimitri, who became king after enduring great hardship, has answered our summoner's call, bringing the lance [[Gradivus|Moon Gradivus]] with him! |
||
| + | |Pop2 = [[File:Dimitri king of faerghus pop02.png|100px]] |
||
| + | |Text2 = Dimitri's parents and family perished in a [[Tragedy of Duscur|massacre]] during his childhood, and from that terrible day onward, he could think of nothing but revenge. When the [[Adrestian Empire]] began its war, Dimitri snapped, and slaughtered countless imperial soldiers in acts of blind vengeance. |
||
| + | |Pop3 = [[File:Dimitri king of faerghus pop03.png|100px]] |
||
| + | |Text3 = But it wasn't too late to bring him back from the brink! [[Byleth]] and Dimitri's other allies rallied around him, setting him back on his rightful path as king once more. |
||
| + | |Pop4 = [[File:Dimitri king of faerghus pop04.png|100px]] |
||
| + | |Text4 = Having found something to live for, Dimitri also rediscovered his just and true spirit. Now he wields his lance not for slaughter, but for justice and for the future of his people! |
||
| + | |Char1 = [[Byleth]] |
||
| + | |CharText1 = Child of the former captain of the [[Knights of Seiros]], [[Jeralt]]. A stoic, capable professor at the [[Officers Academy]]. Byleth supports Dimitri after he loses his way, and helps him find something to live for. |
||
| + | |Char2 = [[Edelgard]] |
||
| + | |CharText2 = Princess and heir apparent of the Adrestian Empire. Her steadfast ambition is veiled by her elegant, self-confident demeanor. She and Dimitri were close during their early childhood. |
||
| + | }} |
||
| + | |||
| + | |-|Legendary Heroes= |
||
| + | ;Savior King |
||
| + | :''King of the Holy Kingdom of Faerghus. Overthrew the empire and united all of Fódlan. Appears in Fire Emblem: Three Houses.'' |
||
| + | |||
| + | ====Base Stats==== |
||
| + | Rarity: ✯✯✯✯✯ |
||
| + | |||
| + | {{CharStat |
||
| + | |game=feh |
||
| + | |image=[[File:Dimitri Savior King Heroes sprite.png]]<br>Savior King |
||
| + | |Group=[[File:Heroes Infantry.png|25px]] Infantry |
||
| + | |Level=1<br>40 |
||
| + | |HP=17/18/19<br>36/40/43 |
||
| + | |Atk=10/11/12<br>38/41/45 |
||
| + | |Spd=7/8/9<br>37/41/44 |
||
| + | |Def=10/11/12<br>34/37/40 |
||
| + | |Res=4/5/6<br>14/18/21 |
||
| + | |Weapon={{Weapon|feh|lance}} [[Lance (weapon)|Lance]] |
||
| + | |Skill=[[File:FEH skill offense.png|20px]] [[Areadbhar]]<br>[[File:FEH skill special.png|20px]] [[Rising Wind]] |
||
| + | }} |
||
| + | |||
| + | ====Skills==== |
||
| + | {{CharSkills |
||
| + | |weapon 1 = [[Iron Lance]] * - * - * - |
||
| + | |weapon 2 = [[Steel Lance]] * - * 3 * - |
||
| + | |weapon 3 = [[Silver Lance]] * [[Steel Lance]] * 4 * 3 |
||
| + | |weapon 4 = [[Areadbhar]] * [[Silver Lance]] * - * 5 |
||
| + | |special 1 = [[Rising Wind]] * - * - * - |
||
| + | |special 2 = [[Blazing Wind]] * [[Rising Wind]] * - * 5 |
||
| + | |passive A 1 = [[Death Blow|Death Blow 1]] * - * - * - |
||
| + | |passive A 2 = [[Sturdy Blow|Sturdy Blow 1]] * [[Death Blow|Death Blow 1]] * - * - |
||
| + | |passive A 3 = [[Sturdy Blow|Sturdy Blow 2]] * [[Sturdy Blow|Sturdy Blow 1]] * - * - |
||
| + | |passive A 4 = [[Sturdy Impact|Sturdy Impact]] * [[Sturdy Blow|Sturdy Blow 2]] * - * 5 |
||
| + | |passive A 5 = [[Attack Speed Clash|Atk Spd Clash 1]] * - * - * - |
||
| + | |passive A 6 = [[Attack Speed Clash|Atk Spd Clash 2]] * [[Attack Speed Clash|Atk Spd Clash 1]] * - * - |
||
| + | |passive A 7 = [[Attack Speed Clash|Atk Spd Clash 3]] * [[Attack Speed Clash|Atk Spd Clash 2]] * - * - |
||
| + | |passive A 8 = [[Attack Speed Clash|Atk Spd Clash 4]] * [[Attack Speed Clash|Atk Spd Clash 3]] * - * 5 |
||
| + | |passive B 1 = [[Atrocity|Atrocity]] * - * - * 5 |
||
| + | |passive B 2 = [[Atrocity|Atrocity II]] * [[Atrocity|Atrocity]] * - * 5 |
||
| + | |passive C 1 = [[Odd Tempest|Odd Tempest 1]] * - * - * - |
||
| + | |passive C 2 = [[Odd Tempest|Odd Tempest 2]] * [[Odd Tempest|Odd Tempest 1]] * - * - |
||
| + | |passive C 3 = [[Odd Tempest|Odd Tempest 3]] * [[Odd Tempest|Odd Tempest 2]] * - * 5 |
||
| + | }} |
||
| + | ====Overall==== |
||
| + | {{Subjective}} |
||
| + | =====Base Set===== |
||
| + | Legendary Dimitri carries a pack of strengths that immediately makes him an incredibly powerful Lance Infantry Legendary Hero. Blessed with the Pair Up Water blessing, Legendary Dimitri can fix what few weaknesses he has by pairing himself with units who can cover them. On his own, he has a monstrous 41 Atk and Spd, allowing him to have powerful offenses and can avoid getting doubled by a vast majority of units in the game. He also has a modest 77 physical bulk, allowing him to duel most units by taking a hit or two. However, his low 18 Res leaves him extremely vulnerable to magic users and Dragons. Still, his kit does alleviate this weakness and leaves only a small group of units that can flat out dispatch him. All-in-all, Legendary Dimitri has massive strengths that can destroy waves of his foes if left with no direct counters to him.<br> |
||
| + | [[Areadbhar]] has an oppressive set of effects with the special cooldown acceleration being the mere tip of its strengths. If he is above 25% HP, he gains +5 Atk/Spd/Def/Res during combat, making him all the more threatening in terms of raw stat values and remaining above 25% is not difficult for Legendary Dimitri with the right skills and inheritances. In addition, if his Spd is higher than his foes, he reduces the damage received from foes (including AOE specials) based on the difference between the Spd of both units x4, maximizing at a 40% reduction should the Spd difference be more than 10 in Dimitri's favor. Needless to say that there are very few units who naturally avoid this last stat and for an unmerged neutral Spd Legendary Dimitri, unless the foe has 46 Spd or more during battle, that effect will have some effect on the outcome of the battle.<br> |
||
| + | [[Atrocity]] further increases his overall damage by 25% if his opponent is at least 50% HP or more at the start of combat, already pushing his insane strength forward to demolishing levels. In addition, after combat in which the opponent does survive, he slows the enemy's special cooldown by one charge and inflicts a -5 penalty to his foe's four core stats as well as their allies within two spaces of Legendary Dimitri. For Legendary Dimitri alone, if he can get this effect off, refresh, and then immediately attack a foe in range, he can possibly have a 10 stat difference which will all but secure a kill onto even the most hardy of foes.<br> |
||
| + | [[Blazing Wind]] inflicts damage to the targeted foe and foes within the AOE's effect range based on the difference between his Atk and their Def. While the damage can be spread across multiple units is useful, moving more foes out of Atrocity's damage range may actually be more of a detriment than a benefit for his overall combat. [[Sturdy Impact]] increases his Atk by 6 and Def by 10 if he initiates combat will also negating his foe's follow-up attack either by stat difference or through skills like [[Vengeful Fighter]]. Finally Legendary Dimitri introduces a new Skill C, [[Odd Tempest]] which on odd-numbered turns, he can move one additional space, essentially making him a Cavalry without the movement penalties from trenches. As a result, he has far more range than he may seem to have. Astute players will need to keep this movement buff in mind when checking the danger zones of the enemy. |
||
| + | =====Counters===== |
||
| + | Most of Legendary Dimitri's weaknesses hinges upon whether or not he has access to [[Distant Counter]]. If he does not, most Green Mages and some Green Dragons carry the innate magical damage to instantly annihilate him, though an emphasis on Spd to prevent as much damage reduction is key for countering him. Even some Blue mages can dispatch him if he is lacking Distant Counter. His low Res makes him vulnerable to most conventional Ploy units, with [[Speed Ploy]] being a bane to his end goals by lowering his Spd by up to 5 and opening the door for more units to avoid his damage range. Otherwise, high bulk Greens can solidly wall him off with [[Edelgard|Legendary and Brave Edelgard]] are excellent counters to him as well as [[Rinkah]]. Even with Distant Counter, the [[Wrathful Staff|Wrathful]]/[[Dazzling Staff]] combo can safely engage upon him and deal moderate damage if not deal with him if they can be refreshed. |
||
| + | =====Skill Inheritance===== |
||
| + | Legendary Dimitri's empty assist skill can be easily filled with a positional skill, namely [[Reposition]] for its sheer utility. [[Noontime]] is a much better special as it can help him maintain his HP threshold to keep Areadbhar's effect active as much as possible. [[Distant Counter]] is his best Skill A option just to narrow down/limit the number of counters who can safely engage him. Skill C can be maintained to give himself additional movement, but inheriting the likes of [[Joint Drive Speed]] adds an additional +4 Spd to himself during combat so long as he is within two spaces of an ally while also providing the same buff to his ally. |
||
| + | |||
| + | ====Meet Some of the Heroes==== |
||
| + | {{MeetHero |
||
| + | |Hero = Savior King Dimitri |
||
| + | |Pop1 = [[File:Dimitri savior king pop01.png|100px]] |
||
| + | |Text1 = Dimitri is the leader of the [[Holy Kingdom of Faerghus]]. You might be misled by his seemingly slender frame, but he's seriously strong! |
||
| + | |Pop2 = [[File:Dimitri savior king pop02.png|100px]] |
||
| + | |Text2 = When he was a young child, Dimitri lost both of his parents. This [[Tragedy of Duscur|incident]] left a terrible scar on his heart, and even when later he entered the [[Officers Academy]] at [[Garreg Mach Monastery]], the wound still showed no sign of healing. |
||
| + | |Pop3 = [[File:Dimitri savior king pop03.png|100px]] |
||
| + | |Text3 = Sadly, a number of other tragedies would follow. For a while, Dimitri was lost to utter despair, but with the support of his [[Byleth|professor]] from the academy and his fellow classmates, he regained the emotional fortitude his kingdom needed. |
||
| + | |Pop4 = [[File:Dimitri savior king pop04.png|100px]] |
||
| + | |Text4 = Having gotten back on his feet, Dimitri joined the war against the [[Adrestian Empire]] to put a stop to the strife that had befallen [[Fódlan]]—with the professor he so respected and the classmates he relied on right by his side! |
||
| + | |Char1 = [[Byleth]] |
||
| + | |CharText1 = Child of the former captain of the [[Knights of Seiros]], [[Jeralt]]. A stoic, capable professor at the Officers Academy. Serving the role of Dimitri's teacher, Byleth sets him on the right path. |
||
| + | |Char2 = [[Edelgard]] |
||
| + | |CharText2 = After ascending as Adrestian Emperor, she defeated the [[Church of Seiros]], solidifying her reign over all of Fódlan. She and Dimitri knew each other as children. |
||
| + | }} |
||
| + | |||
| + | |-|Forces of Will= |
||
| + | ;Savage Boar |
||
| + | :''Prince of Faerghus overcome by hatred. Vowing to have his revenge on Edelgard, he commits to slaughtering his foes without mercy. Appears in Fire Emblem: Three Houses.'' |
||
| + | |||
| + | ====Base Stats==== |
||
| + | Rarity: ✯✯✯✯✯ |
||
| + | {{CharStat |
||
| + | |game=feh |
||
| + | |image=[[File:Dimitri Savage Boar Heroes sprite.png]]<br>Savage Boar |
||
| + | |Group=[[File:Heroes Infantry.png|25px]] Infantry |
||
| + | |Level=1<br>40 |
||
| + | |HP=17/18/19<br>36/40/43 |
||
| + | |Atk=11/12/13<br>39/42/46 |
||
| + | |Spd=6/7/8<br>36/40/43 |
||
| + | |Def=11/12/13<br>35/38/41 |
||
| + | |Res=3/4/5<br>13/17/20 |
||
| + | |Weapon={{Weapon|feh|lance}} [[Lance (weapon)|Lance]] |
||
| + | |Skill=[[File:FEH skill offense.png|20px]] [[Vengeful Lance]]<br>[[File:FEH skill special.png|20px]] [[Night Sky]] |
||
| + | }} |
||
| + | |||
| + | ====Skills==== |
||
| + | {{CharSkills |
||
| + | |weapon 1 = [[Iron Lance]] * - * - * - |
||
| + | |weapon 2 = [[Steel Lance]] * - * - * - |
||
| + | |weapon 3 = [[Silver Lance]] * - * - * - |
||
| + | |weapon 4 = [[Vengeful Lance]]* - * 5 * - |
||
| + | |special 1 = [[Night Sky]] * - * - * - |
||
| + | |special 2 = [[Glimmer]] * [[Night Sky]] * - * 5 |
||
| + | |passive A 1 = [[Attack Speed Solo|Atk Spd Solo 1]] * - * - * - |
||
| + | |passive A 2 = [[Attack Speed Solo|Atk Spd Solo 2]] * [[Attack Speed Solo|Atk Spd Solo 1]] * - * - |
||
| + | |passive A 3 = [[Attack Speed Solo|Atk Spd Solo 3]] * [[Attack Speed Solo|Atk Spd Solo 2]] * - * - |
||
| + | |passive A 4 = [[Attack Speed Solo|Atk Spd Solo 4]] * [[Attack Speed Solo|Atk Spd Solo 3]] * - * 5 |
||
| + | |passive B 1 = [[Murderous Lion|Murderous Lion]] * - * - * 5 |
||
| + | |passive C 1 = [[Odd Tempest|Odd Tempest 1]] * - * - * - |
||
| + | |passive C 2 = [[Odd Tempest|Odd Tempest 2]] * [[Odd Tempest|Odd Tempest 1]] * - * - |
||
| + | |passive C 3 = [[Odd Tempest|Odd Tempest 3]] * [[Odd Tempest|Odd Tempest 2]] * - * 5 |
||
| + | }} |
||
| + | ====Overall==== |
||
| + | {{Subjective}} |
||
| + | =====Base Set===== |
||
| + | Fallen Dimitri is a Lance Infantry designed to be an aggressive unit whose sole purpose is to constantly slaughter the enemy forces on his turn, fitting for this form's mindset. His stat investment is focused solely on his offense, with a powerful 42 Atk and 40 Spd. He also has a decent 78 physical bulk, but is extremely frail to mages at a low 17 Res.<br> |
||
| + | [[Vengeful Lance]] further boosts his Atk by 3, bringing his total Atk with his weapon to 61. If he is not adjacent to an ally, he gains +6 Atk/Spd during combat. If his Atk is greater than his foe's Def and he cannot perform a follow-up attack, he boosts his damage by 50% based on the difference of his Atk and his foe's Def. This effect mainly helps Fallen Dimitri deal significantly more damage against a foe that can prevent his lost follow-up attack. As a result, the effect is rather situational and only serves to help him slay a unit employ specific set of skills.<br> |
||
| + | He has a unique Skill B, [[Murderous Lion]] which inflicts -3 Spd/Def on his foe during combat if he is not adjacent to an ally. It also gives him a special【Canto (Rem. +1)】status after combat, allowing him to use up any remaining movement he has after preforming an interactive action like attacking or using an assist skill and also gains 1 movement point as well. [[Odd Tempest]] grants him an additional space of movement during odd numbered turns and can stack with the Canto boost as well. |
||
| + | |||
| + | =====Counters===== |
||
| + | Fallen Dimitri's weakness is fairly straightforward as his frail magical bulk leaves him wide open to a majority of Tome users. Bad AI can also lead to his downfall as nearly all of his effects require that he be away from his allies to reap the full benefits. Bulky Greens can also take his powerful attacks to a certain degree, but they need to be cautious. |
||
| + | |||
| + | =====Skill Inheritance===== |
||
| + | Fallen Dimitri's only empty skill is his Assist Skill, which [[Reposition]] is an easy fill for its utility, though he needs to make sure that his allies can move away from him otherwise he loses his effects. [[Shove]] or [[Smite]] are in some cases better choices since they keep his allies away from him. [[Galeforce]] can work on him given the aggressive nature of his kit, though he may need to give himself a [[Slaying Lance]] to better suit this. |
||
| + | |||
| + | ====Meet Some of the Heroes==== |
||
| + | {{MeetHero |
||
| + | |Hero = Savage Boar Dimitri |
||
| + | |Pop1 = [[File:Dimitri savage boar pop01.png|100px]] |
||
| + | |Text1 = Today I'll be introducing you to Dimitri from the [[Holy Kingdom of Faerghus]]! That said, I'm a little worried about that gloomy look on his face… |
||
| + | |Pop2 = [[File:Dimitri savage boar pop02.png|100px]] |
||
| + | |Text2 = Dimitri was the only royal who survived an underhanded [[Tragedy of Duscur|plot]] that took place when he was a child. His hatred toward the schemers who took the lives of his family never left him, enveloping his heart in a deep darkness. |
||
| + | |Pop3 = [[File:Dimitri savage boar pop03.png|100px]] |
||
| + | |Text3 = When the [[Adrestian Empire]] embarked on its conquest of [[Fódlan]], Dimitri returned to Faerghus to fight back. But the kingdom was hardly unified, and there were many struggles ahead. |
||
| + | |Pop4 = [[File:Dimitri savage boar pop04.png|100px]] |
||
| + | |Text4 = Having been the victim of plots and betrayals for so long, Dimitri closed his heart off to the world. I wonder if he'll ever smile again… |
||
| + | |Char1 = [[Edelgard]] |
||
| + | |CharText1 = After ascending as Adrestian Emperor, she embarked on a campaign to defeat the [[Church of Seiros]] and solidify her reign over all of Fódlan. She opposes Dimitri. |
||
| + | |Char2 = [[Dedue]] |
||
| + | |CharText2 = Survivor of the tribe that inhabited the [[Duscur|Duscur Region]] west of the Holy Kingdom of Faerghus. Swore loyalty to Dimitri. |
||
| + | }} |
||
| + | |||
| + | |-|Summer Vacation= |
||
| + | ;Sky-Blue Lion |
||
| + | :''Crown prince of the Holy Kingdom of Faerghus and student at Garreg Mach Monastery. He has come to the tropics for some summer training. Appears in Fire Emblem: Three Houses.'' |
||
| + | |||
| + | ====Base Stats==== |
||
| + | Rarity: ✯✯✯✯✯ |
||
| + | {{CharStat |
||
| + | |game=feh |
||
| + | |image=[[File:Dimitri Sky-Blue Lion Heroes sprite.png]]<br>Sky-Blue Lion |
||
| + | |Group=[[File:Heroes Cavalry.png|25px]] Cavalry |
||
| + | |Level=1<br>40 |
||
| + | |HP=17/18/19<br>36/40/43 |
||
| + | |Atk=8/9/10<br>38/42/45 |
||
| + | |Spd=9/10/11<br>37/40/44 |
||
| + | |Def=8/9/10<br>32/35/38 |
||
| + | |Res=3/4/5<br>13/17/20 |
||
| + | |Weapon={{Weapon|feh|axe}} [[Axe]] |
||
| + | |Skill=[[File:FEH skill offense.png|20px]] [[Unyielding Oar]]<br>[[File:FEH skill special.png|20px]] [[Night Sky]] |
||
| + | }} |
||
| + | |||
| + | ====Skills==== |
||
| + | {{CharSkills |
||
| + | |weapon 1 = [[Iron Axe]] * - * - * - |
||
| + | |weapon 2 = [[Steel Axe]] * - * - * - |
||
| + | |weapon 3 = [[Silver Axe]] * - * - * - |
||
| + | |weapon 4 = [[Unyielding Oar]] * - * 5 * - |
||
| + | |special 1 = [[Night Sky]] * - * - * - |
||
| + | |special 2 = [[Glimmer]] * [[Night Sky]] * - * - |
||
| + | |passive A 1 = [[Attack Speed Catch|Atk/Spd Catch 1]] * - * - * - |
||
| + | |passive A 2 = [[Attack Speed Catch|Atk/Spd Catch 2]] * [[Attack Speed Catch|Atk/Spd Catch 1]] * - * - |
||
| + | |passive A 3 = [[Attack Speed Catch|Atk/Spd Catch 3]] * [[Attack Speed Catch|Atk/Spd Catch 2]] * - * - |
||
| + | |passive A 4 = [[Attack Speed Catch|Atk/Spd Catch 4]] * [[Attack Speed Catch|Atk/Spd Catch 3]] * - * 5 |
||
| + | |passive B 1 = [[Atrocity (skill)|Atrocity]] * - * - * 5 |
||
| + | |passive C 1 = [[Threaten Speed|Threaten Spd 1]] * - * - * - |
||
| + | |passive C 2 = [[Threaten Speed Defense|Threaten Spd/Def 1]] * [[Threaten Speed|Threaten Spd 1]] * - * - |
||
| + | |passive C 3 = [[Threaten Speed Defense|Threaten Spd/Def 2]] * [[Threaten Speed Defense|Threaten Spd/Def 1]] * - * - |
||
| + | |passive C 4 = [[Speed Defense Menace|Spd/Def Menace]] * [[Threaten Speed Defense|Threaten Spd/Def 2]] * - * - |
||
| + | }} |
||
| + | ====Overall==== |
||
| + | {{Subjective}} |
||
| + | =====Base Set===== |
||
| + | |||
| + | =====Counters===== |
||
| + | |||
| + | =====Skill Inheritance Options===== |
||
| + | |||
| + | ====Meet Some of the Heroes==== |
||
| + | {{MeetHero |
||
| + | |Hero = Sky-Blue Lion Dimitri |
||
| + | |Pop1 = [[File:Dimitri sky-blue lion pop01.png|100px]] |
||
| + | |Text1 = Where's Dimitri? I'm sure we invited him... What?! He's gone swimming all the way to the next island?! Well, I suppose that kind of stamina is exactly what we should expect from someone in charge of one of the houses of [[Fódlan]]'s [[Officers Academy]]! |
||
| + | |Pop2 = [[File:Dimitri sky-blue lion pop02.png|100px]] |
||
| + | |Text2 = He's certainly pulled off a stylish look with that sun visor and swimsuit combination! By the way, that brooch he's using to fasten his fetching towel-cape matches the one he got for his [[Byleth|professor]]'s birthday! |
||
| + | |Pop3 = [[File:Dimitri sky-blue lion pop03.png|100px]] |
||
| + | |Text3 = Oh, and check out the palm leaves he's used to decorate that large [[Unyielding Oar|wooden oar]] he's carrying! That thing looks pretty heavy, but it doesn't seem like he's having any trouble at all using it one-handed! |
||
| + | |Pop4 = [[File:Dimitri sky-blue lion pop04.png|100px]] |
||
| + | |Text4 = Dimitri always seems to have so much on his mind. I hope he takes this opportunity to relax, enjoy his vacation, and blow away those dark clouds a little! |
||
| + | |Char1 = [[Byleth]] |
||
| + | |CharText1 = Child of the former captain of the [[Knights of Seiros]], [[Jeralt]]. A stoic, capable professor at the Officers Academy. Guides Dimitri as his professor. |
||
| + | |Char2 = [[Edelgard]] |
||
| + | |CharText2 = Princess and heir apparent of the [[Adrestian Empire]]. Her steadfast ambition is veiled by her elegant, self-confident demeanor. She and Dimitri were friendly as children. |
||
| + | |Char3 = [[Claude]] |
||
| + | |CharText3 = Member of House Riegan and leader of the [[Leicester Alliance]]. The sea air makes his heart race. As leader of the [[Golden Deer|Golden Deer House]], he is a rival to Dimitri. |
||
| + | }} |
||
| + | |||
| + | |-|Holiday Lessons= |
||
| + | ;Blessed Protector |
||
| + | :''Crown prince of the Holy Kingdom of Faerghus, delivering winter warmth to the people of Askr as their winter envoy. Appears in Fire Emblem: Three Houses.'' |
||
| + | |||
| + | ====Base Stats==== |
||
| + | Rarity: ✯✯✯✯✯ |
||
| + | {{CharStat |
||
| + | |game=feh |
||
| + | |image=[[File:Dimitri Blessed Protector Heroes sprite.png]]<br>Blessed Protector |
||
| + | |Group=[[File:Heroes Cavalry.png|25px]] Cavalry |
||
| + | |Level=1<br>40 |
||
| + | |HP=18/19/20<br>37/41/44 |
||
| + | |Atk=7/8/9<br>44/47/51 |
||
| + | |Spd=12/13/14<br>42/46/49 |
||
| + | |Def=7/8/9<br>29/32/35 |
||
| + | |Res=3/4/5<br>16/19/22 |
||
| + | |Weapon={{Weapon|feh|Axe}} [[Axe]] |
||
| + | |Skill=[[File:FEH skill offense.png|20px]] [[Blue Yule Axe]]<br>[[File:FEH skill special.png|20px]] [[Dragon Gaze]] |
||
| + | }} |
||
| + | |||
| + | ====Skills==== |
||
| + | {{CharSkills |
||
| + | |weapon 1 = [[Iron Axe]] * - * - * - |
||
| + | |weapon 2 = [[Steel Axe]] * - * - * - |
||
| + | |weapon 3 = [[Silver Axe]] * - * - * - |
||
| + | |weapon 4 = [[Blue Yule Axe]] * - * 5 * - |
||
| + | |special 1 = [[Dragon Gaze]] * - * - * - |
||
| + | |special 2 = [[Draconic Aura]] * [[Dragon Gaze]] * - * - |
||
| + | |special 3 = [[No Quarter]] * [[Draconic Aura]] * - * 5 |
||
| + | |passive A 1 = [[Attack Speed Prime|Atk Spd Prime 1]] * - * - * - |
||
| + | |passive A 2 = [[Attack Speed Prime|Atk Spd Prime 2]] * [[Attack Speed Prime|Atk Spd Prime 1]] * - * - |
||
| + | |passive A 3 = [[Attack Speed Prime|Atk Spd Prime 3]] * [[Attack Speed Prime|Atk Spd Prime 2]] * - * - |
||
| + | |passive A 4 = [[Attack Speed Prime|Atk Spd Prime 4]] * [[Attack Speed Prime|Atk Spd Prime 3]] * - * 5 |
||
| + | |passive B 1 = [[Barbarity|Barbarity]] * - * - * 5 |
||
| + | |passive C 1 = [[Panic Smoke|Panic Smoke 1]] * - * - * - |
||
| + | |passive C 2 = [[Panic Smoke|Panic Smoke 2]] * [[Panic Smoke|Panic Smoke 1]] * - * - |
||
| + | |passive C 3 = [[Panic Smoke|Panic Smoke 3]] * [[Panic Smoke|Panic Smoke 2]] * - * - |
||
| + | |passive C 4 = [[Panic Smoke|Panic Smoke 4]] * [[Panic Smoke|Panic Smoke 3]] * - * 5 |
||
| + | }} |
||
| + | ====Overall==== |
||
| + | {{Subjective}} |
||
| + | =====Base Set===== |
||
| + | |||
| + | =====Counters===== |
||
| + | |||
| + | =====Skill Inheritance===== |
||
| + | |||
| + | ====Meet Some of the Heroes==== |
||
| + | {{MeetHero |
||
| + | |Hero = Blessed Protector Dimitri |
||
| + | |Pop1 = [[File:Dimitri blessed protector pop01.png|100px]] |
||
| + | |Text1 = Dimitri has come from the [[Officers Academy]] in [[Fódlan]] to join us at the winter festival! I wonder what jolly surprises are in store for him today? |
||
| + | |Pop2 = [[File:Dimitri blessed protector pop02.png|100px]] |
||
| + | |Text2 = Red-and-green decorations are essential to the festival—but as you can see, blue outfits are essential to Dimitri! |
||
| + | |Pop3 = [[File:Dimitri blessed protector pop03.png|100px]] |
||
| + | |Text3 = Not that he's ignoring the theme, of course—that [[Blue Yule Axe|hefty axe]] he's carrying for the festival is decorated with cheerful bells and stars! I can already see him swinging that thing around with his impressive strength as if it weighed nothing at all! |
||
| + | |Pop4 = [[File:Dimitri blessed protector pop04.png|100px]] |
||
| + | |Text4 = The winter festival is a special time of year where friends and family exchange gifts with one another. I wonder what Dimitri wants this year? |
||
| + | |Char1 = [[Edelgard]] |
||
| + | |CharText1 = Princess and heir apparent of the [[Adrestian Empire]]. Her steadfast ambition is veiled by her elegant, self-confident demeanor. A house leader like Dimitri, she oversees the [[Black Eagles|Black Eagle House]]. |
||
| + | |Char2 = [[Claude]] |
||
| + | |CharText2 = Heir to [[Noble Houses of Leicester|House Riegan]], the leading house of the [[Leicester Alliance]]. Employs both an easygoing attitude and an effortless skill for scheming. Leader of the [[Golden Deer|Golden Deer House]], making him a friendly rival to Dimitri. |
||
| + | }} |
||
</tabber> |
</tabber> |
||
| + | ===''[[Fire Emblem Warriors: Three Hopes]]''=== |
||
| − | == Quotes == |
||
| − | === |
+ | ====Base Stats==== |
| + | {{CharStat |
||
| + | |game = few3h |
||
| + | |image = [[File:FEW3H Soldier Dimitri Icon.gif]][[Soldier]] |
||
| + | |Crest = [[File:Minor Crest of Blaiddyd Icon.png|30px|Minor Crest of Blaiddyd]] |
||
| + | |Abilities = [[File:Azure Lightning.png|20px]][[Azure Lightning|Azure Lightning Lv 1]]<br>[[File:Royal Bloodline.png|20px]][[King's Might|King's Might Lv 1]]<br>[[File:Reign.png|20px]][[Tactical Attack Damage Up|Reign Lv 1]]<br>[[File:Sword Buster Lv 1.png|20px]][[Sword Buster|Sword Buster Lv 1]] |
||
| + | |Item = [[File:FE16 Lance Weapon Icon.png|20px]][[Iron Lance]] |
||
| + | |Magic = - |
||
| + | |Combat Arts = [[File:Icon Combat Art FE16 Lance.png|20px]][[Knightkneeler]]<br>[[File:Icon Combat Art FE16 Lance.png|20px]][[Earthsplitter]] |
||
| + | |Level = 1 |
||
| + | |HP = 3600 |
||
| + | |Str = 11 |
||
| + | |Mag = 7 |
||
| + | |Dex = 11 |
||
| + | |Spd = 10 |
||
| + | |Lck = 8 |
||
| + | |Def = 9 |
||
| + | |Res = 7 |
||
| + | |Chrm = 11 |
||
| + | }} |
||
| + | |||
| + | ====Learnt Abilities==== |
||
| + | : Beginner Classes |
||
| + | {{LearntAbilities|game=few3h}} |
||
| + | |- |
||
| + | |[[File:FEW3H Staunch Shield.png|20px]] [[Rebellious Spirit]] |
||
| + | |[[File:FEW3H Class Level 1 Icon.png|15px]][[File:FE16 Myrmidon Icon.gif|20px]]<br>[[Myrmidon]] |
||
| + | | - |
||
| + | |- |
||
| + | |[[File:Sword Prowess.png|20px]] [[Sword Prowess]] |
||
| + | |[[File:FEW3H Class Level 2 Icon.png|15px]][[File:FE16 Myrmidon Icon.gif|20px]]<br>[[Myrmidon]] |
||
| + | |Totals with additional Sword Prowesses learned |
||
| + | |- |
||
| + | |[[File:Icon Combat Art FE16 Sword.png|20px]] [[Grounder]] |
||
| + | |[[File:FEW3H Class Mastery Icon.png|15px]][[File:FE16 Myrmidon Icon.gif|20px]]<br>[[Myrmidon]] |
||
| + | | - |
||
| + | |- |
||
| + | |[[File:Impregnable.png|20px]] [[Backbone]] |
||
| + | |[[File:FEW3H Class Level 1 Icon.png|15px]][[File:FE16 Soldier Icon.gif|20px]]<br>[[Soldier]] |
||
| + | | - |
||
| + | |- |
||
| + | |[[File:Lance Prowess.png|20px]] [[Lance Prowess]] |
||
| + | |[[File:FEW3H Class Level 2 Icon.png|15px]][[File:FE16 Soldier Icon.gif|20px]]<br>[[Soldier]] |
||
| + | |Totals with additional Lance Prowesses learned |
||
| + | |- |
||
| + | |[[File:Icon Combat Art FE16 Lance.png|20px]] [[Wheelsweep]] |
||
| + | |[[File:FEW3H Class Mastery Icon.png|15px]][[File:FE16 Soldier Icon.gif|20px]]<br>[[Soldier]] |
||
| + | | - |
||
| + | |- |
||
| + | |[[File:Strength 2 FE16.png|20px]] [[Strength +|Str +2]] |
||
| + | |[[File:FEW3H Class Level 1 Icon.png|15px]][[File:FE16 Fighter Icon.gif|20px]]<br>[[Fighter]] |
||
| + | | - |
||
| + | |- |
||
| + | |[[File:Axe Prowess.png|20px]] [[Axe Prowess]] |
||
| + | |[[File:FEW3H Class Level 2 Icon.png|15px]][[File:FE16 Fighter Icon.gif|20px]]<br>[[Fighter]] |
||
| + | |Totals with additional Axe Prowesses learned |
||
| + | |- |
||
| + | |[[File:Icon Combat Art FE16 Axe.png|20px]] [[Swinging Fury]] |
||
| + | |[[File:FEW3H Class Mastery Icon.png|15px]][[File:FE16 Fighter Icon.gif|20px]]<br>[[Fighter]] |
||
| + | | - |
||
| + | |- |
||
| + | |[[File:Confidence skill.png|20px]] [[Trust]] |
||
| + | |[[File:FEW3H Class Level 1 Icon.png|15px]][[File:FE16 Monk Icon.gif|20px]]<br>[[Monk]] |
||
| + | | - |
||
| + | |- |
||
| + | |[[File:Faith skill.png|20px]] [[Faith Prowess|Faith]] |
||
| + | |[[File:FEW3H Class Level 2 Icon.png|15px]][[File:FE16 Monk Icon.gif|20px]]<br>[[Monk]] |
||
| + | |Totals with additional Faith learned |
||
| + | |- |
||
| + | |[[File:FEW3H Heal Icon.png|20px]] [[Heal]] |
||
| + | |[[File:FEW3H Class Mastery Icon.png|15px]][[File:FE16 Monk Icon.gif|20px]]<br>[[Monk]] |
||
| + | | - |
||
| + | |} |
||
| + | : Intermediate Classes |
||
| + | {{LearntAbilities|game=few3h}} |
||
| + | |- |
||
| + | |[[File:Steal FE16.png|20px]] [[Appraisal]] |
||
| + | |[[File:FEW3H Class Level 1 Icon.png|15px]][[File:FE16 Thief Icon.gif|20px]]<br>[[Thief]] |
||
| + | | - |
||
| + | |- |
||
| + | |[[File:Sword Prowess.png|20px]] [[Sword Prowess]] |
||
| + | |[[File:FEW3H Class Level 2 Icon.png|15px]][[File:FE16 Thief Icon.gif|20px]]<br>[[Thief]] |
||
| + | |Totals with additional Sword Prowesses learned |
||
| + | |- |
||
| + | |[[File:Swordfaire FE16.png|20px]] [[Thief's Wisdom]] |
||
| + | |[[File:FEW3H Class Mastery Icon.png|15px]][[File:FE16 Thief Icon.gif|20px]]<br>[[Thief]] |
||
| + | | - |
||
| + | |- |
||
| + | |[[File:Icon Combat Art FE16 Sword.png|20px]] [[Shadowblade]] |
||
| + | |[[File:FEW3H Class Mastery Icon.png|15px]][[File:FE16 Thief Icon.gif|20px]]<br>[[Thief]] |
||
| + | | - |
||
| + | |- |
||
| + | |[[File:Battalion Vantage FE16.png|20px]] [[Battalion Vantage]] |
||
| + | |[[File:FEW3H Class Level 1 Icon.png|15px]][[File:FE16 Mercenary Icon.gif|20px]]<br>[[Mercenary]] |
||
| + | | - |
||
| + | |- |
||
| + | |[[File:Sword Prowess.png|20px]] [[Sword Prowess]] |
||
| + | |[[File:FEW3H Class Level 2 Icon.png|15px]][[File:FE16 Mercenary Icon.gif|20px]]<br>[[Mercenary]] |
||
| + | |Totals with additional Sword Prowesses learned |
||
| + | |- |
||
| + | |[[File:Icon Combat Art FE16 Sword.png|20px]] [[Windsweep]] |
||
| + | |[[File:FEW3H Class Level 2 Icon.png|15px]][[File:FE16 Mercenary Icon.gif|20px]]<br>[[Mercenary]] |
||
| + | | - |
||
| + | |- |
||
| + | |[[File:Sword Crit +10 FE16.png|20px]] [[Mercenary's Ploy]] |
||
| + | |[[File:FEW3H Class Mastery Icon.png|15px]][[File:FE16 Mercenary Icon.gif|20px]]<br>[[Mercenary]] |
||
| + | | - |
||
| + | |- |
||
| + | |[[File:Desperation FE16.png|20px]] [[Desperation]] |
||
| + | |[[File:FEW3H Class Level 1 Icon.png|15px]][[File:FE16 Cavalier Icon.gif|20px]]<br>[[Cavalier]] |
||
| + | | - |
||
| + | |- |
||
| + | |[[File:Lance Prowess.png|20px]] [[Lance Prowess]] |
||
| + | |[[File:FEW3H Class Level 2 Icon.png|15px]][[File:FE16 Cavalier Icon.gif|20px]]<br>[[Cavalier]] |
||
| + | |Totals with additional Lance Prowesses learned |
||
| + | |- |
||
| + | |[[File:Icon Combat Art FE16 Lance.png|20px]] [[Glowing Ember]] |
||
| + | |[[File:FEW3H Class Level 2 Icon.png|15px]][[File:FE16 Cavalier Icon.gif|20px]]<br>[[Cavalier]] |
||
| + | | - |
||
| + | |- |
||
| + | |[[File:Mortal Coil.png|20px]] [[Knight's Wisdom]] |
||
| + | |[[File:FEW3H Class Mastery Icon.png|15px]][[File:FE16 Cavalier Icon.gif|20px]]<br>[[Cavalier]] |
||
| + | | - |
||
| + | |- |
||
| + | |[[File:Pomp & Circumstance FE16.png|20px]] [[Pomp & Circumstance]] |
||
| + | |[[File:FEW3H Class Level 1 Icon.png|15px]][[File:FEW3H High Lord Dimitri Icon.gif|20px]]<br>[[High Lord]] |
||
| + | | - |
||
| + | |- |
||
| + | |[[File:Icon Combat Art FE16 Lance.png|20px]] [[Frozen Lance]] |
||
| + | |[[File:FEW3H Class Level 1 Icon.png|15px]][[File:FEW3H High Lord Dimitri Icon.gif|20px]]<br>[[High Lord]] |
||
| + | | - |
||
| + | |- |
||
| + | |[[File:Royal Bloodline.png|20px]] [[King's Ploy]] |
||
| + | |[[File:FEW3H Class Level 2 Icon.png|15px]][[File:FEW3H High Lord Dimitri Icon.gif|20px]]<br>[[High Lord]] |
||
| + | | - |
||
| + | |- |
||
| + | |[[File:Confidence skill.png|20px]] [[Perspective]] |
||
| + | |[[File:FEW3H Class Mastery Icon.png|15px]][[File:FEW3H High Lord Dimitri Icon.gif|20px]]<br>[[High Lord]] |
||
| + | | - |
||
| + | |- |
||
| + | |[[File:Defense 2 FE16.png|20px]] [[Defense +|Def +2]] |
||
| + | |[[File:FEW3H Class Level 1 Icon.png|15px]][[File:FE16 Armored Knight Icon.gif|20px]]<br>[[Knight|Armored Knight]] |
||
| + | | - |
||
| + | |- |
||
| + | |[[File:Axe Prowess.png|20px]] [[Axe Prowess]] |
||
| + | |[[File:FEW3H Class Level 2 Icon.png|15px]][[File:FE16 Armored Knight Icon.gif|20px]]<br>[[Knight|Armored Knight]] |
||
| + | |Totals with additional Axe Prowesses learned |
||
| + | |- |
||
| + | |[[File:Icon Combat Art FE16 Axe.png|20px]] [[Lightning Axe]] |
||
| + | |[[File:FEW3H Class Level 2 Icon.png|15px]][[File:FE16 Armored Knight Icon.gif|20px]]<br>[[Knight|Armored Knight]] |
||
| + | | - |
||
| + | |- |
||
| + | |[[File:Confidence skill.png|20px]] [[Armored Infantry's Wisdom]] |
||
| + | |[[File:FEW3H Class Mastery Icon.png|15px]][[File:FE16 Armored Knight Icon.gif|20px]]<br>[[Knight|Armored Knight]] |
||
| + | | - |
||
| + | |- |
||
| + | |[[File:Defiant Str FE16.png|20px]] [[Wild Abandon]] |
||
| + | |[[File:FEW3H Class Level 1 Icon.png|15px]][[File:FE16 Brigand Icon.gif|20px]]<br>[[Brigand]] |
||
| + | | - |
||
| + | |- |
||
| + | |[[File:Icon Combat Art FE16 Axe.png|20px]] [[Spike]] |
||
| + | |[[File:FEW3H Class Level 2 Icon.png|15px]][[File:FE16 Brigand Icon.gif|20px]]<br>[[Brigand]] |
||
| + | | - |
||
| + | |- |
||
| + | |[[File:Perception.png|20px]] [[Warrior's Wisdom]] |
||
| + | |[[File:FEW3H Class Mastery Icon.png|15px]][[File:FE16 Brigand Icon.gif|20px]]<br>[[Brigand]] |
||
| + | | - |
||
| + | |- |
||
| + | |[[File:Bowfaire FE16.png|20px]] [[Archer's Wisdom]] |
||
| + | |[[File:FEW3H Class Level 1 Icon.png|15px]][[File:FE16 Archer Icon.gif|20px]]<br>[[Archer]] |
||
| + | | - |
||
| + | |- |
||
| + | |[[File:Icon Combat Art FE16 Bow.png|20px]] [[Spiral Shot]] |
||
| + | |[[File:FEW3H Class Level 1 Icon.png|15px]][[File:FE16 Archer Icon.gif|20px]]<br>[[Archer]] |
||
| + | | - |
||
| + | |- |
||
| + | |[[File:Bow Prowess.png|20px]] [[Bow Prowess]] |
||
| + | |[[File:FEW3H Class Level 2 Icon.png|15px]][[File:FE16 Archer Icon.gif|20px]]<br>[[Archer]] |
||
| + | |Totals with additional Bow Prowesses learned |
||
| + | |- |
||
| + | |[[File:Icon Combat Art FE16 Bow.png|20px]] [[Drill Arrow]] |
||
| + | |[[File:FEW3H Class Level 2 Icon.png|15px]][[File:FE16 Archer Icon.gif|20px]]<br>[[Archer]] |
||
| + | | - |
||
| + | |- |
||
| + | |[[File:Confidence skill.png|20px]] [[Armsthrift]] |
||
| + | |[[File:FEW3H Class Mastery Icon.png|15px]][[File:FE16 Archer Icon.gif|20px]]<br>[[Archer]] |
||
| + | | - |
||
| + | |- |
||
| + | |[[File:Icon Combat Art FE16 Bow.png|20px]] [[Point-Blank Volley]] |
||
| + | |[[File:FEW3H Class Mastery Icon.png|15px]][[File:FE16 Archer Icon.gif|20px]]<br>[[Archer]] |
||
| + | | - |
||
| + | |- |
||
| + | |[[File:Perception.png|20px]] [[Brawler's Wisdom]] |
||
| + | |[[File:FEW3H Class Level 1 Icon.png|15px]][[File:FE16 Brawler Icon.gif|20px]]<br>[[Brawler]] |
||
| + | | - |
||
| + | |- |
||
| + | |[[File:Icon Combat Art FE16 Brawl.png|20px]] [[Dual Devastators]] |
||
| + | |[[File:FEW3H Class Level 1 Icon.png|15px]][[File:FE16 Brawler Icon.gif|20px]]<br>[[Brawler]] |
||
| + | | - |
||
| + | |- |
||
| + | |[[File:Brawling Prowess.png|20px]] [[Brawling Prowess]] |
||
| + | |[[File:FEW3H Class Level 2 Icon.png|15px]][[File:FE16 Brawler Icon.gif|20px]]<br>[[Brawler]] |
||
| + | |Totals with additional Brawling Prowesses learned |
||
| + | |- |
||
| + | |[[File:Icon Combat Art FE16 Brawl.png|20px]] [[Draining Blow]] |
||
| + | |[[File:FEW3H Class Level 2 Icon.png|15px]][[File:FE16 Brawler Icon.gif|20px]]<br>[[Brawler]] |
||
| + | | - |
||
| + | |- |
||
| + | |[[File:Perception.png|20px]] [[Concentration]] |
||
| + | |[[File:FEW3H Class Mastery Icon.png|15px]][[File:FE16 Brawler Icon.gif|20px]]<br>[[Brawler]] |
||
| + | | - |
||
| + | |- |
||
| + | |[[File:Paragon FE16.png|20px]] [[Kinship]] |
||
| + | |[[File:FEW3H Class Level 1 Icon.png|15px]][[File:FE16 Priest Icon.gif|20px]]<br>[[Priest]] |
||
| + | | - |
||
| + | |- |
||
| + | |[[File:FEW3H Heal Icon.png|20px]] [[Recover]] |
||
| + | |[[File:FEW3H Class Level 1 Icon.png|15px]][[File:FE16 Priest Icon.gif|20px]]<br>[[Priest]] |
||
| + | | - |
||
| + | |- |
||
| + | |[[File:Faith skill.png|20px]] [[Faith Prowess]] |
||
| + | |[[File:FEW3H Class Level 2 Icon.png|15px]][[File:FE16 Priest Icon.gif|20px]]<br>[[Priest]] |
||
| + | |Totals with additional Faith Prowesses learned |
||
| + | |- |
||
| + | |[[File:Catnap.png|20px]] [[Priest's Ploy]] |
||
| + | |[[File:FEW3H Class Mastery Icon.png|15px]][[File:FE16 Priest Icon.gif|20px]]<br>[[Priest]] |
||
| + | | - |
||
| + | |- |
||
| + | |[[File:Defiant Str FE16.png|20px]] [[Lifeforce]] |
||
| + | |[[File:FEW3H Class Level 1 Icon.png|15px]][[File:FE16 Mage Icon.gif|20px]]<br>[[Mage]] |
||
| + | | - |
||
| + | |- |
||
| + | |[[File:FEW3H Black Magic Icon.png|20px]] [[Thoron]] |
||
| + | |[[File:FEW3H Class Level 1 Icon.png|15px]][[File:FE16 Mage Icon.gif|20px]]<br>[[Mage]] |
||
| + | | - |
||
| + | |- |
||
| + | |[[File:Reason skill.png|20px]] [[Reason Prowess]] |
||
| + | |[[File:FEW3H Class Level 2 Icon.png|15px]][[File:FE16 Mage Icon.gif|20px]]<br>[[Mage]] |
||
| + | |Totals with additional Reason Prowesses learned |
||
| + | |- |
||
| + | |[[File:Defiant Mag FE16.png|20px]] [[Mage's Wisdom]] |
||
| + | |[[File:FEW3H Class Mastery Icon.png|15px]][[File:FE16 Mage Icon.gif|20px]]<br>[[Mage]] |
||
| + | | - |
||
| + | |- |
||
| + | |} |
||
| + | : Advanced Classes |
||
| + | {{LearntAbilities|game=few3h}} |
||
| + | |- |
||
| + | |[[File:Confidence skill.png|20px]] [[Sneak Attack]] |
||
| + | |[[File:FEW3H Class Level 1 Icon.png|15px]][[File:FE16 Assassin Icon.gif|20px]]<br>[[Assassin]] |
||
| + | | - |
||
| + | |- |
||
| + | |[[File:Lethality FE16.png|20px]] [[Lethality]] |
||
| + | |[[File:FEW3H Class Level 2 Icon.png|15px]][[File:FE16 Assassin Icon.gif|20px]]<br>[[Assassin]] |
||
| + | | - |
||
| + | |- |
||
| + | |[[File:Icon Combat Art FE16 Sword.png|20px]] [[Assassinate]] |
||
| + | |[[File:FEW3H Class Mastery Icon.png|15px]][[File:FE16 Assassin Icon.gif|20px]]<br>[[Assassin]] |
||
| + | | - |
||
| + | |- |
||
| + | |[[File:FEW3H Staunch Shield.png|20px]] [[Expert Guard]] |
||
| + | |[[File:FEW3H Class Level 1 Icon.png|15px]][[File:FE16 Swordmaster Icon.gif|20px]]<br>[[Swordmaster]] |
||
| + | | - |
||
| + | |- |
||
| + | |[[File:Born Fighter.png|20px]] [[Provoke]] |
||
| + | |[[File:FEW3H Class Level 2 Icon.png|15px]][[File:FE16 Swordmaster Icon.gif|20px]]<br>[[Swordmaster]] |
||
| + | | - |
||
| + | |- |
||
| + | |[[File:Icon Combat Art FE16 Sword.png|20px]] [[Mortal Struggle]] |
||
| + | |[[File:FEW3H Class Level 2 Icon.png|15px]][[File:FE16 Swordmaster Icon.gif|20px]]<br>[[Swordmaster]] |
||
| + | | - |
||
| + | |- |
||
| + | |[[File:Icon Combat Art FE16 Sword.png|20px]] [[Astra]] |
||
| + | |[[File:FEW3H Class Mastery Icon.png|15px]][[File:FE16 Swordmaster Icon.gif|20px]]<br>[[Swordmaster]] |
||
| + | | - |
||
| + | |- |
||
| + | |[[File:Defiant Crit FE16.png|20px]] [[Critical +|Boost Critical]] |
||
| + | |[[File:FEW3H Class Level 1 Icon.png|15px]][[File:FE16 Paladin Icon.gif|20px]]<br>[[Paladin]] |
||
| + | | - |
||
| + | |- |
||
| + | |[[File:Lance Prowess.png|20px]] [[Lance Prowess]] |
||
| + | |[[File:FEW3H Class Level 2 Icon.png|15px]][[File:FE16 Paladin Icon.gif|20px]]<br>[[Paladin]] |
||
| + | |Totals with additional Lance Prowesses learned |
||
| + | |- |
||
| + | |[[File:Lance Crit +10 FE16.png|20px]] [[Lance Critical +10|Apex Lance]] |
||
| + | |[[File:FEW3H Class Mastery Icon.png|15px]][[File:FE16 Paladin Icon.gif|20px]]<br>[[Paladin]] |
||
| + | | - |
||
| + | |- |
||
| + | |[[File:Icon Combat Art FE16 Lance.png|20px]] [[Tempest Lance]] |
||
| + | |[[File:FEW3H Class Mastery Icon.png|15px]][[File:FE16 Paladin Icon.gif|20px]]<br>[[Paladin]] |
||
| + | | - |
||
| + | |- |
||
| + | |[[File:Defense 2 FE16.png|20px]] [[Defense +|Def +5]] |
||
| + | |[[File:FEW3H Class Level 1 Icon.png|15px]][[File:FE16 Fortress Knight Icon.gif|20px]]<br>[[Fortress Knight]] |
||
| + | | - |
||
| + | |- |
||
| + | |[[File:Confidence skill.png|20px]] [[Smite]] |
||
| + | |[[File:FEW3H Class Level 2 Icon.png|15px]][[File:FE16 Fortress Knight Icon.gif|20px]]<br>[[Fortress Knight]] |
||
| + | | - |
||
| + | |- |
||
| + | |[[File:Icon Combat Art FE16 Axe.png|20px]] [[Focused Strike]] |
||
| + | |[[File:FEW3H Class Mastery Icon.png|15px]][[File:FE16 Fortress Knight Icon.gif|20px]]<br>[[Fortress Knight]] |
||
| + | | - |
||
| + | |- |
||
| + | |[[File:Strength 2 FE16.png|20px]] [[Strength +|Str +5]] |
||
| + | |[[File:FEW3H Class Level 1 Icon.png|15px]][[File:FE16 Warrior Icon.gif|20px]]<br>[[Warrior]] |
||
| + | | - |
||
| + | |- |
||
| + | |[[File:Axe Prowess.png|20px]] [[Axe Prowess]] |
||
| + | |[[File:FEW3H Class Level 2 Icon.png|15px]][[File:FE16 Warrior Icon.gif|20px]]<br>[[Warrior]] |
||
| + | |Totals with additional Axe Prowesses learned |
||
| + | |- |
||
| + | |[[File:Battalion Wrath FE16.png|20px]] [[Battalion Wrath]] |
||
| + | |[[File:FEW3H Class Mastery Icon.png|15px]][[File:FE16 Warrior Icon.gif|20px]]<br>[[Warrior]] |
||
| + | | - |
||
| + | |- |
||
| + | |[[File:Icon Combat Art FE16 Axe.png|20px]] [[War Strike]] |
||
| + | |[[File:FEW3H Class Mastery Icon.png|15px]][[File:FE16 Warrior Icon.gif|20px]]<br>[[Warrior]] |
||
| + | | - |
||
| + | |- |
||
| + | |[[File:Offensive Tactics FE16.png|20px]] [[Offensive Tactics]] |
||
| + | |[[File:FEW3H Class Level 1 Icon.png|15px]][[File:FE16 Wyvern Rider Icon.gif|20px]]<br>[[Wyvern Rider]] |
||
| + | | - |
||
| + | |- |
||
| + | |[[File:Perception.png|20px]] [[Wyvern Rider's Wisdom]] |
||
| + | |[[File:FEW3H Class Level 2 Icon.png|15px]][[File:FE16 Wyvern Rider Icon.gif|20px]]<br>[[Wyvern Rider]] |
||
| + | | - |
||
| + | |- |
||
| + | |[[File:Icon Combat Art FE16 Axe.png|20px]] [[Diamond Axe]] |
||
| + | |[[File:FEW3H Class Mastery Icon.png|15px]][[File:FE16 Wyvern Rider Icon.gif|20px]]<br>[[Wyvern Rider]] |
||
| + | | - |
||
| + | |- |
||
| + | |[[File:Icon Combat Art FE16 Bow.png|20px]] [[Thunderbolt]] |
||
| + | |[[File:FEW3H Class Level 1 Icon.png|15px]][[File:FE16 Sniper Icon.gif|20px]]<br>[[Sniper]] |
||
| + | | - |
||
| + | |- |
||
| + | |[[File:Bow Prowess.png|20px]] [[Bow Prowess]] |
||
| + | |[[File:FEW3H Class Level 2 Icon.png|15px]][[File:FE16 Sniper Icon.gif|20px]]<br>[[Sniper]] |
||
| + | |Totals with additional Bow Prowesses learned |
||
| + | |- |
||
| + | |[[File:Icon Combat Art FE16 Bow.png|20px]] [[Hide Presence]] |
||
| + | |[[File:FEW3H Class Level 2 Icon.png|15px]][[File:FE16 Sniper Icon.gif|20px]]<br>[[Sniper]] |
||
| + | | - |
||
| + | |- |
||
| + | |[[File:Rally Movement FE16.png|20px]] [[Warrior Assist]] |
||
| + | |[[File:FEW3H Class Mastery Icon.png|15px]][[File:FE16 Sniper Icon.gif|20px]]<br>[[Sniper]] |
||
| + | | - |
||
| + | |- |
||
| + | |[[File:Icon Combat Art FE16 Bow.png|20px]] [[Hunter's Volley]] |
||
| + | |[[File:FEW3H Class Mastery Icon.png|15px]][[File:FE16 Sniper Icon.gif|20px]]<br>[[Sniper]] |
||
| + | | - |
||
| + | |- |
||
| + | |[[File:Icon Combat Art FE16 Brawl.png|20px]] [[Steady Mind]] |
||
| + | |[[File:FEW3H Class Level 1 Icon.png|15px]][[File:FE16 Grappler Icon.gif|20px]]<br>[[Grappler]] |
||
| + | | - |
||
| + | |- |
||
| + | |[[File:Brawling Prowess.png|20px]] [[Brawling Prowess]] |
||
| + | |[[File:FEW3H Class Level 2 Icon.png|15px]][[File:FE16 Grappler Icon.gif|20px]]<br>[[Grappler]] |
||
| + | |Totals with additional Bow Prowesses learned |
||
| + | |- |
||
| + | |[[File:Icon Combat Art FE16 Brawl.png|20px]] [[Lightning Fist]] |
||
| + | |[[File:FEW3H Class Level 2 Icon.png|15px]][[File:FE16 Grappler Icon.gif|20px]]<br>[[Grappler]] |
||
| + | | - |
||
| + | |- |
||
| + | |[[File:Catnap.png|20px]] [[Rejuvenation]] |
||
| + | |[[File:FEW3H Class Mastery Icon.png|15px]][[File:FE16 Grappler Icon.gif|20px]]<br>[[Grappler]] |
||
| + | | - |
||
| + | |- |
||
| + | |[[File:Icon Combat Art FE16 Brawl.png|20px]] [[Fierce Iron Fist]] |
||
| + | |[[File:FEW3H Class Mastery Icon.png|15px]][[File:FE16 Grappler Icon.gif|20px]]<br>[[Grappler]] |
||
| + | | - |
||
| + | |- |
||
| + | |[[File:Mortal Coil.png|20px]] [[Luck Catalyst]] |
||
| + | |[[File:FEW3H Class Level 1 Icon.png|15px]][[File:FE16 Bishop Icon.gif|20px]]<br>[[Bishop]] |
||
| + | | - |
||
| + | |- |
||
| + | |[[File:FEW3H Heal Icon.png|20px]] [[Luck Catalyst]] |
||
| + | |[[File:FEW3H Class Level 1 Icon.png|15px]][[File:FE16 Bishop Icon.gif|20px]]<br>[[Bishop]] |
||
| + | | - |
||
| + | |- |
||
| + | |[[File:Faith skill.png|20px]] [[Faith Prowess|Faith]] |
||
| + | |[[File:FEW3H Class Level 2 Icon.png|15px]][[File:FE16 Bishop Icon.gif|20px]]<br>[[Bishop]] |
||
| + | |Totals with additional Faith learned |
||
| + | |- |
||
| + | |[[File:Catnap.png|20px]] [[Renewal]] |
||
| + | |[[File:FEW3H Class Mastery Icon.png|15px]][[File:FE16 Bishop Icon.gif|20px]]<br>[[Bishop]] |
||
| + | | - |
||
| + | |- |
||
| + | |[[File:Fiendish Blow FE16.png|20px]] [[Fiendish Blow]] |
||
| + | |[[File:FEW3H Class Level 1 Icon.png|15px]][[File:FE16 Warlock Icon.gif|20px]]<br>[[Warlock]] |
||
| + | | - |
||
| + | |- |
||
| + | |[[File:Reason skill.png|20px]] [[Reason Prowess]] |
||
| + | |[[File:FEW3H Class Level 2 Icon.png|15px]][[File:FE16 Warlock Icon.gif|20px]]<br>[[Warlock]] |
||
| + | |Totals with additional Reason Prowesses learned |
||
| + | |- |
||
| + | |[[File:Essence of Lightning.png|20px]] [[Essence of Lightning]] |
||
| + | |[[File:FEW3H Class Mastery Icon.png|15px]][[File:FE16 Warlock Icon.gif|20px]]<br>[[Warlock]] |
||
| + | | - |
||
| + | |- |
||
| + | |[[File:Poison Strike FE16.png|20px]] [[Poison Strike]] |
||
| + | |[[File:FEW3H Class Level 1 Icon.png|15px]][[File:FE16 Dark Mage Icon.gif|20px]]<br>[[Dark Mage]] |
||
| + | | - |
||
| + | |- |
||
| + | |[[File:FEW3H Sharpshooter.png|20px]] [[Dark Mage's Wisdom]] |
||
| + | |[[File:FEW3H Class Level 2 Icon.png|15px]][[File:FE16 Dark Mage Icon.gif|20px]]<br>[[Dark Mage]] |
||
| + | | - |
||
| + | |- |
||
| + | |[[File:Lifetaker FE16.png|20px]] [[Lifetaker]] |
||
| + | |[[File:FEW3H Class Mastery Icon.png|15px]][[File:FE16 Dark Mage Icon.gif|20px]]<br>[[Dark Mage]] |
||
| + | | - |
||
| + | |- |
||
| + | |} |
||
| + | : Master Classes |
||
| + | {{LearntAbilities|game=few3h}} |
||
| + | |- |
||
| + | |[[File:Pass FE16.png|20px]] [[Pass]] |
||
| + | |[[File:FEW3H Class Level 1 Icon.png|15px]][[File:FE16 Trickster Icon.gif|20px]]<br>[[Trickster]] |
||
| + | | - |
||
| + | |- |
||
| + | |[[File:Icon Combat Art FE16 Sword.png|20px]] [[Electric Grounder]] |
||
| + | |[[File:FEW3H Class Level 1 Icon.png|15px]][[File:FE16 Trickster Icon.gif|20px]]<br>[[Trickster]] |
||
| + | | - |
||
| + | |- |
||
| + | |[[File:Unsought Power.png|20px]] [[Forethought]] |
||
| + | |[[File:FEW3H Class Level 2 Icon.png|15px]][[File:FE16 Trickster Icon.gif|20px]]<br>[[Trickster]] |
||
| + | | - |
||
| + | |- |
||
| + | |[[File:Perception.png|20px]] [[Patience]] |
||
| + | |[[File:FEW3H Class Mastery Icon.png|15px]][[File:FE16 Trickster Icon.gif|20px]]<br>[[Trickster]] |
||
| + | | - |
||
| + | |- |
||
| + | |[[File:Icon Combat Art FE16 Sword.png|20px]] [[Sword Dance]] |
||
| + | |[[File:FEW3H Class Level 1 Icon.png|15px]][[File:FE16 Dancer Male Icon.gif|20px]]<br>[[Dancer]] |
||
| + | | - |
||
| + | |- |
||
| + | |[[File:Special Dance FE16.png|20px]] [[Special Dance]] |
||
| + | |[[File:FEW3H Class Level 1 Icon.png|15px]][[File:FE16 Dancer Male Icon.gif|20px]]<br>[[Dancer]] |
||
| + | | - |
||
| + | |- |
||
| + | |[[File:Mortal Coil.png|20px]] [[Charm Catalyst]] |
||
| + | |[[File:FEW3H Class Level 1 Icon.png|15px]][[File:FE16 Dancer Male Icon.gif|20px]]<br>[[Dancer]] |
||
| + | | - |
||
| + | |- |
||
| + | |[[File:Icon Combat Art FE16 Sword.png|20px]] [[Haze Slice]] |
||
| + | |[[File:FEW3H Class Level 1 Icon.png|15px]][[File:FE16 Mortal Savant Icon.gif|20px]]<br>[[Mortal Savant]] |
||
| + | | - |
||
| + | |- |
||
| + | |[[File:FEW3H Staunch Shield.png|20px]] [[Counterstrike]] |
||
| + | |[[File:FEW3H Class Level 2 Icon.png|15px]][[File:FE16 Mortal Savant Icon.gif|20px]]<br>[[Mortal Savant]] |
||
| + | | - |
||
| + | |- |
||
| + | |[[File:FEW3H Staunch Shield.png|20px]] [[Counterbreak]] |
||
| + | |[[File:FEW3H Class Mastery Icon.png|15px]][[File:FE16 Mortal Savant Icon.gif|20px]]<br>[[Mortal Savant]] |
||
| + | | - |
||
| + | |- |
||
| + | |[[File:Icon Combat Art FE16 Lance.png|20px]] [[Dark Lance]] |
||
| + | |[[File:FEW3H Class Level 1 Icon.png|15px]][[File:FE16 Dark Knight Icon.gif|20px]]<br>[[Dark Knight]] |
||
| + | | - |
||
| + | |- |
||
| + | |[[File:Paragon FE16.png|20px]] [[Vanguard's Benefit]] |
||
| + | |[[File:FEW3H Class Level 2 Icon.png|15px]][[File:FE16 Dark Knight Icon.gif|20px]]<br>[[Dark Knight]] |
||
| + | | - |
||
| + | |- |
||
| + | |[[File:Icon Combat Art FE16 Lance.png|20px]] [[Counterstrike]] |
||
| + | |[[File:FEW3H Class Level 2 Icon.png|15px]][[File:FE16 Dark Knight Icon.gif|20px]]<br>[[Dark Knight]] |
||
| + | | - |
||
| + | |- |
||
| + | |[[File:Name Drop.png|20px]] [[Panache]] |
||
| + | |[[File:FEW3H Class Mastery Icon.png|15px]][[File:FE16 Dark Knight Icon.gif|20px]]<br>[[Dark Knight]] |
||
| + | | - |
||
| + | |- |
||
| + | |[[File:Icon Combat Art FE16 Lance.png|20px]] [[Lightstrike]] |
||
| + | |[[File:FEW3H Class Level 1 Icon.png|15px]][[File:FE16 Holy Knight Icon.gif|20px]]<br>[[Holy Knight]] |
||
| + | | - |
||
| + | |- |
||
| + | |[[File:Name Drop.png|20px]] [[Cyclical Awakening]] |
||
| + | |[[File:FEW3H Class Level 2 Icon.png|15px]][[File:FE16 Holy Knight Icon.gif|20px]]<br>[[Holy Knight]] |
||
| + | | - |
||
| + | |- |
||
| + | |[[File:Icon Combat Art FE16 Lance.png|20px]] [[Shatter Slash]] |
||
| + | |[[File:FEW3H Class Level 2 Icon.png|15px]][[File:FE16 Holy Knight Icon.gif|20px]]<br>[[Holy Knight]] |
||
| + | | - |
||
| + | |- |
||
| + | |[[File:Defiant Res FE16.png|20px]] [[Defiant Resistance|Defiant Res]] |
||
| + | |[[File:FEW3H Class Mastery Icon.png|15px]][[File:FE16 Holy Knight Icon.gif|20px]]<br>[[Holy Knight]] |
||
| + | | - |
||
| + | |- |
||
| + | |[[File:Swordbreaker FE16.png|20px]] [[Swordbreaker]] |
||
| + | |[[File:FEW3H Class Level 1 Icon.png|15px]][[File:FEW3H Great Lord Icon.gif|20px]]<br>[[Great Lord]] |
||
| + | | - |
||
| + | |- |
||
| + | |[[File:Icon Combat Art FE16 Lance.png|20px]] [[Thunder Rush]] |
||
| + | |[[File:FEW3H Class Level 1 Icon.png|15px]][[File:FEW3H Great Lord Icon.gif|20px]]<br>[[Great Lord]] |
||
| + | | - |
||
| + | |- |
||
| + | |[[File:FEW3H Captain's Grit.png|20px]] [[Seasoned Tactics]] |
||
| + | |[[File:FEW3H Class Level 2 Icon.png|15px]][[File:FEW3H Great Lord Icon.gif|20px]]<br>[[Great Lord]] |
||
| + | | - |
||
| + | |- |
||
| + | |[[File:Icon Combat Art FE16 Lance.png|20px]] [[Paraselene]] |
||
| + | |[[File:FEW3H Class Level 2 Icon.png|15px]][[File:FEW3H Great Lord Icon.gif|20px]]<br>[[Great Lord]] |
||
| + | | - |
||
| + | |- |
||
| + | |[[File:Royal Bloodline.png|20px]] [[Savior of the Meek]] |
||
| + | |[[File:FEW3H Class Mastery Icon.png|15px]][[File:FEW3H Great Lord Icon.gif|20px]]<br>[[Great Lord]] |
||
| + | | - |
||
| + | |- |
||
| + | |[[File:Axefaire FE16.png|20px]] [[Armored Cavalry's Wisdom]] |
||
| + | |[[File:FEW3H Class Level 1 Icon.png|15px]][[File:FE16 Great Knight Icon.gif|20px]]<br>[[Great Knight]] |
||
| + | | - |
||
| + | |- |
||
| + | |[[File:Icon Combat Art FE16 Axe.png|20px]] [[Armor Smasher]] |
||
| + | |[[File:FEW3H Class Level 1 Icon.png|15px]][[File:FE16 Great Knight Icon.gif|20px]]<br>[[Great Knight]] |
||
| + | | - |
||
| + | |- |
||
| + | |[[File:Defense 2 FE16.png|20px]] [[Defense +|Def +10]] |
||
| + | |[[File:FEW3H Class Level 2 Icon.png|15px]][[File:FE16 Great Knight Icon.gif|20px]]<br>[[Great Knight]] |
||
| + | | - |
||
| + | |- |
||
| + | |[[File:Armored Blow FE16.png|20px]] [[Stalwart Stance]] |
||
| + | |[[File:FEW3H Class Mastery Icon.png|15px]][[File:FE16 Great Knight Icon.gif|20px]]<br>[[Great Knight]] |
||
| + | | - |
||
| + | |- |
||
| + | |[[File:Icon Combat Art FE16 Axe.png|20px]] [[Helmsplitter]] |
||
| + | |[[File:FEW3H Class Level 1 Icon.png|15px]][[File:FE16 Wyvern Lord Icon.gif|20px]]<br>[[Wyvern Lord]] |
||
| + | | - |
||
| + | |- |
||
| + | |[[File:Strength 2 FE16.png|20px]] [[Strength +|Str +10]] |
||
| + | |[[File:FEW3H Class Level 2 Icon.png|15px]][[File:FE16 Wyvern Lord Icon.gif|20px]]<br>[[Wyvern Lord]] |
||
| + | | - |
||
| + | |- |
||
| + | |[[File:Plead.png|20px]] [[Safeguard]] |
||
| + | |[[File:FEW3H Class Mastery Icon.png|15px]][[File:FE16 Wyvern Lord Icon.gif|20px]]<br>[[Wyvern Lord]] |
||
| + | | - |
||
| + | |- |
||
| + | |[[File:Icon Combat Art FE16 Bow.png|20px]] [[Waning Shot]] |
||
| + | |[[File:FEW3H Class Level 1 Icon.png|15px]][[File:FE16 Bow Knight Icon.gif|20px]]<br>[[Bow Knight]] |
||
| + | | - |
||
| + | |- |
||
| + | |[[File:Bow Prowess.png|20px]] [[Bow Prowess]] |
||
| + | |[[File:FEW3H Class Level 2 Icon.png|15px]][[File:FE16 Bow Knight Icon.gif|20px]]<br>[[Bow Knight]] |
||
| + | |Totals with additional Bow Prowesses learned |
||
| + | |- |
||
| + | |[[File:Icon Combat Art FE16 Bow.png|20px]] [[Deadeye]] |
||
| + | |[[File:FEW3H Class Level 2 Icon.png|15px]][[File:FE16 Bow Knight Icon.gif|20px]]<br>[[Bow Knight]] |
||
| + | | - |
||
| + | |- |
||
| + | |[[File:Defiant Spd FE16.png|20px]] [[Defiant Speed|Defiant Spd]] |
||
| + | |[[File:FEW3H Class Mastery Icon.png|15px]][[File:FE16 Bow Knight Icon.gif|20px]]<br>[[Bow Knight]] |
||
| + | | - |
||
| + | |- |
||
| + | |[[File:Icon Combat Art FE16 Brawl.png|20px]] [[Whirlwind Kick]] |
||
| + | |[[File:FEW3H Class Level 1 Icon.png|15px]][[File:FE16 War Master Icon.gif|20px]]<br>[[War Master]] |
||
| + | | - |
||
| + | |- |
||
| + | |[[File:Brawling Prowess.png|20px]] [[Brawling Prowess]] |
||
| + | |[[File:FEW3H Class Level 2 Icon.png|15px]][[File:FE16 War Master Icon.gif|20px]]<br>[[War Master]] |
||
| + | |Totals with additional Brawling Prowesses learned |
||
| + | |- |
||
| + | |[[File:Icon Combat Art FE16 Brawl.png|20px]] [[Might Blow]] |
||
| + | |[[File:FEW3H Class Level 2 Icon.png|15px]][[File:FE16 War Master Icon.gif|20px]]<br>[[War Master]] |
||
| + | | - |
||
| + | |- |
||
| + | |[[File:Name Drop.png|20px]] [[Piercing Cry]] |
||
| + | |[[File:FEW3H Class Mastery Icon.png|15px]][[File:FE16 War Master Icon.gif|20px]]<br>[[War Master]] |
||
| + | | - |
||
| + | |- |
||
| + | |[[File:Defiant Str FE16.png|20px]] [[Impossible Feat]] |
||
| + | |[[File:FEW3H Class Level 1 Icon.png|15px]][[File:FE16 Dark Bishop Icon.gif|20px]]<br>[[Dark Bishop]] |
||
| + | | - |
||
| + | |- |
||
| + | |[[File:Reason skill.png|20px]] [[Reason Prowess]] |
||
| + | |[[File:FEW3H Class Level 2 Icon.png|15px]][[File:FE16 Dark Bishop Icon.gif|20px]]<br>[[Dark Bishop]] |
||
| + | |Totals with additional Reason Prowesses learned |
||
| + | |- |
||
| + | |[[File:Strength 2 FE16.png|20px]] [[Strengthtaker|Absorb Strength]] |
||
| + | |[[File:FEW3H Class Mastery Icon.png|15px]][[File:FE16 Dark Bishop Icon.gif|20px]]<br>[[Dark Bishop]] |
||
| + | | - |
||
| + | |- |
||
| + | |} |
||
| + | |||
| + | ====Supports==== |
||
| + | {{SeeAlso|Dimitri/Warriors: Three Hopes Supports}} |
||
| + | *[[Shez]] |
||
| + | *[[Edelgard]] |
||
| + | *[[Claude]] |
||
| + | *[[Bernadetta]] |
||
| + | *[[Dedue]] |
||
| + | *[[Felix]] |
||
| + | *[[Ashe]] |
||
| + | *[[Sylvain]] |
||
| + | *[[Mercedes]] |
||
| + | *[[Annette]] |
||
| + | *[[Ingrid]] |
||
| + | *[[Rodrigue]] |
||
| + | *[[Yuri]] |
||
| + | |||
| + | ====Recruitment (Warriors)==== |
||
| + | Dimitri will automatically be recruited if Shez chooses to join the Blue Lion house in [[Three Houses (Chapter/Three Hopes)|Chapter 2]]. If Shez chose to join any other house, Dimitri cannot be recruited whatsoever. |
||
| + | |||
| + | Dimitri will only be playable during ''Scarlet Blaze'' or ''Golden Wildfire'' through the Record Keeper during a New Game+ file, as long as that file has completed ''Azure Gleam'' data. |
||
| + | |||
| + | ==Quotes== |
||
| + | ===''Three Houses''=== |
||
:[[Dimitri/Quotes]] |
:[[Dimitri/Quotes]] |
||
| − | === |
+ | ===''Engage''=== |
| + | :[[Dimitri/Engage Quotes]] |
||
| + | |||
| + | ===''Heroes''=== |
||
:[[Dimitri/Heroes Quotes]] |
:[[Dimitri/Heroes Quotes]] |
||
| + | ===''Warriors: Three Hopes''=== |
||
| − | == Possible Endings == |
||
| + | :[[Dimitri/Warriors: Three Hopes Quotes]] |
||
| − | {{Spoiler}}'''Dimitri - Savior King''' |
||
| − | :After his coronation, Dimitri spent his life reforming and ruling justly over Fódlan. He focused particularly on improving living situations for orphans and improving foreign relations. He was known for listening intently to the voices of all, and for instituting a new form of government in which the people were free to be active participants. He lived for his people and alongside them, and was thusly dubbed the Savior King. |
||
| + | ==Possible Endings== |
||
| − | '''Dimitri and [[Byleth]]''' |
||
| + | {{Spoiler}} |
||
| − | :Paired with the end of the war, the joyous marriage of Byleth, the newly-appointed archbishop, and Dimitri, the newly-crowned king of Faerghus, gave the people of Fódlan much to celebrate. The two were devoted to improving life for the people and to seeking greater wisdom in order to reform the government and the church from the inside out. As leaders of church and state respectively, at times they engaged in heated debate. Even still, when enjoying a long horse ride or a quiet evening, they were not as the world saw them, but rather two adoring spouses, desperately in love. They remained as such for the rest of their days. |
||
| + | ;Dimitri - Savior King |
||
| + | :''After his coronation, Dimitri spent his life reforming and ruling justly over Fódlan. He focused particularly on improving living situations for orphans and improving foreign relations. He was known for listening intently to the voices of all, and for instituting a new form of government in which the people were free to be active participants. He lived for his people and alongside them, and was thusly dubbed the Savior King.'' |
||
| − | + | ;Dimitri and [[Byleth]] |
|
| + | :''Paired with the end of the war, the joyous marriage of Byleth, the newly-appointed archbishop, and Dimitri, the newly-crowned king of Faerghus, gave the people of Fódlan much to celebrate. The two were devoted to improving life for the people and to seeking greater wisdom in order to reform the government and the church from the inside out. As leaders of church and state respectively, at times they engaged in heated debate. Even still, when enjoying a long horse ride or a quiet evening, they were not as the world saw them, but rather two adoring spouses, desperately in love. They remained as such for the rest of their days.'' |
||
| − | :Dimitri assumed the throne of the Holy Kingdom of Faerghus and spent his life ruling justly over Fódlan. Several years after his coronation, he took Marianne, whom he loved dearly, as his queen. Many of Dimitri's greatest achievements can be traced to wisdom provided by Marianne, who had received tutelage from her adoptive father, Margrave Edmund. Many years later, when Dimitri fell to illness, he clutched his queen's hand until the very end. The queen's journal, uncovered after her passing, contained recounts of their time together. The last words, penned with trembling hand, are: "I would not trade our time together or the happiness we knew for anything." |
||
| − | + | ;Dimitri and [[Dedue]] |
|
| − | :After his coronation, Dimitri assumed the throne of the Holy Kingdom of Faerghus and |
+ | :''After his coronation, Dimitri assumed the throne of the Holy Kingdom of Faerghus, and his loyal vassal, Dedue, remained ever at his side. Among Dimitri's achievements was the reconciliation with Duscur: an extraordinary effort that required extensive negotiations to get past a history of betrayal and oppression. It was a trying task, but Dimitri never once considered giving up. While they behaved as lord and vassal in public, it is said that Dimitri and Dedue were more like family in private. When Dimitri finally fell to illness, Dedue tended to his liege's deathbed, and then took up a post at his grave for the rest of his days. When the time came, they were buried beside each other.'' |
| − | + | ;Dimitri and [[Felix]] |
|
| − | :After his coronation, Dimitri assumed the throne of the Holy Kingdom of Faerghus and |
+ | :''After his coronation, Dimitri assumed the throne of the Holy Kingdom of Faerghus and spent his life ruling justly over Fódlan. At his side every step of the way was his right-hand adviser, Duke Felix Fraldarius. Their lifelong bond grew so strong over time that, when Dimitri finally passed, it is said that Felix's grief was more potent even than the queen's. The stories of their lives were passed down to future generations as chivalric tales that rivaled those of Loog, the King of Lions, and his sworn friend, Kyphon.'' |
| − | + | ;Dimitri and [[Annette]] |
|
| − | :After his coronation, Dimitri assumed the throne of the Holy Kingdom of Faerghus and spent his life ruling justly over Fódlan. At his side every step of the way was |
+ | :''After his coronation, Dimitri assumed the throne of the Holy Kingdom of Faerghus and spent his life ruling justly over Fódlan. At his side every step of the way was his queen, Annette, whose wisdom provided not only reliable counsel, but a whole assortment of revolutionary policies. The royal couple's sincere approach to governance earned them widespread acclaim, securing their line as a dynasty that lasted for generations to come. Their married life was said to be full of love and cheer.'' |
| − | + | ;Dimitri and [[Mercedes]] |
|
| − | :Dimitri assumed the throne of the Holy Kingdom of Faerghus and |
+ | :''After his coronation, Dimitri assumed the throne of the Holy Kingdom of Faerghus and took his friend, Mercedes, as his queen. Most were shocked by his choice, as she did not come from a distinguished noble line. Still, when the people saw her devotion to healing the damage caused by the war, they decided she was the ideal match for the one they called the Savior King. It is said that the couple led busy but happy lives, and that they never failed to express their appreciation for one another, no matter the hardship.'' |
| − | + | ;Dimitri and [[Ingrid]] |
|
| − | :Dimitri assumed the throne of the Holy Kingdom of Faerghus and spent his life ruling justly over Fódlan. |
+ | :''After his coronation, Dimitri assumed the throne of the Holy Kingdom of Faerghus and spent his life ruling justly over Fódlan. At his side every step of the way was Ingrid, who left House Galatea to serve House Blaiddyd as a knight. As they worked together to restore the Kingdom, the pair fell in love and were eventually married. But while Ingrid was happy to play the role of queen, and to support her husband in public and in private, she insisted on taking up a weapon and serving on the front lines in battle.'' |
| − | + | ;Dimitri and [[Marianne]] |
|
| − | : |
+ | :''Dimitri assumed the throne of the Holy Kingdom of Faerghus and spent his life ruling justly over Fódlan. Several years after his coronation, he took Marianne, whom he loved dearly, as his queen. Many of Dimitri's greatest achievements can be traced to wisdom provided by Marianne, who had received tutelage from her adoptive father, Margrave Edmund. Many years later, when Dimitri fell to illness, he clutched his queen's hand until the very end. The queen's journal, uncovered after her passing, contained recounts of their time together. The last words, penned with trembling hand, are: "I would not trade our time together or the happiness we knew for anything."'' |
| − | + | ;Dimitri and [[Flayn]] |
|
| − | : |
+ | :''Dimitri assumed the throne of the Holy Kingdom of Faerghus and spent his life ruling justly over Fódlan. Some time after his coronation, he took Flayn, who now enjoyed a position of prominence in the church, as his queen. Many speculated at first that the marriage was politically motivated, but it is said that over time the love they had for one another became clear to see. Their lives were full of warmth and tranquility. Many years later, when Dimitri passed, his journals revealed that he had kept a meticulous record of all the meals he and his wife had enjoyed together.'' |
| − | + | ;Dimitri and [[Gilbert]] |
|
| − | :Dimitri assumed the throne of the Holy Kingdom of Faerghus and spent his life ruling justly over Fódlan. At his side was the knight, Gustave, who had discarded the name of Gilbert and reaffirmed his oath of fealty to the royal family. After many more years of service, in which the trust between them grew and never wavered, Gustave finally wished to retire. Though he bristled slightly at Dimitri's request to look after and tutor the young prince, it is said that Gustave took on that duty with due patience and solemnity for the remainder of his life. |
+ | :''Dimitri assumed the throne of the Holy Kingdom of Faerghus and spent his life ruling justly over Fódlan. At his side was the knight, Gustave, who had discarded the name of Gilbert and reaffirmed his oath of fealty to the royal family. After many more years of service, in which the trust between them grew and never wavered, Gustave finally wished to retire. Though he bristled slightly at Dimitri's request to look after and tutor the young prince, it is said that Gustave took on that duty with due patience and solemnity for the remainder of his life.'' |
| − | + | ;Dimitri and [[Catherine]] |
|
| − | : |
+ | :''Dimitri assumed the throne of the Holy Kingdom of Faerghus and spent his life ruling justly over Fódlan. Two years after his coronation, he announced his marriage to Catherine. The people speculated wildly about how this union came to be. Some said that Dimitri spent two full years wooing her, while others suggested that the matter was resolved by a duel. In any case, the couple worked tirelessly to reform the Kingdom, but despite their busy days, it is said that they always found time for sparring, and that the clash of steel could be heard throughout the castle at all hours.'' |
| + | |||
| + | ;Dimitri and [[Hapi]] |
||
| + | :''After his coronation, Dimitri assumed the throne of the Holy Kingdom of Faerghus. He focused first and foremost on the restoration of the Kingdom but at the same time worked to expose the schemes of Cornelia and of those who conspired to bring about the Tragedy of Duscur. Always by his side was Hapi, who relentlessly pursued those who slither in the dark and, with Dimitri's help, discovered a magic spell to rid herself of her condition. Once all had settled down, the pair was known to have tea together often in the capital. It is said that Dimitri's tendency to discuss politics during tea time frequently moved Hapi to smirk, shake her head, and sigh. |
||
| + | ''{{SpoilerEnd}} |
||
==Non-Canon Appearances== |
==Non-Canon Appearances== |
||
| − | ===''Super Smash Bros.''=== |
+ | ===''[[Super Smash Bros. Ultimate]]''=== |
[[File:Byleth SSBU Dimitri Alt.png|150px|thumb|Artwork of Byleth's Dimitri costume]] |
[[File:Byleth SSBU Dimitri Alt.png|150px|thumb|Artwork of Byleth's Dimitri costume]] |
||
Dimitri appears in ''[[Super Smash Bros. Ultimate]]'' as a background character at [[Garreg Mach Monastery]] and as a collectible spirit in both his Academy and War Phase appearances. [[Byleth]]'s third alternate palette is based off of Dimitri. |
Dimitri appears in ''[[Super Smash Bros. Ultimate]]'' as a background character at [[Garreg Mach Monastery]] and as a collectible spirit in both his Academy and War Phase appearances. [[Byleth]]'s third alternate palette is based off of Dimitri. |
||
| + | |||
| + | ;Spirit Info |
||
| + | {|class="wikitable" |
||
| + | !No. |
||
| + | !width="20%" |Name |
||
| + | !Image |
||
| + | !Type |
||
| + | !Class |
||
| + | !Slots |
||
| + | !Effect |
||
| + | |- |
||
| + | |align="center" |1,384 |
||
| + | |align="center" |'''Dimitri (Fire Emblem)''' |
||
| + | |[[File:Artwork Dimitri.png|120px]] |
||
| + | |align="center" |Primary (Shield) |
||
| + | |align="center" |★★☆☆ (Advanced) |
||
| + | |align="center" |2 |
||
| + | |align="center" |Can Be Enhanced at Lv. 99 |
||
| + | |- |
||
| + | |align="center" |1,385 |
||
| + | |align="center" |'''Dimitri - Five Years Later (Fire Emblem)''' |
||
| + | |[[File:Dimitri Artwork 5Years.png|120px]] |
||
| + | |align="center" |Primary (Shield) |
||
| + | |align="center" |★★★☆ (Ace) |
||
| + | |align="center" |2 |
||
| + | |align="center" |Hyper Smash Attacks |
||
| + | |} |
||
| + | ;Spirit Battle |
||
| + | |||
| + | {|class="wikitable" style="width:100%;" |
||
| + | !style="width:5%;" |Spirit |
||
| + | !Enemy Fighter(s) |
||
| + | !Type |
||
| + | !Power/Class |
||
| + | !Stage |
||
| + | !Rules |
||
| + | !Conditions |
||
| + | !Music |
||
| + | |- |
||
| + | |align="center" |[[File:Artwork Dimitri.png|50px]]<br>No. 1,384<br>'''Dimitri (Fire Emblem)''' |
||
| + | |align="center" |•Byleth<br>•Ganondorf |
||
| + | |align="center" |Shield |
||
| + | |align="center" |5,000 / ★★☆☆ (Advanced) |
||
| + | |align="center" |Distant Planet (Omega) |
||
| + | |align="center" |None |
||
| + | |align="center" |•Stamina battle<br>•The enemy has increased attack power |
||
| + | |align="center" |"Between Heaven and Earth" |
||
| + | |} |
||
| + | |||
| + | ===''WarioWare: Get It Together!''=== |
||
| + | Dimitri appears in ''WarioWare: Get It Together!'' as a background character in the Nintendo Classics microgame "Fire Emblem: Three Houses". The player engages in a [[Tea Party]] session with either Edelgard, Dimitri or Claude and must successfully choose the correct prompt. Dimitri's three prompts are always "You're great!" but the incorrect prompts include typos. |
||
===''[[Fire Emblem 0 (Cipher)]]''=== |
===''[[Fire Emblem 0 (Cipher)]]''=== |
||
Dimitri is illustrated in the trading card game ''Fire Emblem Cipher'' with the following cards: |
Dimitri is illustrated in the trading card game ''Fire Emblem Cipher'' with the following cards: |
||
| + | {{Col|width=25%}} |
||
| + | {{CardLink|P16-013PR}} |
||
| + | {{CardLink|P17-003PR}} |
||
| + | {{CardLink|P19-012PR}} |
||
| + | {{CardLink|P20-001PR}} |
||
| + | {{CardLink|P21-007PR}} |
||
| + | {{CardLink|P22-008PR}} |
||
| + | {{CardLink|S12-005ST}} |
||
| + | {{CardLink|S12-005ST+}} |
||
{{CardLink|B17-111HN}} |
{{CardLink|B17-111HN}} |
||
{{CardLink|B18-018SR}} |
{{CardLink|B18-018SR}} |
||
| + | {{Col/end}} |
||
| + | |||
| + | {{Col|width=25%}} |
||
{{CardLink|B18-018SR+}} |
{{CardLink|B18-018SR+}} |
||
{{CardLink|B18-019N}} |
{{CardLink|B18-019N}} |
||
{{CardLink|B18-020HN}} |
{{CardLink|B18-020HN}} |
||
{{CardLink|B19-024R}} |
{{CardLink|B19-024R}} |
||
| − | {{CardLink| |
+ | {{CardLink|B21-001SR}} |
| − | {{CardLink| |
+ | {{CardLink|B21-001SR+}} |
| − | {{CardLink| |
+ | {{CardLink|B21-002N}} |
| − | {{CardLink| |
+ | {{CardLink|B21-003HN}} |
| − | {{CardLink| |
+ | {{CardLink|B22-092R}} |
| + | {{CardLink|B22-093N}} |
||
| + | {{Col/end}}{{clr}} |
||
| + | |||
| + | ==''Choose Your Legends'' Placement History== |
||
| + | <div class="mw-collapsible mw-collapsed" style="width:100%" data-expandtext="Show all placements"> |
||
| + | {|class="wikitable" width=100% style="text-align: center;float:left;margin: auto" |
||
| + | |- |
||
| + | !style="width:12.5%" |Round |
||
| + | !style="width:16.1%" |Placement |
||
| + | !style="width:55.5%" |Character Version |
||
| + | !style="width:15%" |Votes |
||
| + | |}{{clr}} |
||
| + | <div class="mw-collapsible-content"> |
||
| + | {|class="wikitable" width=100% style="text-align: center;float:left;margin: auto" |
||
| + | |style="width:12.5%" |CYL1 - CYL3 |
||
| + | |style="width:87.5%" colspan="5" |N/A |
||
| + | |}{{clr}} |
||
| + | </div> |
||
| + | {|class="wikitable" width=100% style="text-align: center;float:left;margin: auto" |
||
| + | |style="width:12.5%" |[[Fire Emblem Heroes/Choose Your Legends Results: Round 4|CYL4]] |
||
| + | |style="width:16.1%" |<span style="color:#d4af37">Winner</span><br><big>'''2'''</big> |
||
| + | |style="width:55.5%" |[[File:CYL Dimitri War Portrait.png|100x100px]]<br><small>[[Fire Emblem: Three Houses|Three Houses]]</small> |
||
| + | |style="width:15%" |69,448 |
||
| + | |}{{clr}} |
||
| + | <div class="mw-collapsible-content"> |
||
| + | {|class="wikitable" width=100% style="text-align: center;float:left;margin: auto" |
||
| + | |style="width:12.5%" |CYL5 onward |
||
| + | |style="width:87.5%" colspan="5" |Ineligible |
||
| + | |}{{clr}} |
||
| + | </div> |
||
==Etymology== |
==Etymology== |
||
| − | + | {{w|Dimitri}} ({{IPA-en|dɪmit.ɹi}}) is a male given name. It is the French, Italian, Dutch, Finnish, and Church Slavic variant of the Greek name Demetrios ("devoted to {{w|Demeter}}," the goddess of fertility, agriculture, and sacred law). {{w|Alexandre}} is the French, Portuguese, Catalan, and Galician form of Alexander, meaning "defender of the people" in Greek. {{w|Bladud|Blaiddyd}} is the moniker of a legendary Brittonic king who encouraged the practice of [[Necromancer|necromancy]], the name means "Wolf-lord" in Welsh. |
|
| − | == |
+ | ==Trivia== |
| − | *Dimitri shares his English voice actor, Chris Hackney, with [[Boey]] in ''[[Fire Emblem Echoes: Shadows of Valentia|Echoes |
+ | *Dimitri shares his English voice actor, Chris Hackney, with [[Boey]] in ''[[Fire Emblem Echoes: Shadows of Valentia|Echoes]]'' and ''Heroes'', as well as [[Quan]] in ''Heroes''. |
| + | **Chris Hackney stated in an [https://www.thegamer.com/fire-emblem-three-houses-dimitr-voice-actor-interview/ interview] that his favorite scene to record was the post-Gronder scene with [[Rodrigue]]. |
||
*Due to House [[Riegan]] being a [[wikipedia:Cadet branch|cadet branch]] of the [[Blaiddyd]] royal family, Dimitri is distantly related to [[Claude]]. |
*Due to House [[Riegan]] being a [[wikipedia:Cadet branch|cadet branch]] of the [[Blaiddyd]] royal family, Dimitri is distantly related to [[Claude]]. |
||
*Dimitri shares the alias "Tempest King" with [[Joshua]] from ''[[Fire Emblem: The Sacred Stones|The Sacred Stones]]''. |
*Dimitri shares the alias "Tempest King" with [[Joshua]] from ''[[Fire Emblem: The Sacred Stones|The Sacred Stones]]''. |
||
| − | *Dimitri is the only house leader to have two playable retainers — [[Dedue]] |
+ | *Dimitri is the only house leader to have two playable retainers — [[Dedue]] and [[Gilbert]], though the latter is only playable after the timeskip. |
| + | *As a Lord in the Academy phase, Dimitri's eyes on his sprite will change color to match his affiliation — blue as a player unit, red as an enemy, and yellow as a third army enemy. This quirk is not present for [[Edelgard]] or Claude and stops for Dimitri after the timeskip. |
||
| − | *Dimitri stands at 180cm (or about 5’11”), growing to 188cm (or about 6’2”) after the timeskip. |
||
| + | *Dimitri uses blue colors for his classes. |
||
| − | *As a Lord in the Academy phase, Dimitri's eyes on his sprite will change color to match his affiliation — blue as a player unit, red as an enemy, and yellow as a third army enemy. This quirk is not present for [[Edelgard]] or Claude, and stops for Dimitri after the timeskip. |
||
| − | *In [[Field of Revenge|Chapter 17]] of |
+ | *In [[Field of Revenge|Chapter 17]] of ''Crimson Flower'', Dimitri's sprite depicts him with an eyepatch, even though he does not lose his right eye. |
| + | **Despite this, an unused sprite exists in the game's code that depicts Dimitri as a Great Lord, but without his eyepatch. |
||
| − | *Dimitri has the most portraits in the game. In Azure Moon, Verdant Wind, and Silver Snow, Dimitri has bags under his eyes which disappear after Chapter 17 of the Azure Moon route as well as a childhood portrait during a flashback in [[Our Chosen Paths|Chapter 21]]. While in the Crimson Flower route he still has his right eye. |
||
| + | *Dimitri has the most portraits in the game. In ''Azure Moon'', ''Verdant Wind'', and ''Silver Snow'', Dimitri has bags under his eyes that disappear after Chapter 17 of ''Azure Moon'' as well as a childhood portrait during a flashback in [[Our Chosen Paths|Chapter 21]]. However, in ''Crimson Flower'', he still has his right eye. |
||
| − | *Dimitri has the highest amount of critical hit quotes in the series at 12. Four during the Academy Phase, four after the timeskip but before [[The King's Triumphant Return|Chapter 18]], and four from Chapter 18 of the Azure Moon route onwards. |
||
| + | **Game director Toshiyuki Kusakihara stated in an [https://nintendoeverything.com/fire-emblem-three-houses-interview-part-2-byleth-dimitri-eyepatch/3/ interview] that Dimitri was not initially going to have an eyepatch after the timeskip. The decision to give him one was taken later in development and was meant to communicate that he underwent certain hardships in the other routes. |
||
| + | ***On a technical note, Dimitri's battle model as an enemy in Gronder Field in ''Verdant Wind'' lacks the bags under his eyes while keeping his pre-chapter 18 voice clips at the same time. |
||
| + | *Dimitri has the highest amount of critical hit quotes in the series at 18. Four during the Academy Phase, four when facing a named enemy in the Academy Phase, Four between [[Reunion at Dawn (Azure Moon)|Chapters 13]] [[Blood of the Eagle and Lion (Azure Moon)|and 17]], four from [[The King's Triumphant Return|Chapter 18]] onwards, and two when facing a named enemy in the War Phase post-Chapter 18. |
||
| + | *In ''Three Houses'', due to Dimitri having ageusia, he has the least amount of disliked dishes with only 1 disliked dish while also having the least amount of favorite dishes with only 6 in total. |
||
*In ''Super Smash Bros. Ultimate'', [[Byleth]]'s Dimitri costume is the only one where the dagger is recolored. The color scheme matches the dagger Dimitri gave to Edelgard. |
*In ''Super Smash Bros. Ultimate'', [[Byleth]]'s Dimitri costume is the only one where the dagger is recolored. The color scheme matches the dagger Dimitri gave to Edelgard. |
||
| + | *Dimitri's artwork from the Academy Phase depicts him wielding a [[Silver Lance]], while his one from the War Phase depicts him wielding [[Areadbhar]]. |
||
| − | *In a survey conducted by Nintendo DREAM Magazine, Dimitri won [https://i.imgur.com/rsH2EgE.jpg 1st place] in the character popularity poll for ''Fire Emblem: Three Houses''. The male-female vote ratio was 1:2. He ranked 1st with 30.2% of the vote among those who completed the game and 32.4% overall. |
||
| − | *In |
+ | *In a survey conducted by Nintendo DREAM Magazine, Dimitri won [https://i.imgur.com/rsH2EgE.jpg 1st place] in the character popularity poll for ''Three Houses''. The male-female vote ratio was 1:2. He ranked 1st with 30.2% of the vote among those who completed the game and 32.4% overall. |
| − | *In |
+ | **In the second survey, he won [https://i.imgur.com/H24mJjb.jpg 1st place] in the character popularity poll. The male-female vote ratio was 1:3. He ranked 1st among those who completed the game with 415 points. |
| + | **In the third survey, he won [https://i.imgur.com/yYHnEnB.jpg 1st place] in the character popularity poll. The male-female vote ratio was 1:3. He ranked 1st among those who completed the game with 310 points. |
||
| + | **In the fourth survey, he won [https://i.imgur.com/dShIU3N.jpg 1st place] in the character popularity poll. The male-female vote ratio was 1:4. He ranked 1st among those who completed the game with 213 points. |
||
| + | **In the fifth survey, he won [https://i.imgur.com/61swPGK.jpg 1st place] in the character popularity poll. The male-female vote ratio was 1:4. He ranked 1st among those who completed the game with 36.7% of the vote. |
||
*In the December 2019 issue of Nintendo DREAM Magazine, Dimitri ranked [https://japanesenintendo.com/2019/10/21/nintendo-dream-character-poll-5/ 8th] in the character popularity poll for most favorite Nintendo character. |
*In the December 2019 issue of Nintendo DREAM Magazine, Dimitri ranked [https://japanesenintendo.com/2019/10/21/nintendo-dream-character-poll-5/ 8th] in the character popularity poll for most favorite Nintendo character. |
||
| − | *In the |
+ | **In the January 2020 issue, he ranked [https://japanesenintendo.com/2019/11/22/nintendo-dream-character-poll-6/ 4th] in the character popularity poll for most favorite Nintendo character. |
| − | *In the |
+ | **In the February 2020 issue, he ranked [https://japanesenintendo.com/2019/12/25/nintendo-dream-character-poll-7/ 8th] in the character popularity poll for most favorite Nintendo character. |
| − | *In the |
+ | **In the March 2020 issue, he ranked [https://japanesenintendo.com/2020/01/21/nintendo-dream-character-poll-8 8th] in the character popularity poll for most favorite Nintendo character. |
| − | *In |
+ | *In a survey conducted by Famitsu Magazine, Dimitri won [https://i.imgur.com/8Sy3EYd.jpg 1st place] in the character popularity poll for ''Three Houses''. He ranked 1st for males and 1st overall with 1,335 votes. He also placed 1st among S-Supports chosen in the first playthrough with 596 votes. |
| − | *In the |
+ | *In the fourth ''Fire Emblem Heroes: Choose Your Legends'' popularity poll, Dimitri won [https://vote4.campaigns.fire-emblem-heroes.com/en-US/results 1st place] for males and 2nd place overall with 69,448 votes. |
| + | *Dimitri won the 39th [[Voting Gauntlet]] [https://support.fire-emblem-heroes.com/voting_gauntlet/tournaments/39 (Brave Reprisals)] in ''Heroes''. |
||
| − | *In the March 2020 issue of Nintendo DREAM Magazine, Dimitri ranked [https://japanesenintendo.com/2020/01/21/nintendo-dream-character-poll-8 8th] in the character popularity poll for most favorite Nintendo character. |
||
| − | * |
+ | *Dimitri won the 62nd [https://support.fire-emblem-heroes.com/voting_gauntlet/tournaments/62 Voting Gauntlet (Sea-Spray Skirmish)] in ''Heroes''. |
| − | == |
+ | ==Gallery== |
{{SeeMain|gallery}} |
{{SeeMain|gallery}} |
||
{{FE16}} |
{{FE16}} |
||
| + | {{FE17}} |
||
{{FEH}} |
{{FEH}} |
||
| + | {{FEW3H}} |
||
{{Cipher}} |
{{Cipher}} |
||
| − | [[Category:Playable characters]] |
+ | [[Category:Playable characters]][[de:Dimitri Alexandre Blaiddyd]][[es:Dimitri]][[fr:Dimitri]] |
[[Category:Male Characters]] |
[[Category:Male Characters]] |
||
[[Category:Fire Emblem: Three Houses Characters]] |
[[Category:Fire Emblem: Three Houses Characters]] |
||
| Line 699: | Line 2,811: | ||
[[Category:Fire Emblem 0 (Cipher) Characters]] |
[[Category:Fire Emblem 0 (Cipher) Characters]] |
||
[[Category:Fire Emblem Heroes Characters]] |
[[Category:Fire Emblem Heroes Characters]] |
||
| + | [[Category:Brave Heroes]] |
||
| + | [[Category:Legendary Heroes]] |
||
| + | [[Category:Fire Emblem Warriors: Three Hopes Characters]] |
||
| + | [[Category:Major Antagonists]] |
||
| + | [[Category:Enemies]] |
||
| + | [[Category:Fire Emblem Engage Characters]] |
||
| + | [[Category:Emblems]] |
||
| + | [[Category:Bond Ring]] |
||
| + | [[Category:Allies]] |
||
Latest revision as of 00:20, 8 April 2024
—Dimitri to Byleth
Dimitri is a playable character and one of the main protagonists in Fire Emblem: Three Houses and Fire Emblem Warriors: Three Hopes. He is the 17-year-old prince of the Holy Kingdom of Faerghus and the house leader of the Blue Lions. He possesses a Minor Crest of Blaiddyd and wields Lances as his main weapon.
Profile
Early Life
Dimitri is the crown prince of the Holy Kingdom of Faerghus. He was born in Imperial Year 1162 as the eldest son of King Lambert; his mother, the queen consort, perished in a plague that was later cured by Cornelia. He befriended Edelgard during her exile and she taught him how to dance. Dimitri gave her a dagger as a token of affection before she returned to the Adrestian Empire in 1174.
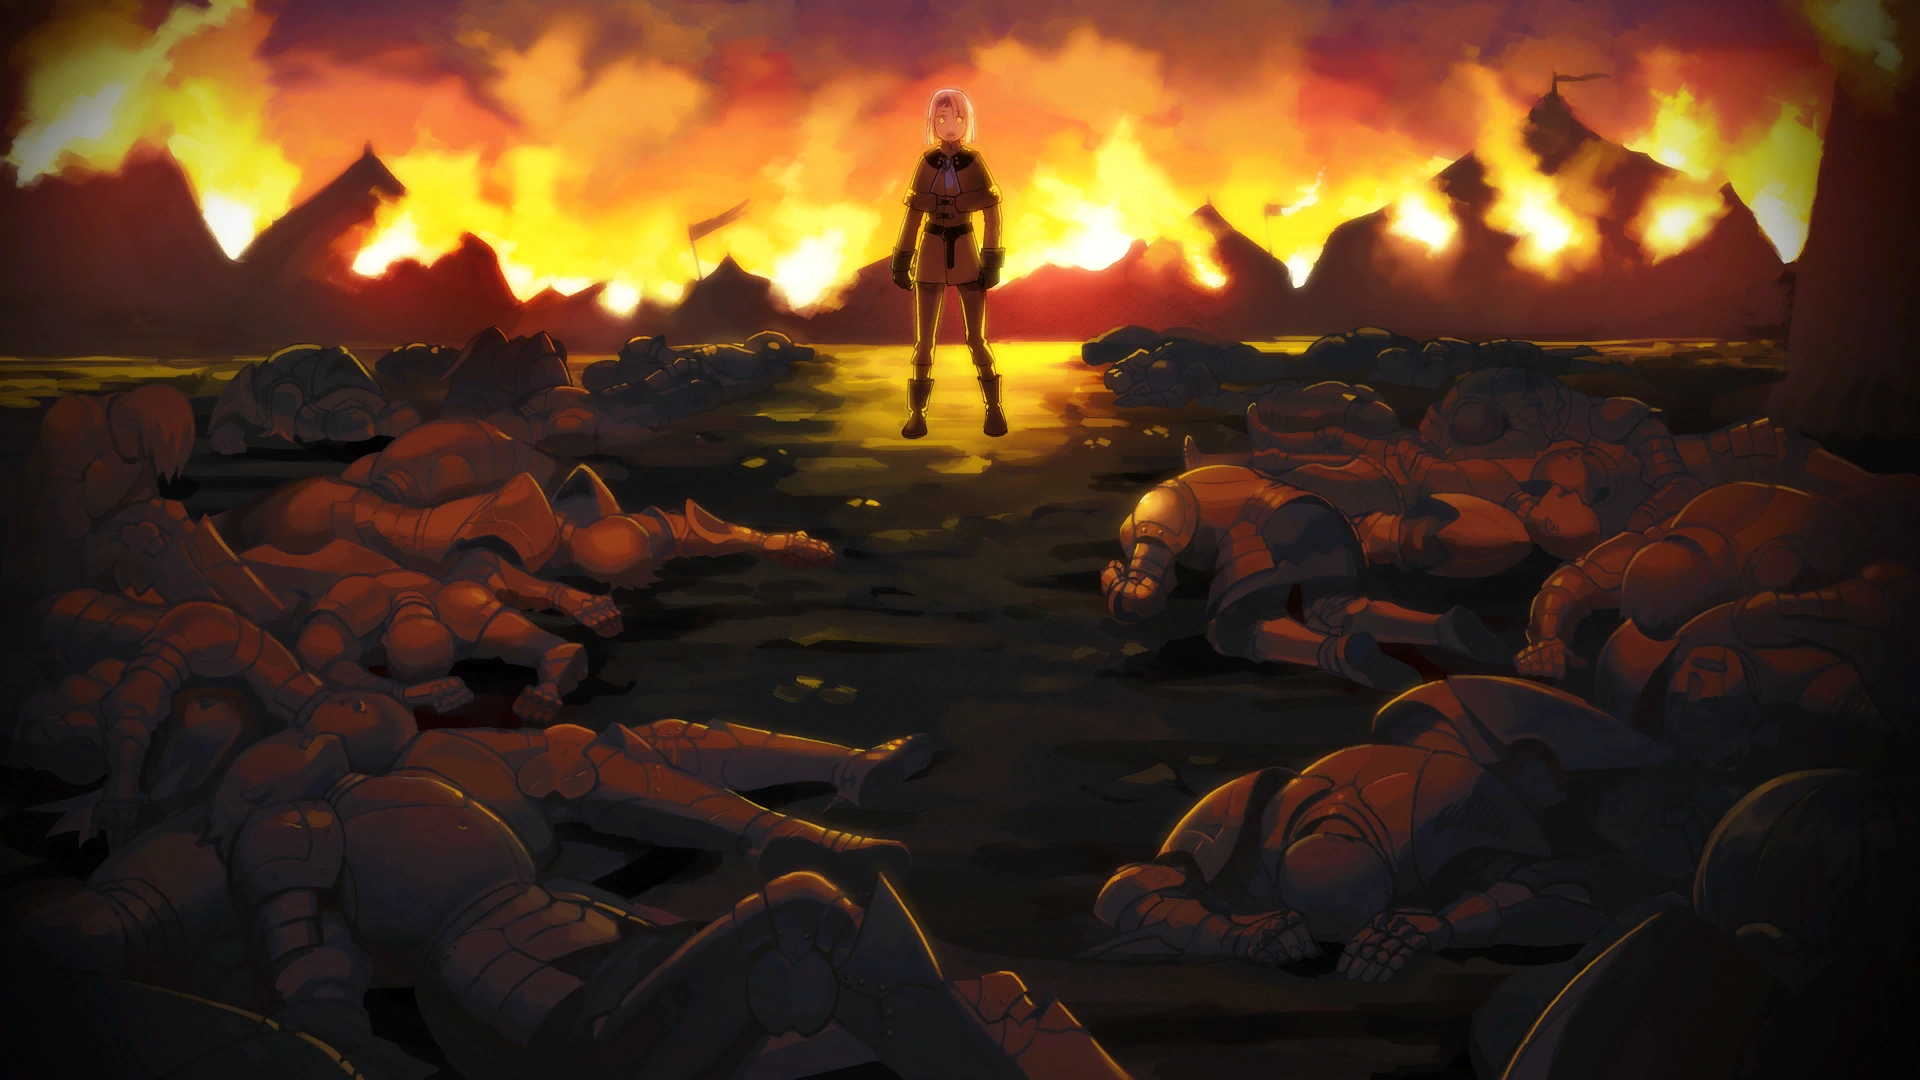

Dimitri witnesses the Tragedy of Duscur.
Dimitri was the only surviving royal of the Tragedy of Duscur in 1176. His uncle and Lambert's elder brother, Grand Duke Rufus of Itha, ruled as regent in Dimitri's stead. During the Kingdom's retaliatory subjugation of Duscur, he saved and befriended Dedue who became his vassal. He fought his maiden battle two years later, where he distinguished himself as a commander in quelling a rebellion in western Faerghus. However, a strange bloodlust overtook him during that battle, which strained his relationship with Felix from that point on.
Three Houses
Academy Phase
In 1180, Dimitri enrolls as a student of the Officers Academy in Garreg Mach Monastery and serves as the house leader of the Blue Lions. His childhood friends Sylvain, Ingrid, and Felix are among his classmates. His story changes depending on what class Byleth chooses to teach.
Blue Lions
Byleth chooses to instruct the Blue Lions house, helping Dimitri grow into a capable leader. During the night of the Academy Ball, the Blue Lions vow to reunite in five years for the Millennium Festival. Dimitri agrees to the reunion and hopes that everyone can make it.
"Just a minute! The following section contains spoilers. Viewing it will cost a lot. Are you prepared to pay for it?"
|

However, hostile encounters with the Flame Emperor and Those Who Slither in the Dark slowly drive Dimitri to become more ruthless. After the Ball, he confides to Byleth that Edelgard is his stepsister and that he gave her a dagger as a gift during their childhood. Dimitri suddenly hears voices and sees the Flame Emperor conversing with Thales. Believing that the Flame Emperor was responsible for the Tragedy of Duscur, he confronts them. However, the Flame Emperor denies involvement and vanishes, leaving behind a dagger which Dimitri recognizes.
After Byleth merges with Sothis, Rhea instructs them to descend into the Holy Tomb and claim their power from the throne. The Flame Emperor interferes, seeking to raid the tomb of its Crest Stones, which leads to a skirmish. With most of the Emperor's forces dispatched, Dimitri unmasks their leader. To his shock and dismay, his suspicion that the Flame Emperor is Edelgard is confirmed. Outraged over her perceived involvement in his family's death, Dimitri snaps and slaughters her remaining forces. She is forced to retreat, but not before Dimitri vows to make Edelgard suffer for her crimes and kill her.
Edelgard ascends the Adrestian Empire's throne, deposing Ionius IX and declaring war on the Church of Seiros. Dimitri fights beside Claude in the front lines to protect the Monastery from invasion. Although Edelgard and her vanguard are repelled, the invaders are reinforced by a larger army, forcing Rhea to enter the fray as The Immaculate One. Byleth attempts to aid her, but Thales sends them plummeting into a ravine. Garreg Mach Monastery eventually falls into Imperial control, scattering the Knights of Seiros and personnel of the Officers Academy not affiliated with the Empire.
Cindered Shadows
"Just a minute! The following section contains spoilers. Viewing it will cost a lot. Are you prepared to pay for it?"
|
Dimitri is the other Blue Lion besides Ashe in the party that explores Abyss. Moved by the pleas of the Ashen Wolves to aid them in protecting the residents, he is impressed as to how outcasts are able to find sanctuary beneath Garreg Mach.
War Phase
Azure Moon
"Just a minute! The following section contains spoilers. Viewing it will cost a lot. Are you prepared to pay for it?"
|
After the fall of Garreg Mach Monastery and Byleth's disappearance, Dimitri is falsely accused of murdering Grand Duke Rufus, branded a traitor by Cornelia who declares Faerghus a vassal state of the Empire, and imprisoned for alleged regicide. He is able to escape imprisonment due to Dedue's apparent sacrifice but is presumed dead. At some point, he damages his right eye and is forced to wear an eyepatch. He lives a solitary life as a vagabond. Rumors of a sadistic warrior capable of slaying scores of soldiers begin to propagate throughout the Empire.
In 1185, Byleth returns after a five year absence and finds Dimitri, now a shell of his former self, alone in the ruins of the Monastery surrounded by fresh corpses of Imperial soldiers. He mistakes them for a ghost but soon realizes that they are alive. A bandit gang raiding a nearby village spurs the two into combat. During the skirmish, they reunite with other members of the Blue Lions, fulfilling the promise they made as students. Determined to overthrow Cornelia and kill Edelgard, the Blue Lions reclaim the Monastery as their stronghold.
With the Blue Lions reunited, Dimitri immediately plans on killing Edelgard by mobilizing his allies. The Monastery is suddenly attacked by Imperial forces in response to the Knights of Seiros returning to it. The Imperials are defeated and its leader Randolph is captured. Dimitri taunts Randolph, mocking his motivations as a general as well as concluding that they are both murderers. While Dimitri intends on slowly torturing the captive general, Byleth interferes and mercy kills Randolph.
Acting on Byleth and Gilbert's counsel, Dimitri gathers more allies and support from the rebelling Kingdom nobles still loyal to him as the rightful King of Faerghus. In response to Rodrigue's pledge of support, they go to Ailell to link up with soldiers of House Fraldarius. However, they are intercepted by the forces of House Rowe led by Gwendal. After vanquishing the enemy, Rodrigue bestows Areadbhar to Dimitri and joins his crusade. Seeking to secure the Great Bridge of Myrddin, Dimitri faces off against the Empire. If Dedue's Paralogue was completed in the Academy phase, he survives after helping Dimitri escape imprisonment and reunites with his classmates. With the bridge under his control, Dimitri confronts Dedue and is relieved that he survived thanks to the aid of the same Duscur men he saved years prior. Dedue renews his pledge of loyalty to his liege, but Dimitri makes him promise not to throw his life away again.
Dimitri commands his forces to march into Adrestian territory, leading them to Gronder Field where the Blue Lions previously emerged victorious in their mock battle five years ago. For the first time since the war began, the three nations meet on the battlefield. The three-way battle is fierce and though Faerghus forces Edelgard to retreat, it is ultimately a Pyrrhic victory. Dimitri is outraged that she has escaped his grasp once more, but he is fatigued from the battle and urged by his allies to not pursue Edelgard due to Imperial reinforcements.
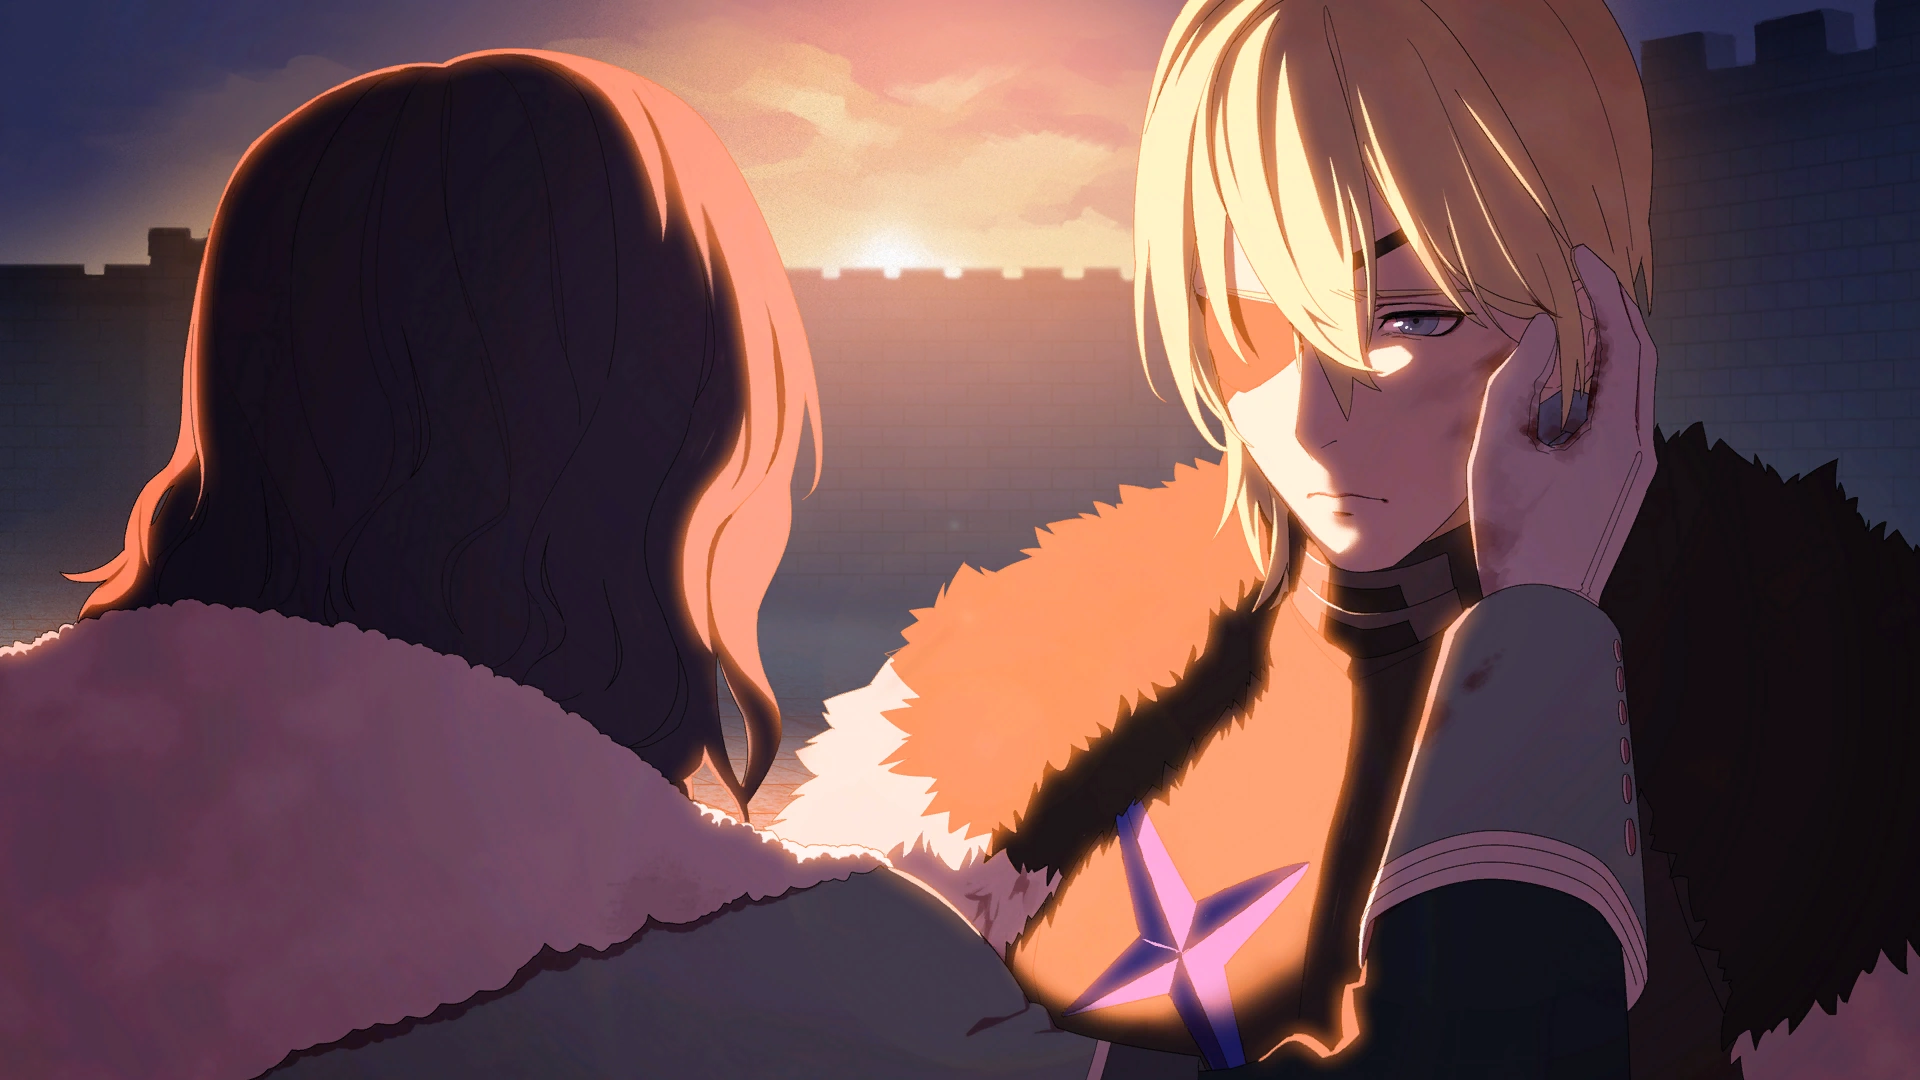

Rodrigue absolves Dimitri of guilt.
Suddenly, Fleche, a young maiden they encountered on the Great Bridge of Myrddin, appears on the battlefield and manages to wound Dimitri with her sword. Before she can land the final blow, Rodrigue shields Dimitri, which allows Byleth to cut her down. Rodrigue's sacrifice finally reawakens Dimitri's conscience, and he realizes that his lust for vengeance has not only consumed himself, but affected others as well. Rodrigue absolves him of any responsibility for his death and tells Dimitri that he should live for his ideals rather than stay shackled by ghosts of the past. With his dying breath, Rodrigue remarks that Dimitri resembles his late father Lambert. As a heavy downpour begins to fall, Byleth offers their hand to Dimitri and promises that they will continue to guide him. The other Blue Lions also vow to continue fighting alongside him.
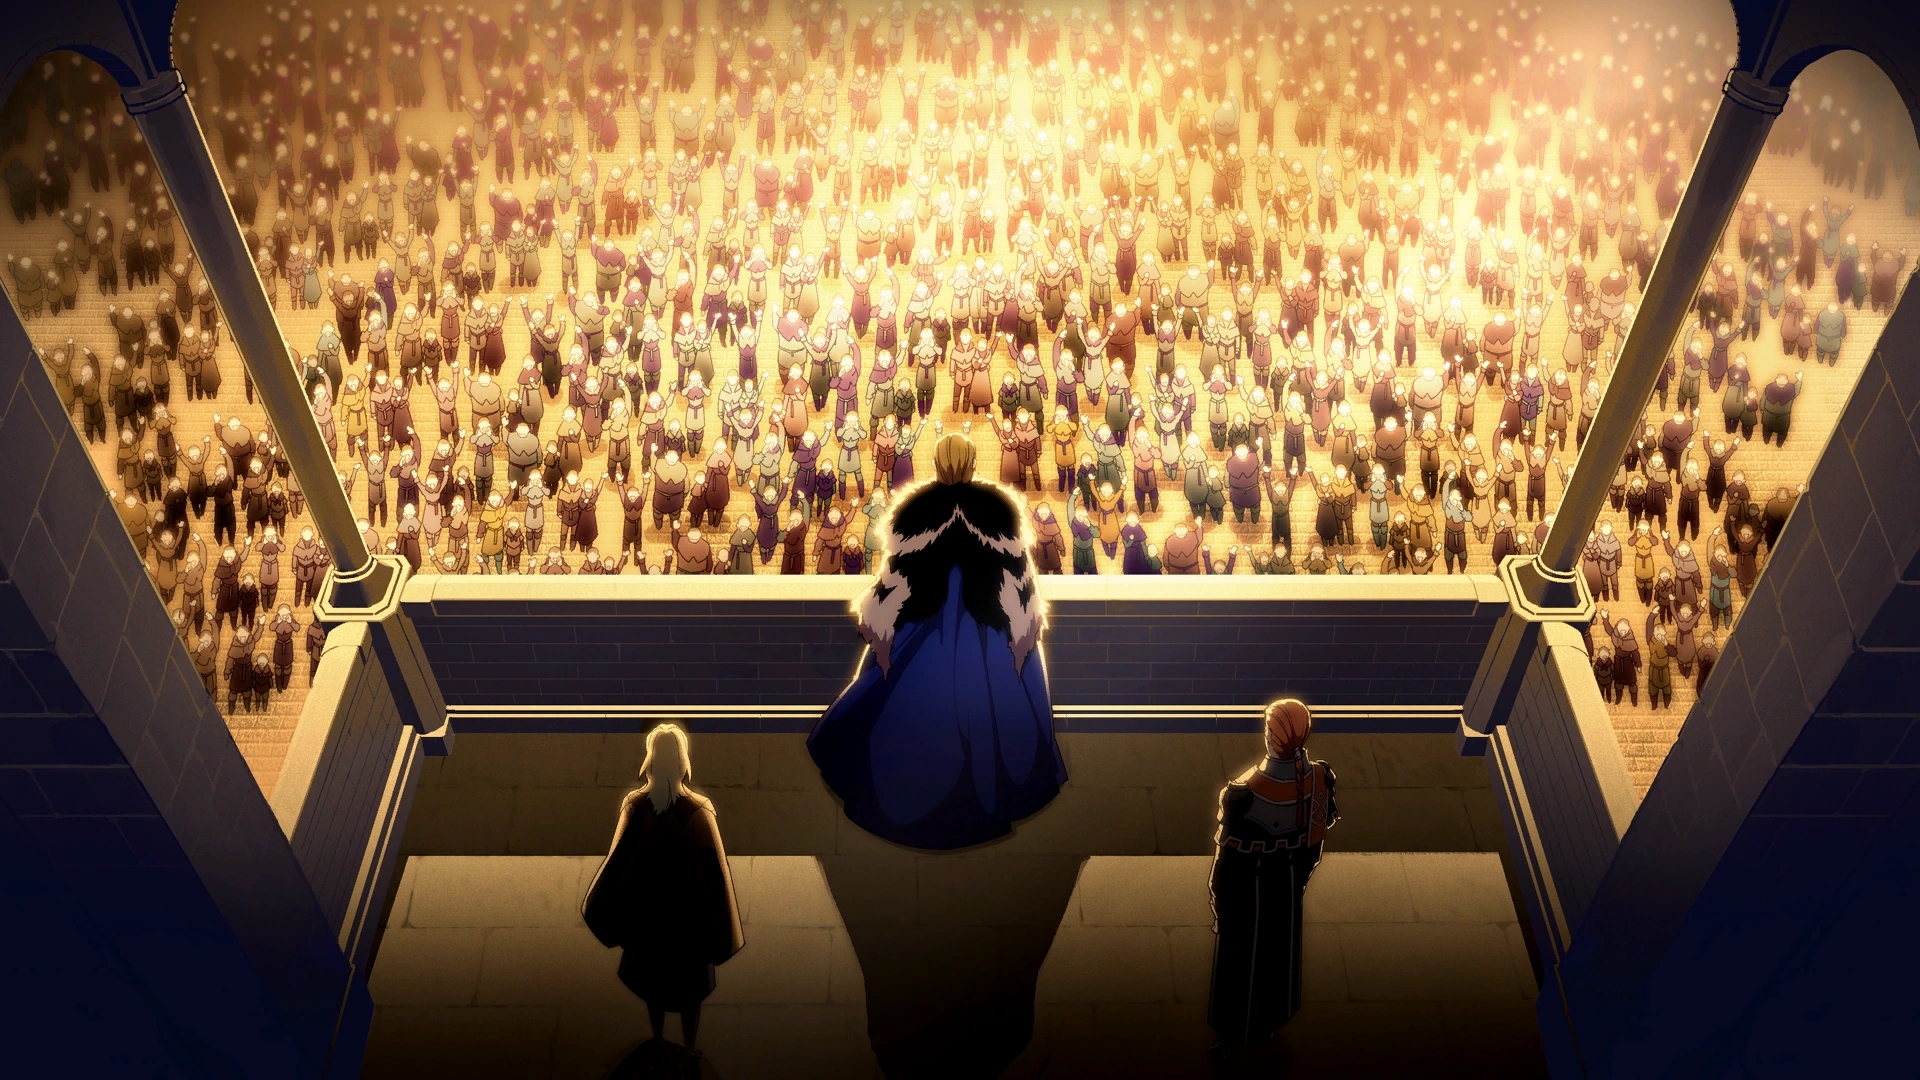

Dimitri greets his subjects after liberating Fhirdiad.
A messenger from the Leicester Alliance arrives in Faerghus with dire news that Volkhard is spearheading an Imperial invasion of Alliance territory. Dimitri and Byleth heed Claude's plea for assistance. They arrive in Derdriu with the assault already underway, but the Alliance has fortified the city and stalled the Empire's advance with skirmishes. The Kingdom's pincer attack turns the tide of battle and Volkhard's forces are defeated. Volkhard is mortally wounded, he evades Dimitri's questions concerning The Tragedy of Duscur and instead goads him to kill Edelgard before dying. Claude confesses that he gambled the Alliance's survival on Dimitri before he even retook Fhirdiad. He then hands Dimitri Failnaught and announces that he is abdicating as leader of the Alliance since the lords of the roundtable conference unanimously voted to accede into the Kingdom. After informing them of Rhea's imprisonment in Enbarr, Claude departs Fódlan on a personal mission.
With the combined might of Faerghus and the former Alliance now at his disposal, Dimitri launches a proper invasion of the Empire. His army routs the garrison of Fort Merceus, slaying the Death Knight and securing a foothold in Imperial territory. A messenger from Margrave Gautier informs them that Faerghus has been pacified and will join forces with the Alliance army marching south. Dimitri briefly returns to Garreg Mach Monastery to interrogate a prisoner, who confesses that House Kleiman was a conspirator in the Tragedy of Duscur. Although disturbed by the revelation, he promptly returns to the front lines. As his forces approach Enbarr, Dimitri attempts to parley with Edelgard to learn her motivations for starting the war. She accepts on a whim and remembers her childhood in Faerghus after Dimitri returns her dagger, but the two are unable to compromise their world views.
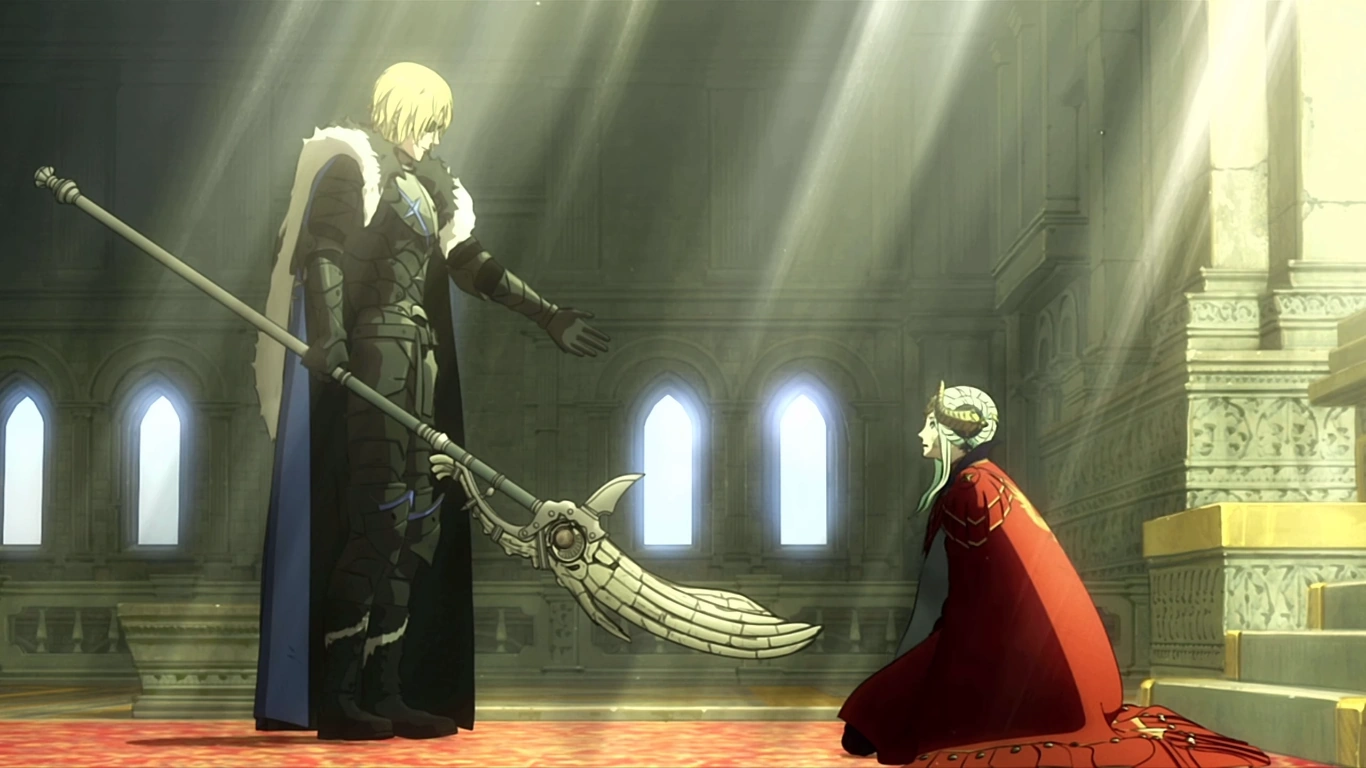

Dimitri tries to reconcile with Edelgard.
Dimitri besieges Enbarr and defeats a transformed Edelgard in battle. He attempts to reconcile with her, but she throws her dagger into his shoulder and he instinctively pierces her heart with Areadbhar, killing her. Forlorn, Dimitri is led away from the throne room by Byleth. In the aftermath, he is crowned the ruler of a united Fódlan. He spends the rest of his life reforming the continent; particularly alleviating poverty, improving foreign relations, and introducing a participatory form of government. With the assistance of Byleth, the new Archbishop of the Church of Seiros, Dimitri ushers Fódlan into a new golden age.
Silver Snow
"Just a minute! The following section contains spoilers. Viewing it will cost a lot. Are you prepared to pay for it?"
|
Dimitri is hiding in the Dukedom of Fraldarius after Dedue helped him escape execution in Fhirdiad. When the Resistance Army takes the Great Bridge of Myrddin, Gilbert is sent as an envoy to propose cooperation with Faerghus. Seteth allows them safe passage across the bridge, but declines to join them as he believes their advance towards Enbarr is reckless. Subsequently, news reaches Garreg Mach Monastery that Dimitri has died after his forces were decimated routing the Imperial Army at the Battle of Gronder Field. During that night, Byleth sees Dimitri. He laments the deaths of Rodrigue, Gilbert, and Dedue as well as his inability to restore the Kingdom or defeat the Empire. Before Dimitri is able to finish, Byleth is woken up by Seteth and the prince is nowhere to be seen. While several of his former classmates mourn Dimitri's death, Ferdinand speculates on whether he could still be alive when Byleth tells him about their dream. Overall, it is left ambiguous whether it was all a dream in Byleth's head, if he was a ghost, or if Dimitri survived the Battle of Gronder Field.
Verdant Wind
"Just a minute! The following section contains spoilers. Viewing it will cost a lot. Are you prepared to pay for it?"
|
Dimitri is able to escape execution in Fhirdiad thanks to Dedue's help and raises an army in secret. After the Alliance army secures the Great Bridge of Myrddin, Judith declares that an army flying the banners of House Blaiddyd has marched through Alliance territory unopposed and is rushing towards Gronder Field. Rather than sending envoys to negotiate safe passage through the Great Bridge of Myrddin, the unknown army instead heads further east into Ordelia territory and frees the bridges from Imperial control.
Dimitri arrives on Gronder Field with his Kingdom Army, resulting in a three way battle between against Edelgard's army and the Leicester Alliance's army. The fierce battle that unfolds consumes the three armies, but the Alliance's army ultimately emerges victorious. Consumed by his quest for vengeance, Dimitri ignores his fatigue and chases after Edelgard, only to collapse from exhaustion. Left vulnerable, the Empire's army surrounds Dimitri and brutally executes him. Dedue, however, survives the fight and then vows to avenge him.
Crimson Flower
"Just a minute! The following section contains spoilers. Viewing it will cost a lot. Are you prepared to pay for it?"
|
Dimitri ascends the throne of Faerghus and consolidates his power throughout the Kingdom by swearing fealty to the Church of Seiros. He gives asylum to Rhea and the Knights of Seiros in Fhirdiad, exiles Cornelia to prevent intrigue in the capital, and has Rodrigue escort her to Arianrhod and garrison the city with Fraldarius soldiers to ensure the loyalty of House Rowe. After the fall of the Leicester Alliance, the remnants of the Eastern Church flee to Fhirdiad. When Arianrhod is destroyed by javelins of light, Dimitri swears to avenge the fallen.
As the Black Eagle Strike Force marches towards the Kingdom capital, Dimitri tells Rhea that his heir will continue the Blaiddyd bloodline and directs her to position the Knights of Seiros to flank Edelgard's forces before he intercepts them at the Tailtean Plains. The rain delays Rhea's advance, forcing the Kingdom to make first contact with the Empire. Hubert notes that Dimitri has grown shrewd, as his younger self would have simply charged the front lines rather than adopt a defensive formation in anticipation of Rhea's maneuver. Dimitri is distraught when some of his soldiers willingly turn themselves into Demonic Beasts, and chides Dedue for giving them Crest Stones without his knowledge and consent. Should Byleth face him, Dimitri will express horror that the professor sided with Edelgard and shows regret that he has to kill them. Dimitri is eventually defeated and slain by Edelgard. If Dedue is defeated before transforming into a Giant Demonic Beast, Dimitri will instead pass peacefully in his vassal's arms.
Warriors: Three Hopes
After Monica is rescued and "Tomas" is driven out of the monastery, Dimitri is summoned by Rhea, and informed by Rodrigue that Dimitri's uncle Rufus has seized control of Fhirdiad and is orchestrating a purge of House Fraldarius under the pretense of trying to stop them from installing Dimitri as a puppet. Together with Rodrigue, Gilbert and the Blue Lions save Annette (who remains behind to avoid a conflict with House Dominic's neighbors), and Dimitri returns to Fhirdiad.
As Dimitri's attempts to convince Rufus to stand down fall on deaf ears, the Blue Lions arrive at Fhirdiad, rout Rufus' troops, arrest him, and force Cornelia to flee. In the aftermath, Dimitri publicly executes Rufus for treason. When Margrave Gautier reports on his and the western lords' complicity in the Tragedy of Duscur, Dimitri decides to publicly admit the truth to the people of Faerghus and that it is time for him to formally take the throne. He convinces Gilbert to retake his birth identity of Gustave and have both him and Shez accept posts in the Kingdom army (If the latter is part of the Blue Lions).
Two years after the succession crisis, while Dimitri has kept Faerghus neutral on Adrestia's war on the Church, Seteth directly petitions for Kingdom aid. As the Faerghus royal family's legitimacy stems from the Church's support, the debt owned to Church's previous aid in the succession crisis, and the fact that the Empire may obtain undue influence over the Kingdom if left unchecked, Dimitri agrees to the request and orders his knights to prepare for battle with the Empire. With the odds of the Church holding Garreg Mach Monastery against the Empire grim, Dimitri and his troops make for Ailell, the Valley of Torment, to meet with Rhea and escort her to Fhirdiad.
If Byleth was recruited, Dimitri, Felix, and Dedue are seen together wondering where the two mercenaries are. Rodrigue reports that mages from Those Who Slither In The Dark in the forest. But before they could act, a Kingdom General reports that Shez is attacking Byleth. Upon defeating Shez and saving Byleth, Dimitri and the rest of the army face off against Solon. However during the battle Shez escapes. After Solon retreats, he meets up with Claude and Edelgard, who was acting strange before all three were transported to Zahras by Epimenides. Upon arriving there, he finds Edelgard back to normal and realizes that she was under some sort of spell the entire time. He agrees to team up with Edelgard to escape Zahras. After Shez teleports everyone back, he and Claude wonder what Zahras was and realized that Edelgard is gone. But they put that aside as they prepare to march towards Garreg Mach.
Personality
A sincere young man who seems like the embodiment of chivalry, Dimitri has a shade of darkness lying beneath his cheerful demeanor. Despite being a royal, he dislikes formality and pretentiousness, preferring his allies to be frank.
Dimitri has a strange sense of humor, which is evident by his fondness for Alois' corny jokes. By his own admission, he finds them humorous precisely because they are terrible. According to Hapi, there is an uncanny resemblance to his stepmother Patricia in terms of personality, such as the way they interact with people and show anger. He enjoys combat training, weapon repair, and long rides, but dislikes fragile objects and delicate work, as he is unable to control his prodigious strength. Despite this, he is agile and became a capable dancer under Edelgard's tutelage. Like Edelgard, he is uncomfortable with scorching heat.
Dimitri suffers from ageusia and survivor's guilt as a result of the slaughter in the Tragedy of Duscur. The former leaves him as the only person able to stomach Flayn's food and the latter causes him to see and hear apparitions of the dead. He is close to Dedue and admits that being able to save someone gave him a reason to live. In regards to the Crest System, Dimitri holds somewhat of a mixed stance towards it. While he believes that the system can be cruel for those like Miklan where it overlooks his own merits in favor of those with Crests, he maintains the stance that discarding such beliefs would cause greater problems. He overall believes that the two sides must reach an understanding with one another.
"Just a minute! The following section contains spoilers. Viewing it will cost a lot. Are you prepared to pay for it?"
|
Near the end of his academic year in Azure Moon, Dimitri develops an obsessive hatred of Edelgard after discovering she is the Flame Emperor and is determined to kill her personally. The series of tragedies that follow Edelgard's revelation and declaration of war takes a heavy toll on his psyche. By the time he reunites with Byleth, Dimitri has lost any semblance of happiness and composure he had as a student, becoming brooding, cynical, and ruthless. When reunited with his former classmates, he is brusque and coldly dismisses them as mere tools to exact his revenge. Dimitri's five years of isolation have also exacerbated his survivor's guilt. He openly converses with apparitions of his deceased parents and Glenn, promising to appease them with Edelgard's death. His indignation blinds him to the needs of others and he demonstrates a reckless disregard for his own well-being. Despite this, he still shows empathy to those orphaned by war.
Dimitri is unable to justify killing for one's ideals, and so he rejects the notion of taking up arms for a higher cause as sophistry. Thus, he dehumanizes all killers as monsters and is not above maiming and torturing his captive foes. This disdain extends to himself, as shown by his willingness to be wounded and disfigured by his enemies. However, he is oddly sympathetic to those who are also motivated by revenge, and was willing to die by Fleche's hands as atonement for her brother's death.
Byleth's influence determines Dimitri's fate. In the routes where they do not instruct him, Dimitri will die consumed by vengeance or peacefully in Crimson Flower, but solely if Dedue is defeated before he transforms into a demonic beast. If he is Byleth's chosen house leader, his obsession with appeasing the dead finally fades after Rodrigue sacrifices himself to thwart Fleche's assassination attempt. This event restores Dimitri's sanity and he resolves to fight for his beliefs together with his allies, unburdened by the ghosts of his past. Reflecting on his exile, Dimitri would later confess to Byleth that experiencing poverty during his life in the slums deeply affected him; the plight of the poor inspired him to change Fódlan from the ground up. Though unsure of his fitness to be king, the people's support upon liberating Fhirdiad bolsters his desire to serve them. After the war, Dimitri becomes a benevolent king beloved by the masses for his societal reforms and participatory form of government.
Dimitri's Three Hopes counterpart retains his sanity but still has survivor's guilt. He hesitates with certain tasks like killing his uncle and accepting Areadbhar. He will do anything to keep his people and friends safe, including surrendering to Cornelia or fighting a possessed Shez.
In-Game
Fire Emblem: Three Houses
Base Stats
| Starting Class | Crest | ||||||||
|---|---|---|---|---|---|---|---|---|---|
| Level | HP | Str | Mag | Dex | Spd | Lck | Def | Res | Cha |
| 1 | 28 | 12 | 4 | 7 | 7 | 5 | 7 | 4 | 9 |
| Magic | Combat Arts | Abilities | Starting Items | ||||||
| - | |||||||||
| Skill | |||||||||||
|---|---|---|---|---|---|---|---|---|---|---|---|
| Level | E+ | D+ | E | E | E | E | E | D | E | D | E |
| Start |
| Skill | |||||||||||
|---|---|---|---|---|---|---|---|---|---|---|---|
| Level | C | B | D | E | E | E | E | C+ | E | C | E |
| Start |
As an Enemy
Rivalry of the Houses
| Starting Class | Crest | ||||||||
|---|---|---|---|---|---|---|---|---|---|
| Level | HP | Str | Mag | Dex | Spd | Lck | Def | Res | Cha |
| 3 | 29 | 13 | 4 | 8 | 8 | 5 | 8 | 4 | 10 |
| Magic | Combat Arts | Abilities | Starting Items | ||||||
| - | - | ||||||||
| Starting Class | Crest | ||||||||
|---|---|---|---|---|---|---|---|---|---|
| Level | HP | Str | Mag | Dex | Spd | Lck | Def | Res | Cha |
| 4 | 30 | 14 | 5 | 9 | 9 | 6 | 8 | 5 | 11 |
| Magic | Combat Arts | Abilities | Starting Items | ||||||
| - | - | ||||||||
| Starting Class | Crest | ||||||||
|---|---|---|---|---|---|---|---|---|---|
| Level | HP | Str | Mag | Dex | Spd | Lck | Def | Res | Cha |
| 8 | 33 | 17 | 6 | 12+4 | 12 | 8 | 11 | 6 | 14 |
| Magic | Combat Arts | Abilities | Starting Items | ||||||
| - | - | ||||||||
| Skill | |||||||||||
|---|---|---|---|---|---|---|---|---|---|---|---|
| Level | E | E | E | E | E | E | E | E | - | - | - |
| Start |
Battle of the Eagle and Lion
| Starting Class | Crest | ||||||||
|---|---|---|---|---|---|---|---|---|---|
| Level | HP | Str | Mag | Dex | Spd | Lck | Def | Res | Cha |
| 15 | 37 | 20 | 6 | 13 | 13 | 9 | 12 | 5 | 18+1 |
| Magic | Combat Arts | Abilities | Starting Items | ||||||
| - | - | ||||||||
| Starting Class | Crest | ||||||||
|---|---|---|---|---|---|---|---|---|---|
| Level | HP | Str | Mag | Dex | Spd | Lck | Def | Res | Cha |
| 16 | 40 | 23 | 7 | 16 | 16 | 10 | 15 | 7 | 21+1 |
| Magic | Combat Arts | Abilities | Starting Items | ||||||
| - | - | ||||||||
| Starting Class | Crest | ||||||||
|---|---|---|---|---|---|---|---|---|---|
| Level | HP | Str | Mag | Dex | Spd | Lck | Def | Res | Cha |
| 22 | 48 | 31 | 11 | 23 | 22 | 14 | 20 | 11 | 28+1 |
| Magic | Combat Arts | Abilities | Starting Items | ||||||
| - | - | ||||||||
| Skill | |||||||||||
|---|---|---|---|---|---|---|---|---|---|---|---|
| Level | D+ | B | E | E | E | E | E | C | - | - | - |
| Start |
To War at Gronder (Verdant Wind)
| Starting Class | Crest | ||||||||
|---|---|---|---|---|---|---|---|---|---|
| Level | HP | Str | Mag | Dex | Spd | Lck | Def | Res | Cha |
| 35 | 51 | 30 | 7 | 21 | 22 | 9 | 18 | 9 | 28+10 |
| Magic | Combat Arts | Abilities | Starting Items | ||||||
| - | |||||||||
| Starting Class | Crest | ||||||||
|---|---|---|---|---|---|---|---|---|---|
| Level | HP | Str | Mag | Dex | Spd | Lck | Def | Res | Cha |
| 36 | 57 | 36 | 11 | 26 | 28 | 14 | 24 | 11 | 34+10 |
| Magic | Combat Arts | Abilities | Starting Items | ||||||
| - | |||||||||
| Starting Class | Crest | ||||||||
|---|---|---|---|---|---|---|---|---|---|
| Level | HP | Str | Mag | Dex | Spd | Lck | Def | Res | Cha |
| 42 | 68 | 46 | 18 | 36 | 37 | 21 | 33 | 18 | 44+10 |
| Magic | Combat Arts | Abilities | Starting Items | ||||||
| - | |||||||||
| Skill | |||||||||||
|---|---|---|---|---|---|---|---|---|---|---|---|
| Level | B | B | D+ | C | C+ | E+ | E+ | B | - | - | - |
| Start |
Combat at Tailtean Plains
| Starting Class | Crest | ||||||||
|---|---|---|---|---|---|---|---|---|---|
| Level | HP | Str | Mag | Dex | Spd | Lck | Def | Res | Cha |
| 37 | 58 | 34 | 8 | 23 | 24 | 11 | 21 | 10 | 29+10 |
| Magic | Combat Arts | Abilities | Starting Items | ||||||
| - | |||||||||
| Starting Class | Crest | ||||||||
|---|---|---|---|---|---|---|---|---|---|
| Level | HP | Str | Mag | Dex | Spd | Lck | Def | Res | Cha |
| 38 | 64 | 40 | 11 | 29 | 30 | 15 | 27 | 11 | 35+10 |
| Magic | Combat Arts | Abilities | Starting Items | ||||||
| - | |||||||||
| Starting Class | Crest | ||||||||
|---|---|---|---|---|---|---|---|---|---|
| Level | HP | Str | Mag | Dex | Spd | Lck | Def | Res | Cha |
| 44 | 76 | 51 | 19 | 39 | 39 | 23 | 34 | 19 | 45+10 |
| Magic | Combat Arts | Abilities | Starting Items | ||||||
| - | |||||||||
| Skill | |||||||||||
|---|---|---|---|---|---|---|---|---|---|---|---|
| Level | B | A | C | C+ | B | D | D | A | - | - | - |
| Start |
Growth Rates
Class:
Maximum Stats
Learnt Magic
| Skill Level | Reason | Faith |
|---|---|---|
| D | Thunder | Heal |
| D+ | - | Nosferatu |
| C | Thoron | Recover |
| C+ | - | - |
| B | - | - |
| B+ | - | - |
| A | - | Aura |
| A+ | - | - |
Learnt Abilities
| Ability | Learned at | Notes |
|---|---|---|
| Innate | - | |
| Replaces Sword Prowess Lv 2 | ||
| Replaces Sword Prowess Lv 2 | ||
| Replaces Sword Prowess Lv 3 | ||
| Replaces Sword Prowess Lv 4 | ||
| - | ||
| - | ||
| - | ||
| - | ||
| - | ||
| - | ||
| - | ||
| Innate | - | |
| Replaces Lance Prowess Lv 2 | ||
| Replaces Lance Prowess Lv 3 | ||
| Replaces Lance Prowess Lv 4 | ||
| Innate | - | |
| - | ||
| - | ||
| - | ||
| - | ||
| - | ||
| - | ||
| - | ||
| Replaces Axe Prowess Lv 1 | ||
| Replaces Axe Prowess Lv 2 | ||
| Replaces Axe Prowess Lv 3 | ||
| Replaces Axe Prowess Lv 4 | ||
| - | ||
| - | ||
| - | ||
| - | ||
| - | ||
| - | ||
| Replaces Bow Prowess Lv 1 | ||
| Replaces Bow Prowess Lv 2 | ||
| Replaces Bow Prowess Lv 3 | ||
| Replaces Bow Prowess Lv 4 | ||
| - | ||
| - | ||
| - | ||
| - | ||
| - | ||
| Replaces Brawling Prowess Lv 1 | ||
| Replaces Brawling Prowess Lv 2 | ||
| Replaces Brawling Prowess Lv 3 | ||
| Replaces Brawling Prowess Lv 4 | ||
| - | ||
| - | ||
| - | ||
| - | ||
| - | ||
| - | ||
| Replaces Reason Lv 1 | ||
| Replaces Reason Lv 2 | ||
| Replaces Reason Lv 3 | ||
| Replaces Reason Lv 4 | ||
| - | ||
| - | ||
| - | ||
| Replaces Faith Lv 1 | ||
| Replaces Faith Lv 2 | ||
| Replaces Faith Lv 3 | ||
| Replaces Faith Lv 4 | ||
| - | ||
| - | ||
| Innate | - | |
| Replaces Authority Lv 1 | ||
| Replaces Authority Lv 2 | ||
| Replaces Authority Lv 3 | ||
| Replaces Authority Lv 4 | ||
| - | ||
| - | ||
| - | ||
| - | ||
| - | ||
| - | ||
| - | ||
| - | ||
| Replaces Weight -3 | ||
| - | ||
| Unlocked after twelve tutoring sessions in Riding | ||
| - | ||
| - | ||
| - | ||
| - | ||
| Replaces Alert Stance | ||
| - |
Recruitment
Dimitri is first playable in the prologue and will stay with Byleth if they choose to teach the Blue Lions house in the next chapter. Otherwise, he is unrecruitable in the other two houses. Note that any items that Dimitri has in the prologue will be lost if another house is chosen, so it is best to trade with Byleth before the prologue ends.
Overall
Subjective: The following part of this article is based upon the editor's personal experiences and opinions, and therefore may not be applicable for all readers.
|
As the main Lord of Azure Moon, Dimitri can be deployed on almost every map. Of the Lord trio, he is the most durable with a high HP growth and good Defense growth and boasts the highest Strength growth in the game, making him an excellent front line unit capable of taking punishment from enemies. His only downsides are his mediocre Resistance and Luck growths, leaving him vulnerable to Mages and susceptible to critical hits as well as slightly lowering his critical hit and magical avoid.
As a bearer of the minor Crest of Blaiddyd, he can double his damage output when using Combat Arts at the cost of more weapon durability; while it is useful in dire situations, it has a very low activation rate and will require some equipment management.
Given his skill levels, Dimitri will have easy access to the Myrmidon line (Myrmidon, Mercenary, Thief, Swordmaster), Soldier line (Soldier, Cavalier, Paladin), and his exclusive Lord line (Lord, High Lord, Great Lord). However, his class repertoire lacks versatility compared to the other main characters. Dimitri should also be prioritized for Tutoring during the Academy Phase, as he cannot be Tutored nor affected by Goals and Group Tasks from chapters 13 to 17. Compared to the other lords, he only has four in-game months of Tutoring and Goal experience during the War Phase (while Edelgard also has only four months of Tutoring available in the War Phase, this is simply because her route is shorter than the other Lords).
Specifically, his affinity for Lances and budding talent in Riding encourage Dimitri to progress through the cavalry class line. Although mastery of this class progression is not necessary, they do offer useful abilities such as Desperation from Cavalier, but care should be taken in regards to the Speed growth penalty applied by Cavalier and Paladin. In terms of master class, while Wyvern Lord is tempting due to its high statline, Dimitri has low starting levels for Flying and Axes as well as a bane in the latter. A suitable alternative would be Bow Knight, as this class avoid his banes and +2 Bow Range synergizes well with his Seal Movement budding talent and Canto. Despite his bane in Axes, it is worthwhile to class him into Brigand to acquire Death Blow, which will provide a damage boost to player phase attacks. Advancing Dimitri to War Master will require diligence, but learning Quick Riposte will allow him to double while preventing follow-ups on enemy phase if his HP is above 50%. Flying is also worth investing in for Alert Stance+, which combines well with Dimitri's post-timeskip personal skill, giving him excellent Avoid chance on enemy phase if he has full HP. However, these skills may require New Game+ or grinding unlimited auxiliary battles on Normal difficulty.
Dimitri excels in utilizing battalion skills as he is the only unit in the game that can access both Battalion Vantage and Battalion Wrath. When using these skills with a weapon like a Wo Dao or Killer Lance equipped, a high Dexterity Dimitri can easily achieve 100% critical chance during the enemy phase and kill enemies before they can retaliate. If Quick Riposte is acquired, this combination will let Dimitri inflict two critical hits before the enemy can counter. After the timeskip, Dimitri receives the King of Lions Corps battalion, whose Wave Attack gambit is effective against Armored foes. He receives the Hero's Relic Areadbhar after Chapter 15, which grants him the combat art Atrocity, allowing Dimitri to deal effective damage to every enemy type as well as +15 Might and +20 Hit at the cost of -3 weapon durability. If triggered alongside his Minor Crest of Blaiddyd, Dimitri is very likely to kill whatever he is attacking in one hit unless the enemy has multiple HP bars, though this will also result in a greater cost in weapon durability.
Overall, Dimitri is perhaps the most powerful physical offensive unit available to the player. While Claude is faster and more accurate, and Edelgard is more adept with magic, Dimitri can dish out more punishment than either of them while being able to take a significant beating. The only things that will hold him back are magic (which can deal serious damage to him) and his below-par Luck.
Gift List
| Gift Name | Type of Gift | Description | Rank |
|---|---|---|---|
| Whetstone | Favorite | A stone used to sharpen the blades of swords or lances. Appreciated by those who enjoy weapon maintenance. | ★★ |
| Owl Feather | Favorite | A feather from a messenger owl that can be used in a variety of ways. Appreciated by everyone. | ★★★ |
| Riding Boots | Favorite | Boots specially made for mastering the equestrian arts. Appreciated by those who enjoy horseback riding. | ★★★ |
| Training Weight | Favorite | A weight that you can strap to your back to build muscle. Appreciated by those who enjoy weight training. | ★★★ |
| Ceremonial Sword | Favorite | A beautiful ceremonial sword with a mangled blade. Appreciated by weapon collectors. | ★★★★ |
| Book of Sheet Music | Dislike | An old collection of sheet music filled with hymns and pastoral songs. Appreciated by those who enjoy music. | ★★★ |
| Armored Bear Stuffy | Dislike | A fluffy stuffed bear wearing distinguished armor. Appreciated by those who love animals or cute things. | ★★★ |
| Gemstone Beads | Dislike | Small, sparkling beads for sewing into fabric. Appreciated by fans of embroidery and handicraft. | ★ |
| Meal Name | Type of Meal | Description |
|---|---|---|
| Saghert and Cream | Favorite | A baked confection coated with Noa fruit cream and a currant reduction, often enjoyed as a dessert at family gatherings. |
| Sautéed Jerky | Favorite | Jerky aged in the monastery and sautéed for a delightfully salty flavor. A perfect snack to go with your favorite drink. |
| Onion Gratin Soup | Favorite | Onions stewed with white trout and baked with a layer of cheese on top. Will warm you up from the inside out. |
| Sweet Bun Trio | Favorite | Traditional pastries from Faerghus, known for their subtle sweetness. The dough is made with eggs and sugar. |
| Cheesy Verona Stew | Favorite | A rich dish consisting of verona and sautéed Teutates loach. These ingredients are boiled and served with two kinds of melted cheese. |
| Gautier Cheese Gratin | Favorite | A gratin of bird meat topped with heaps of Gautier cheese, which is famous for its low fat content. It has a unique flavor. |
| Peach Sorbet | Dislike | A sorbet made with thin slices of magically frozen peach, dusted with bean flour. |
Lost Items
| Lost Item | Description |
|---|---|
| Black Leather Gloves | High-quality leather gloves for wearing under gauntlets. They probably belong to someone picky about armor. |
| Training Logbook | A detailed record of someone’s combat training. It probably belongs to someone who trains relentlessly. |
| Dulled Longsword | A worn iron longsword that feels quite heavy. It seems like something Dimitri would own. |
Tea Party Conversations
- See also: Dimitri/Tea Party
Supports
- See also: Dimitri/Supports
- Byleth
- Dedue
- Felix
- Ashe
- Sylvain
- Mercedes
- Annette
- Ingrid
- Raphael
- Marianne
- Flayn
- Gilbert
- Alois
- Catherine
- Hapi
Fire Emblem Engage
- Known as the Emblem of Rivals. The wise and virtuous prince of a nation of knights.
Emblem Skills
| Emblem Ring | |||||||||
|---|---|---|---|---|---|---|---|---|---|
| Stat Boosts | |||||||||
| HP | Str | Mag | Def | Res | Dex | Spd | Lck | Bld | Mov |
| ◎ | ◎ | ◎ | |||||||
| Sync Skills | Engage Weapons | Engage Skill | Engage Attack | ||||||
(Shield Gambit) |
|||||||||
Bond Ring
- Crown prince of the Holy Kingdom of Faerghus, a land in another world. Leader of the Blue Lion House at Garreg Mach Monastery. He is courteous and sincere, but he hides darkness deep in his heart.

| ||
| Str +1 | ||
| Str +1 Dex +1 | ||
| World | HP +2 Str +1 Dex +1 | |
| HP +2 Str +2 Dex +1 |
Fire Emblem Heroes
- The Protector
- Crown prince of the Holy Kingdom of Faerghus. Known for his chivalry, it seems a darkness may lurk beneath the surface. Appears in Fire Emblem: Three Houses.
Base Stats
Rarity: ✯✯✯✯✯
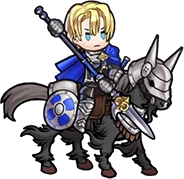 | Title | ||||
|---|---|---|---|---|---|
| The Protector | |||||
| Group | |||||
| Level | HP | Atk | Spd | Def | Res |
| 1 40 | 17/18/19 36/40/43 | 9/10/11 33/36/39 | 4/5/6 26/29/32 | 9/10/11 31/34/37 | 2/3/4 15/18/21 |
| Skills | Weapon | ||||
Skills
| Type | Name | Prerequisite | Default | Unlocked |
|---|---|---|---|---|
| Iron Lance | - | - | - | |
| Steel Lance | - | - | - | |
| Silver Lance | - | - | - | |
| Noble Lance | Silver Lance | - | ||
| Retribution | - | - | ||
| Vengeance | Retribution | - | ||
| A | - | - | ||
| - | ||||
| - | ||||
| B | - | - | ||
| - | ||||
Overall
Subjective: The following part of this article is based upon the editor's personal experiences and opinions, and therefore may not be applicable for all readers.
|
Base Set
Dimitri is similar to many Lance Cavaliers, which tend to have physical bulk and high Atk. His middling Spd makes him susceptible to follow-up attacks and low Res leaves him vulnerable to Mages and Dragons. However, these glaring weaknesses are mitigated by his base kit.
Noble Lance grants +3 Atk augmenting Dimitri's base stats to an impressive 55 at neutral IV. His weapon's unique effect ameliorates his Spd issue. If both he and his opponent are at 100% HP or both have HP less than 100%, he is guaranteed a follow-up. This synergizes well with his high Atk, allowing him to deal massive damage to his enemies so long as he maintains the threshold to utilize its effect. While it requires some coordination, the output is worth it.
Vengeance takes 50% of Dimitri's current damage and adds it to his Atk. Since the special is dependent on HP, it can be devastating or inconsequential. Dimitri has Death Blow 4, giving him a solid +8 Atk when he initiates, bringing his Atk to 63 at neutral IV upon initiation. Lull Attack Defense neutralizes any visible Atk/Def buff his opponent has and inflicts a -3 Atk/Def debuff on them during combat, further enhancing his damage and bulk.
Counters
Dimitri is weak to Mages as his neutral 18 Res is too low to resist magic attacks, even from those at weapon disadvantage. His cavalry status is a double-edged sword, while it gives him excellent movement, he is vulnerable to cavalry effective weapons like Zanbato or Ridersbane. All three forms of Micaiah can easily nuke him, even without their cavalry effective weapons, negating the use of Grani's Shield. Dragons can deal heavy damage as well as Staff units with Dazzling/Wrathful Staff who can engage him without fear of retaliation. Otherwise, standard bulky Greens like Surtr and Hector can tank him and retaliate with weapon advantage.
Skill Inheritance
As with most cavalry units, Reposition is recommended as a standard positioning skill.
Dimitri's remaining kit is flexible, Bonfire or Luna can deal greater and more consistent damage boosts when his special procs. He can also make great use of Galeforce as it will help him maneuver across the map, especially if used in tandem with a Heavy Blade seal. Movement skills such as Wings of Mercy, Hit and Run, and Drag Back are suggested as a B Skill. The C Skill is best suited for cavalry support skills as he can benefit from his allies' cavalry buffs while benefiting them in return. Savage Blow is an excellent alternative, as it is unlikely for Dimitri to escape all battles unscathed and will allow him to continue utilizing Noble Lance's effect with a Dancer on standby or Galeforce active.
Meet Some of the Heroes
| The Protector Dimitri | |||
|---|---|---|---|

|
The Blue Lions is one of the houses that make up the Officers Academy in central Fódlan. This house is where students from the Holy Kingdom of Faerghus gather, and it's led by none other than the kingdom's prince and future king, Dimitri! | ||

|
Dimitri is chivalrous and kind, and he has a good reputation for his strong sense of duty and responsibility. People also like him because he doesn't let his royal standing come between him and others! | ||
|
With outstanding skills like his, he truly deserves his leadership of the Blue Lions. He's an expert with lances in particular! | ||
|
Sometimes, Dimitri seems to have a lot on his mind. But even so, I'm sure that won't stop him from being a great friend to the Order of Heroes! | ||
| Closely Associated Characters | |||
| Edelgard | The heir apparent of the Adrestian Empire. She's dignified, refined, and self-confident—traits that mask her raw ambition. She leads the Black Eagle House, making her Dimitri's peer. | ||
| Claude | The heir of Duke Riegan, head of the Leicester Alliance. He's a hard man to get a grasp of, and employs means both fair and foul to get his way. Leader of the Golden Deer House and Dimitri's arch-rival. | ||
- King of Faerghus
- King of the Holy Kingdom of Faerghus. Although he lost himself for a time, he now walks the path of a great ruler. Appears in Fire Emblem: Three Houses.
Base Stats
Rarity: ✯✯✯✯✯
 | Title | ||||
|---|---|---|---|---|---|
| King of Faerghus | |||||
| Group | |||||
| Level | HP | Atk | Spd | Def | Res |
| 1 40 | 18/19/20 37/41/44 | 9/10/11 37/40/44 | 7/8/9 33/36/39 | 9/10/11 37/40/44 | 5/6/7 15/19/22 |
| Skills | Weapon | ||||
Skills
Overall
Subjective: The following part of this article is based upon the editor's personal experiences and opinions, and therefore may not be applicable for all readers.
|
Base Set
Winner of the Choose Your Legends Round 4 for the men's division, Brave Dimitri does not disappoint. He has an excelled offensive spread at 40 Atk and 36 Spd with a strong 81 physical bulk. Brave Dimitri can hit incredibly hard and can easily double a huge portion of the cast, especially with a Spd asset. His only downside is his low Res, which can leave him vulnerable to Mages. Still, he has plenty in his base kit that makes him a punishing unit to face and can easily clear a field of enemies with ease. Choosing Brave Dimitri as a free Brave Hero leads to excellent results even with a neutral spread version.
Moon Gradivus allows Brave Dimitri to counterattack from range and hastens his special cooldown when his opponent hits him. While mainly built with defense in mind, the acceleration still works offensively and thus, he can unleash his Special virtually during every single round of combat.
Brave Dimitri's unique Brave Skill is Blue Lion Rule. If his Def is greater than his foe's, he reduces damage from incoming AOE damage specials and in-combat damage from his foe based on the difference of the stats x4 (maximizing at 40%). Brave Dimitri becomes incredibly bulky and can even take some hard hitting mage attacks with relative ease due to the common low bulk of them. Additionally he makes a guaranteed follow-up under the same activation requirement if his opponent initiates. While he has solid enough Spd to not need this for most matchups, it does give him a leg against many of the top tier offensive Spd units.
Noontime grants him a sustain special that heals him for 30% of the damage he deals when it activates. He hits hard enough that he will get a sizeable return on his regeneration. Attack Defense Unity is a new Skill A that he introduced and if he is within two spaces of an ally, he gains +5 Atk/Def and also gains an additional bonus to his Atk/Def if he has a penalty inflicted on him such as through Threaten Attack or Chill Defense. Both stats independently gain stats during combat based on the penalized amount x2. This makes trying to deal with him with such skills futile as he will merely turn them in to bonuses so long as he stays relatively near his allies. Finally Joint Hone Attack grants himself and his adjacent allies +5 Atk at the start of his turn if he is adjacent to at least one foe.
Counters
As mentioned above, trying to depower Brave Dimitri through debuffs to his Atk and Def are ill advised as he will merely turn them into strengths. However, his Spd can still be affected without penalty as well as his Res. While he has enough Spd, he does not nearly have enough to avoid punishment from perhaps two of his strongest counters, Legendary Celica and Thrasir, who outspeed and can even outright destroy him in a single round of combat due to color advantage, superior Spd, and targeting his magical bulk. Even Nino under the right circumstances can achieve this. Dazzling/Wrathful Staff also works well as Brave Dimitri is unable to run Null C-Disrupt without forfeiting his strong Blue Lion Rule skill, thus leaving him unable to counterattack the uncontested chip damage.
Skill Inheritance
Brave Dimitri's base kit is perfectly tailored for success and really he only requires a Positional Assist skill, namely Reposition as a superior movement option for pulling allies out of danger. Pulse Smoke can be considered for an alternative Skill C just to slow down his enemy's special cooldown charge. If an alternate special is desired, Dragon Fang is an option considering how his high Atk will allow for a great deal of extra damage to be added on every time. Bonfire is also an option, taking his high Def into account, but it is overshadowed by specials that calculate extra damage using his Atk.
Meet Some of the Heroes
| King of Faerghus Dimitri | |||
|---|---|---|---|
|
The Holy Kingdom of Faerghus is one of the three great powers of Fódlan. And now Dimitri, who became king after enduring great hardship, has answered our summoner's call, bringing the lance Moon Gradivus with him! | ||

|
Dimitri's parents and family perished in a massacre during his childhood, and from that terrible day onward, he could think of nothing but revenge. When the Adrestian Empire began its war, Dimitri snapped, and slaughtered countless imperial soldiers in acts of blind vengeance. | ||

|
But it wasn't too late to bring him back from the brink! Byleth and Dimitri's other allies rallied around him, setting him back on his rightful path as king once more. | ||
|
Having found something to live for, Dimitri also rediscovered his just and true spirit. Now he wields his lance not for slaughter, but for justice and for the future of his people! | ||
| Closely Associated Characters | |||
| Byleth | Child of the former captain of the Knights of Seiros, Jeralt. A stoic, capable professor at the Officers Academy. Byleth supports Dimitri after he loses his way, and helps him find something to live for. | ||
| Edelgard | Princess and heir apparent of the Adrestian Empire. Her steadfast ambition is veiled by her elegant, self-confident demeanor. She and Dimitri were close during their early childhood. | ||
- Savior King
- King of the Holy Kingdom of Faerghus. Overthrew the empire and united all of Fódlan. Appears in Fire Emblem: Three Houses.
Base Stats
Rarity: ✯✯✯✯✯
 | Title | ||||
|---|---|---|---|---|---|
| Savior King | |||||
| Group | |||||
| Level | HP | Atk | Spd | Def | Res |
| 1 40 | 17/18/19 36/40/43 | 10/11/12 38/41/45 | 7/8/9 37/41/44 | 10/11/12 34/37/40 | 4/5/6 14/18/21 |
| Skills | Weapon | ||||
Skills
Overall
Subjective: The following part of this article is based upon the editor's personal experiences and opinions, and therefore may not be applicable for all readers.
|
Base Set
Legendary Dimitri carries a pack of strengths that immediately makes him an incredibly powerful Lance Infantry Legendary Hero. Blessed with the Pair Up Water blessing, Legendary Dimitri can fix what few weaknesses he has by pairing himself with units who can cover them. On his own, he has a monstrous 41 Atk and Spd, allowing him to have powerful offenses and can avoid getting doubled by a vast majority of units in the game. He also has a modest 77 physical bulk, allowing him to duel most units by taking a hit or two. However, his low 18 Res leaves him extremely vulnerable to magic users and Dragons. Still, his kit does alleviate this weakness and leaves only a small group of units that can flat out dispatch him. All-in-all, Legendary Dimitri has massive strengths that can destroy waves of his foes if left with no direct counters to him.
Areadbhar has an oppressive set of effects with the special cooldown acceleration being the mere tip of its strengths. If he is above 25% HP, he gains +5 Atk/Spd/Def/Res during combat, making him all the more threatening in terms of raw stat values and remaining above 25% is not difficult for Legendary Dimitri with the right skills and inheritances. In addition, if his Spd is higher than his foes, he reduces the damage received from foes (including AOE specials) based on the difference between the Spd of both units x4, maximizing at a 40% reduction should the Spd difference be more than 10 in Dimitri's favor. Needless to say that there are very few units who naturally avoid this last stat and for an unmerged neutral Spd Legendary Dimitri, unless the foe has 46 Spd or more during battle, that effect will have some effect on the outcome of the battle.
Atrocity further increases his overall damage by 25% if his opponent is at least 50% HP or more at the start of combat, already pushing his insane strength forward to demolishing levels. In addition, after combat in which the opponent does survive, he slows the enemy's special cooldown by one charge and inflicts a -5 penalty to his foe's four core stats as well as their allies within two spaces of Legendary Dimitri. For Legendary Dimitri alone, if he can get this effect off, refresh, and then immediately attack a foe in range, he can possibly have a 10 stat difference which will all but secure a kill onto even the most hardy of foes.
Blazing Wind inflicts damage to the targeted foe and foes within the AOE's effect range based on the difference between his Atk and their Def. While the damage can be spread across multiple units is useful, moving more foes out of Atrocity's damage range may actually be more of a detriment than a benefit for his overall combat. Sturdy Impact increases his Atk by 6 and Def by 10 if he initiates combat will also negating his foe's follow-up attack either by stat difference or through skills like Vengeful Fighter. Finally Legendary Dimitri introduces a new Skill C, Odd Tempest which on odd-numbered turns, he can move one additional space, essentially making him a Cavalry without the movement penalties from trenches. As a result, he has far more range than he may seem to have. Astute players will need to keep this movement buff in mind when checking the danger zones of the enemy.
Counters
Most of Legendary Dimitri's weaknesses hinges upon whether or not he has access to Distant Counter. If he does not, most Green Mages and some Green Dragons carry the innate magical damage to instantly annihilate him, though an emphasis on Spd to prevent as much damage reduction is key for countering him. Even some Blue mages can dispatch him if he is lacking Distant Counter. His low Res makes him vulnerable to most conventional Ploy units, with Speed Ploy being a bane to his end goals by lowering his Spd by up to 5 and opening the door for more units to avoid his damage range. Otherwise, high bulk Greens can solidly wall him off with Legendary and Brave Edelgard are excellent counters to him as well as Rinkah. Even with Distant Counter, the Wrathful/Dazzling Staff combo can safely engage upon him and deal moderate damage if not deal with him if they can be refreshed.
Skill Inheritance
Legendary Dimitri's empty assist skill can be easily filled with a positional skill, namely Reposition for its sheer utility. Noontime is a much better special as it can help him maintain his HP threshold to keep Areadbhar's effect active as much as possible. Distant Counter is his best Skill A option just to narrow down/limit the number of counters who can safely engage him. Skill C can be maintained to give himself additional movement, but inheriting the likes of Joint Drive Speed adds an additional +4 Spd to himself during combat so long as he is within two spaces of an ally while also providing the same buff to his ally.
Meet Some of the Heroes
| Savior King Dimitri | |||
|---|---|---|---|

|
Dimitri is the leader of the Holy Kingdom of Faerghus. You might be misled by his seemingly slender frame, but he's seriously strong! | ||

|
When he was a young child, Dimitri lost both of his parents. This incident left a terrible scar on his heart, and even when later he entered the Officers Academy at Garreg Mach Monastery, the wound still showed no sign of healing. | ||

|
Sadly, a number of other tragedies would follow. For a while, Dimitri was lost to utter despair, but with the support of his professor from the academy and his fellow classmates, he regained the emotional fortitude his kingdom needed. | ||

|
Having gotten back on his feet, Dimitri joined the war against the Adrestian Empire to put a stop to the strife that had befallen Fódlan—with the professor he so respected and the classmates he relied on right by his side! | ||
| Closely Associated Characters | |||
| Byleth | Child of the former captain of the Knights of Seiros, Jeralt. A stoic, capable professor at the Officers Academy. Serving the role of Dimitri's teacher, Byleth sets him on the right path. | ||
| Edelgard | After ascending as Adrestian Emperor, she defeated the Church of Seiros, solidifying her reign over all of Fódlan. She and Dimitri knew each other as children. | ||
- Savage Boar
- Prince of Faerghus overcome by hatred. Vowing to have his revenge on Edelgard, he commits to slaughtering his foes without mercy. Appears in Fire Emblem: Three Houses.
Base Stats
Rarity: ✯✯✯✯✯
 | Title | ||||
|---|---|---|---|---|---|
| Savage Boar | |||||
| Group | |||||
| Level | HP | Atk | Spd | Def | Res |
| 1 40 | 17/18/19 36/40/43 | 11/12/13 39/42/46 | 6/7/8 36/40/43 | 11/12/13 35/38/41 | 3/4/5 13/17/20 |
| Skills | Weapon | ||||
Skills
| Type | Name | Prerequisite | Default | Unlocked |
|---|---|---|---|---|
| Iron Lance | - | - | - | |
| Steel Lance | - | - | - | |
| Silver Lance | - | - | - | |
| Vengeful Lance | - | - | ||
| Night Sky | - | - | - | |
| Glimmer | Night Sky | - | ||
| A | - | - | ||
| - | ||||
| - | ||||
| B | - | |||
| C | - | - | ||
| - | ||||
Overall
Subjective: The following part of this article is based upon the editor's personal experiences and opinions, and therefore may not be applicable for all readers.
|
Base Set
Fallen Dimitri is a Lance Infantry designed to be an aggressive unit whose sole purpose is to constantly slaughter the enemy forces on his turn, fitting for this form's mindset. His stat investment is focused solely on his offense, with a powerful 42 Atk and 40 Spd. He also has a decent 78 physical bulk, but is extremely frail to mages at a low 17 Res.
Vengeful Lance further boosts his Atk by 3, bringing his total Atk with his weapon to 61. If he is not adjacent to an ally, he gains +6 Atk/Spd during combat. If his Atk is greater than his foe's Def and he cannot perform a follow-up attack, he boosts his damage by 50% based on the difference of his Atk and his foe's Def. This effect mainly helps Fallen Dimitri deal significantly more damage against a foe that can prevent his lost follow-up attack. As a result, the effect is rather situational and only serves to help him slay a unit employ specific set of skills.
He has a unique Skill B, Murderous Lion which inflicts -3 Spd/Def on his foe during combat if he is not adjacent to an ally. It also gives him a special【Canto (Rem. +1)】status after combat, allowing him to use up any remaining movement he has after preforming an interactive action like attacking or using an assist skill and also gains 1 movement point as well. Odd Tempest grants him an additional space of movement during odd numbered turns and can stack with the Canto boost as well.
Counters
Fallen Dimitri's weakness is fairly straightforward as his frail magical bulk leaves him wide open to a majority of Tome users. Bad AI can also lead to his downfall as nearly all of his effects require that he be away from his allies to reap the full benefits. Bulky Greens can also take his powerful attacks to a certain degree, but they need to be cautious.
Skill Inheritance
Fallen Dimitri's only empty skill is his Assist Skill, which Reposition is an easy fill for its utility, though he needs to make sure that his allies can move away from him otherwise he loses his effects. Shove or Smite are in some cases better choices since they keep his allies away from him. Galeforce can work on him given the aggressive nature of his kit, though he may need to give himself a Slaying Lance to better suit this.
Meet Some of the Heroes
| Savage Boar Dimitri | |||
|---|---|---|---|
|
Today I'll be introducing you to Dimitri from the Holy Kingdom of Faerghus! That said, I'm a little worried about that gloomy look on his face… | ||

|
Dimitri was the only royal who survived an underhanded plot that took place when he was a child. His hatred toward the schemers who took the lives of his family never left him, enveloping his heart in a deep darkness. | ||

|
When the Adrestian Empire embarked on its conquest of Fódlan, Dimitri returned to Faerghus to fight back. But the kingdom was hardly unified, and there were many struggles ahead. | ||
|
Having been the victim of plots and betrayals for so long, Dimitri closed his heart off to the world. I wonder if he'll ever smile again… | ||
| Closely Associated Characters | |||
| Edelgard | After ascending as Adrestian Emperor, she embarked on a campaign to defeat the Church of Seiros and solidify her reign over all of Fódlan. She opposes Dimitri. | ||
| Dedue | Survivor of the tribe that inhabited the Duscur Region west of the Holy Kingdom of Faerghus. Swore loyalty to Dimitri. | ||
- Sky-Blue Lion
- Crown prince of the Holy Kingdom of Faerghus and student at Garreg Mach Monastery. He has come to the tropics for some summer training. Appears in Fire Emblem: Three Houses.
Base Stats
Rarity: ✯✯✯✯✯
 | Title | ||||
|---|---|---|---|---|---|
| Sky-Blue Lion | |||||
| Group | |||||
| Level | HP | Atk | Spd | Def | Res |
| 1 40 | 17/18/19 36/40/43 | 8/9/10 38/42/45 | 9/10/11 37/40/44 | 8/9/10 32/35/38 | 3/4/5 13/17/20 |
| Skills | Weapon | ||||
Skills
| Type | Name | Prerequisite | Default | Unlocked |
|---|---|---|---|---|
| Iron Axe | - | - | - | |
| Steel Axe | - | - | - | |
| Silver Axe | - | - | - | |
| Unyielding Oar | - | - | ||
| Night Sky | - | - | - | |
| Glimmer | Night Sky | - | - | |
| A | - | - | ||
| - | ||||
| - | ||||
| B | - | |||
| C | - | - | ||
| - | ||||
| - | ||||
| - |
Overall
Subjective: The following part of this article is based upon the editor's personal experiences and opinions, and therefore may not be applicable for all readers.
|
Base Set
Counters
Skill Inheritance Options
Meet Some of the Heroes
| Sky-Blue Lion Dimitri | |||
|---|---|---|---|
|
Where's Dimitri? I'm sure we invited him... What?! He's gone swimming all the way to the next island?! Well, I suppose that kind of stamina is exactly what we should expect from someone in charge of one of the houses of Fódlan's Officers Academy! | ||

|
He's certainly pulled off a stylish look with that sun visor and swimsuit combination! By the way, that brooch he's using to fasten his fetching towel-cape matches the one he got for his professor's birthday! | ||

|
Oh, and check out the palm leaves he's used to decorate that large wooden oar he's carrying! That thing looks pretty heavy, but it doesn't seem like he's having any trouble at all using it one-handed! | ||
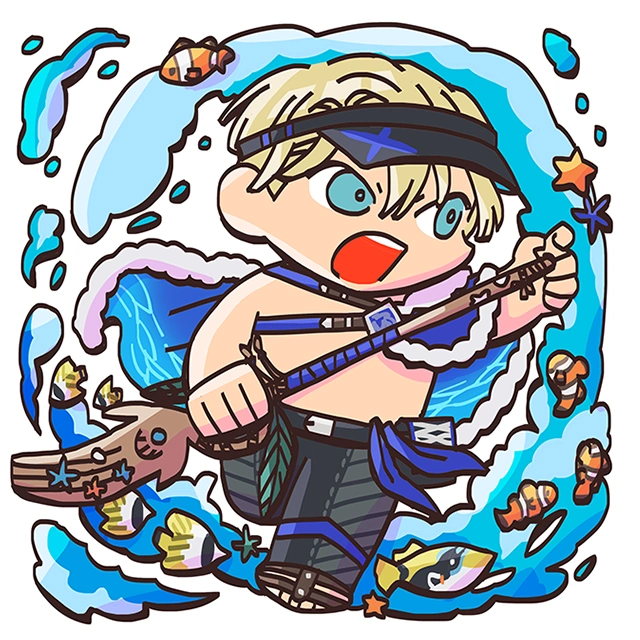
|
Dimitri always seems to have so much on his mind. I hope he takes this opportunity to relax, enjoy his vacation, and blow away those dark clouds a little! | ||
| Closely Associated Characters | |||
| Byleth | Child of the former captain of the Knights of Seiros, Jeralt. A stoic, capable professor at the Officers Academy. Guides Dimitri as his professor. | ||
| Edelgard | Princess and heir apparent of the Adrestian Empire. Her steadfast ambition is veiled by her elegant, self-confident demeanor. She and Dimitri were friendly as children. | ||
| Claude | Member of House Riegan and leader of the Leicester Alliance. The sea air makes his heart race. As leader of the Golden Deer House, he is a rival to Dimitri. | ||
- Blessed Protector
- Crown prince of the Holy Kingdom of Faerghus, delivering winter warmth to the people of Askr as their winter envoy. Appears in Fire Emblem: Three Houses.
Base Stats
Rarity: ✯✯✯✯✯
 | Title | ||||
|---|---|---|---|---|---|
| Blessed Protector | |||||
| Group | |||||
| Level | HP | Atk | Spd | Def | Res |
| 1 40 | 18/19/20 37/41/44 | 7/8/9 44/47/51 | 12/13/14 42/46/49 | 7/8/9 29/32/35 | 3/4/5 16/19/22 |
| Skills | Weapon | ||||
Skills
Overall
Subjective: The following part of this article is based upon the editor's personal experiences and opinions, and therefore may not be applicable for all readers.
|
Base Set
Counters
Skill Inheritance
Meet Some of the Heroes
| Blessed Protector Dimitri | |||
|---|---|---|---|

|
Dimitri has come from the Officers Academy in Fódlan to join us at the winter festival! I wonder what jolly surprises are in store for him today? | ||

|
Red-and-green decorations are essential to the festival—but as you can see, blue outfits are essential to Dimitri! | ||
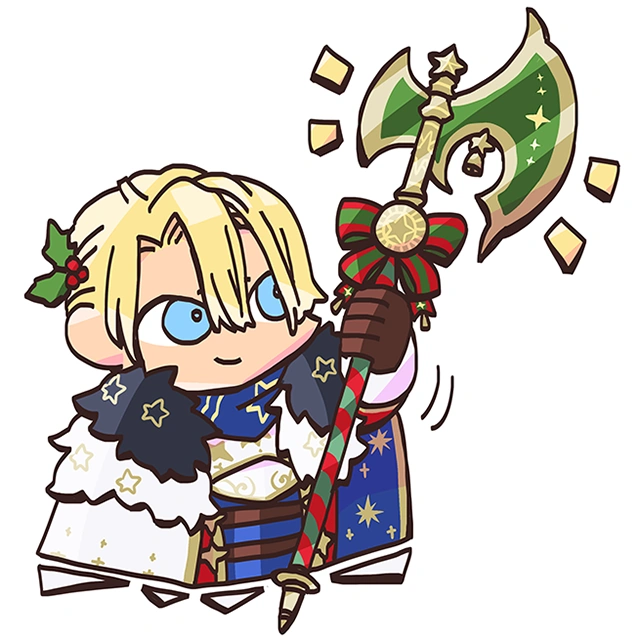
|
Not that he's ignoring the theme, of course—that hefty axe he's carrying for the festival is decorated with cheerful bells and stars! I can already see him swinging that thing around with his impressive strength as if it weighed nothing at all! | ||
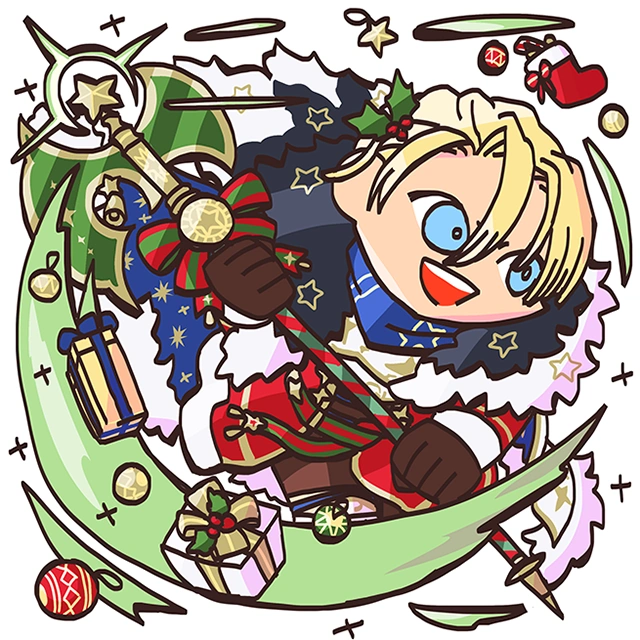
|
The winter festival is a special time of year where friends and family exchange gifts with one another. I wonder what Dimitri wants this year? | ||
| Closely Associated Characters | |||
| Edelgard | Princess and heir apparent of the Adrestian Empire. Her steadfast ambition is veiled by her elegant, self-confident demeanor. A house leader like Dimitri, she oversees the Black Eagle House. | ||
| Claude | Heir to House Riegan, the leading house of the Leicester Alliance. Employs both an easygoing attitude and an effortless skill for scheming. Leader of the Golden Deer House, making him a friendly rival to Dimitri. | ||
Fire Emblem Warriors: Three Hopes
Base Stats
| Starting Class | Crest | ||||||||
|---|---|---|---|---|---|---|---|---|---|
| Level | HP | Str | Mag | Dex | Spd | Lck | Def | Res | Cha |
| 1 | 3600 | 11 | 7 | 11 | 10 | 8 | 9 | 7 | 11 |
| Magic | Combat Arts | Abilities | Starting Items | ||||||
| - | |||||||||
Learnt Abilities
- Beginner Classes
| Ability | Learned at | Notes |
|---|---|---|
Myrmidon |
- | |
Myrmidon |
Totals with additional Sword Prowesses learned | |
Myrmidon |
- | |
Soldier |
- | |
Soldier |
Totals with additional Lance Prowesses learned | |
Soldier |
- | |
Fighter |
- | |
Fighter |
Totals with additional Axe Prowesses learned | |
Fighter |
- | |
Monk |
- | |
Monk |
Totals with additional Faith learned | |
Monk |
- |
- Intermediate Classes
- Advanced Classes
- Master Classes
Supports
- See also: Dimitri/Warriors: Three Hopes Supports
Recruitment (Warriors)
Dimitri will automatically be recruited if Shez chooses to join the Blue Lion house in Chapter 2. If Shez chose to join any other house, Dimitri cannot be recruited whatsoever.
Dimitri will only be playable during Scarlet Blaze or Golden Wildfire through the Record Keeper during a New Game+ file, as long as that file has completed Azure Gleam data.
Quotes
Three Houses
Engage
Heroes
Warriors: Three Hopes
Possible Endings
"Just a minute! The following section contains spoilers. Viewing it will cost a lot. Are you prepared to pay for it?"
|
- Dimitri - Savior King
- After his coronation, Dimitri spent his life reforming and ruling justly over Fódlan. He focused particularly on improving living situations for orphans and improving foreign relations. He was known for listening intently to the voices of all, and for instituting a new form of government in which the people were free to be active participants. He lived for his people and alongside them, and was thusly dubbed the Savior King.
- Dimitri and Byleth
- Paired with the end of the war, the joyous marriage of Byleth, the newly-appointed archbishop, and Dimitri, the newly-crowned king of Faerghus, gave the people of Fódlan much to celebrate. The two were devoted to improving life for the people and to seeking greater wisdom in order to reform the government and the church from the inside out. As leaders of church and state respectively, at times they engaged in heated debate. Even still, when enjoying a long horse ride or a quiet evening, they were not as the world saw them, but rather two adoring spouses, desperately in love. They remained as such for the rest of their days.
- Dimitri and Dedue
- After his coronation, Dimitri assumed the throne of the Holy Kingdom of Faerghus, and his loyal vassal, Dedue, remained ever at his side. Among Dimitri's achievements was the reconciliation with Duscur: an extraordinary effort that required extensive negotiations to get past a history of betrayal and oppression. It was a trying task, but Dimitri never once considered giving up. While they behaved as lord and vassal in public, it is said that Dimitri and Dedue were more like family in private. When Dimitri finally fell to illness, Dedue tended to his liege's deathbed, and then took up a post at his grave for the rest of his days. When the time came, they were buried beside each other.
- Dimitri and Felix
- After his coronation, Dimitri assumed the throne of the Holy Kingdom of Faerghus and spent his life ruling justly over Fódlan. At his side every step of the way was his right-hand adviser, Duke Felix Fraldarius. Their lifelong bond grew so strong over time that, when Dimitri finally passed, it is said that Felix's grief was more potent even than the queen's. The stories of their lives were passed down to future generations as chivalric tales that rivaled those of Loog, the King of Lions, and his sworn friend, Kyphon.
- Dimitri and Annette
- After his coronation, Dimitri assumed the throne of the Holy Kingdom of Faerghus and spent his life ruling justly over Fódlan. At his side every step of the way was his queen, Annette, whose wisdom provided not only reliable counsel, but a whole assortment of revolutionary policies. The royal couple's sincere approach to governance earned them widespread acclaim, securing their line as a dynasty that lasted for generations to come. Their married life was said to be full of love and cheer.
- Dimitri and Mercedes
- After his coronation, Dimitri assumed the throne of the Holy Kingdom of Faerghus and took his friend, Mercedes, as his queen. Most were shocked by his choice, as she did not come from a distinguished noble line. Still, when the people saw her devotion to healing the damage caused by the war, they decided she was the ideal match for the one they called the Savior King. It is said that the couple led busy but happy lives, and that they never failed to express their appreciation for one another, no matter the hardship.
- Dimitri and Ingrid
- After his coronation, Dimitri assumed the throne of the Holy Kingdom of Faerghus and spent his life ruling justly over Fódlan. At his side every step of the way was Ingrid, who left House Galatea to serve House Blaiddyd as a knight. As they worked together to restore the Kingdom, the pair fell in love and were eventually married. But while Ingrid was happy to play the role of queen, and to support her husband in public and in private, she insisted on taking up a weapon and serving on the front lines in battle.
- Dimitri and Marianne
- Dimitri assumed the throne of the Holy Kingdom of Faerghus and spent his life ruling justly over Fódlan. Several years after his coronation, he took Marianne, whom he loved dearly, as his queen. Many of Dimitri's greatest achievements can be traced to wisdom provided by Marianne, who had received tutelage from her adoptive father, Margrave Edmund. Many years later, when Dimitri fell to illness, he clutched his queen's hand until the very end. The queen's journal, uncovered after her passing, contained recounts of their time together. The last words, penned with trembling hand, are: "I would not trade our time together or the happiness we knew for anything."
- Dimitri and Flayn
- Dimitri assumed the throne of the Holy Kingdom of Faerghus and spent his life ruling justly over Fódlan. Some time after his coronation, he took Flayn, who now enjoyed a position of prominence in the church, as his queen. Many speculated at first that the marriage was politically motivated, but it is said that over time the love they had for one another became clear to see. Their lives were full of warmth and tranquility. Many years later, when Dimitri passed, his journals revealed that he had kept a meticulous record of all the meals he and his wife had enjoyed together.
- Dimitri and Gilbert
- Dimitri assumed the throne of the Holy Kingdom of Faerghus and spent his life ruling justly over Fódlan. At his side was the knight, Gustave, who had discarded the name of Gilbert and reaffirmed his oath of fealty to the royal family. After many more years of service, in which the trust between them grew and never wavered, Gustave finally wished to retire. Though he bristled slightly at Dimitri's request to look after and tutor the young prince, it is said that Gustave took on that duty with due patience and solemnity for the remainder of his life.
- Dimitri and Catherine
- Dimitri assumed the throne of the Holy Kingdom of Faerghus and spent his life ruling justly over Fódlan. Two years after his coronation, he announced his marriage to Catherine. The people speculated wildly about how this union came to be. Some said that Dimitri spent two full years wooing her, while others suggested that the matter was resolved by a duel. In any case, the couple worked tirelessly to reform the Kingdom, but despite their busy days, it is said that they always found time for sparring, and that the clash of steel could be heard throughout the castle at all hours.
- Dimitri and Hapi
- After his coronation, Dimitri assumed the throne of the Holy Kingdom of Faerghus. He focused first and foremost on the restoration of the Kingdom but at the same time worked to expose the schemes of Cornelia and of those who conspired to bring about the Tragedy of Duscur. Always by his side was Hapi, who relentlessly pursued those who slither in the dark and, with Dimitri's help, discovered a magic spell to rid herself of her condition. Once all had settled down, the pair was known to have tea together often in the capital. It is said that Dimitri's tendency to discuss politics during tea time frequently moved Hapi to smirk, shake her head, and sigh.
Non-Canon Appearances
Super Smash Bros. Ultimate


Artwork of Byleth's Dimitri costume
Dimitri appears in Super Smash Bros. Ultimate as a background character at Garreg Mach Monastery and as a collectible spirit in both his Academy and War Phase appearances. Byleth's third alternate palette is based off of Dimitri.
- Spirit Info
| No. | Name | Image | Type | Class | Slots | Effect |
|---|---|---|---|---|---|---|
| 1,384 | Dimitri (Fire Emblem) | 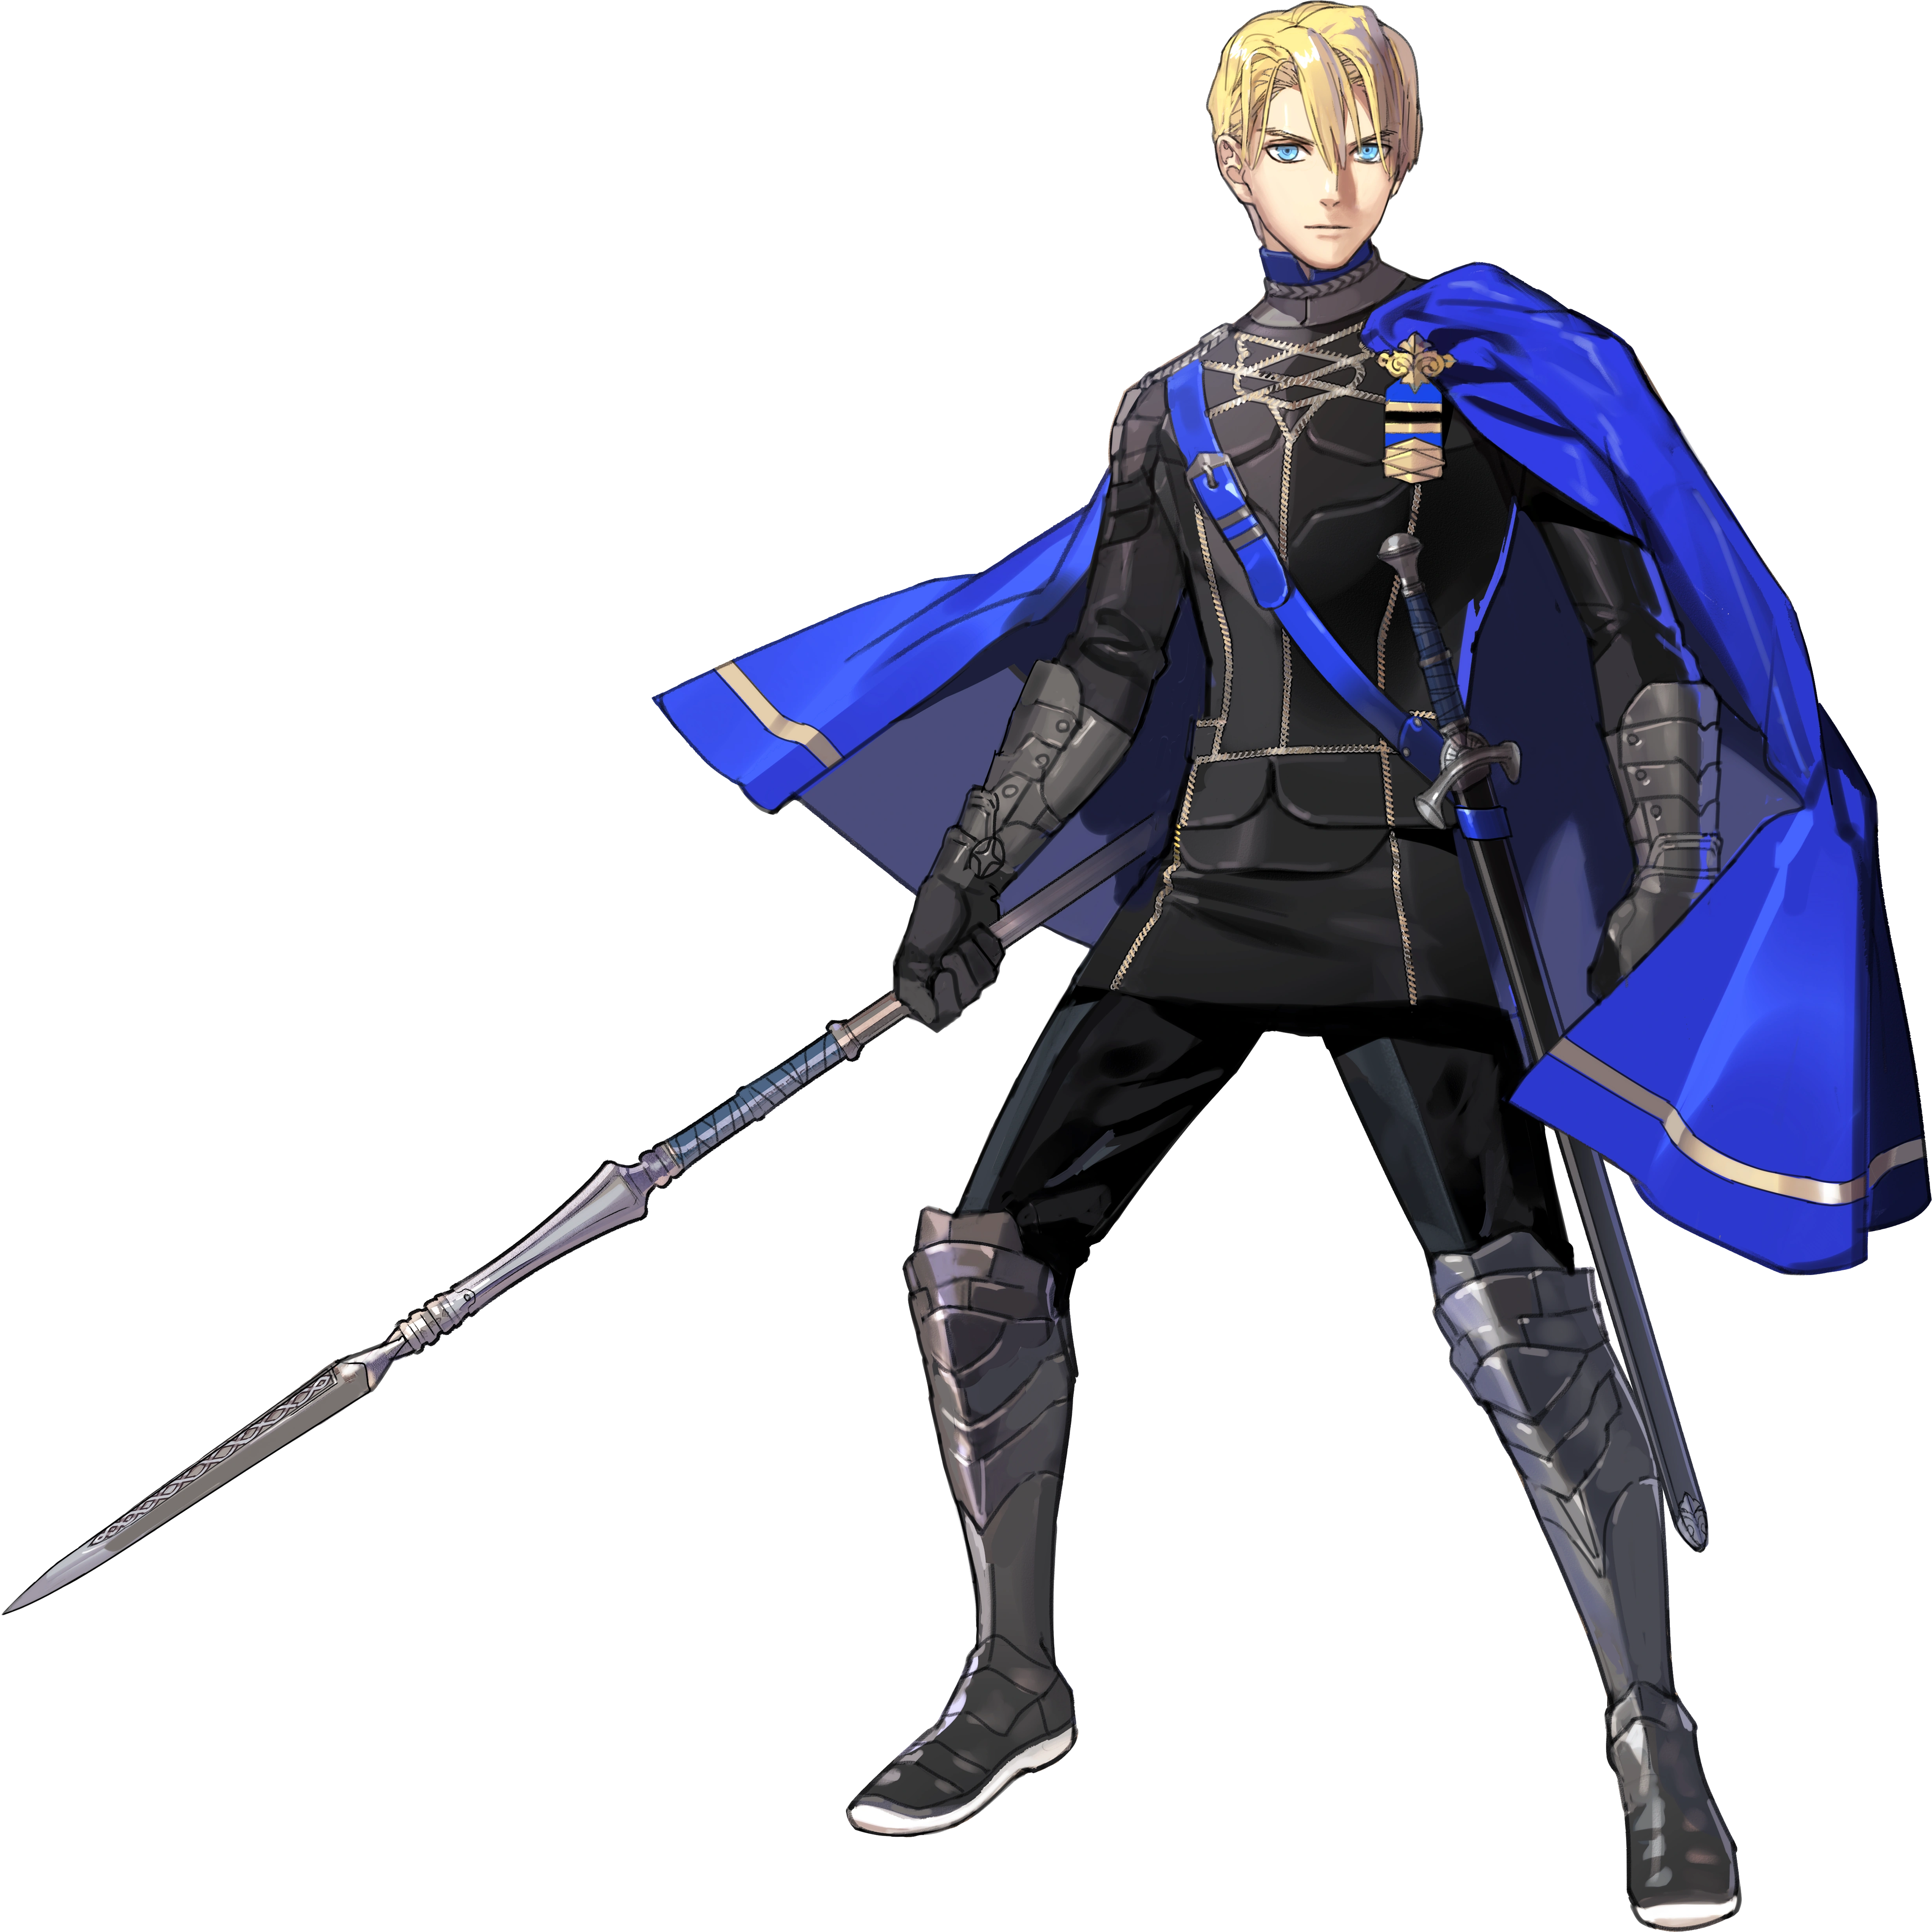
|
Primary (Shield) | ★★☆☆ (Advanced) | 2 | Can Be Enhanced at Lv. 99 |
| 1,385 | Dimitri - Five Years Later (Fire Emblem) | 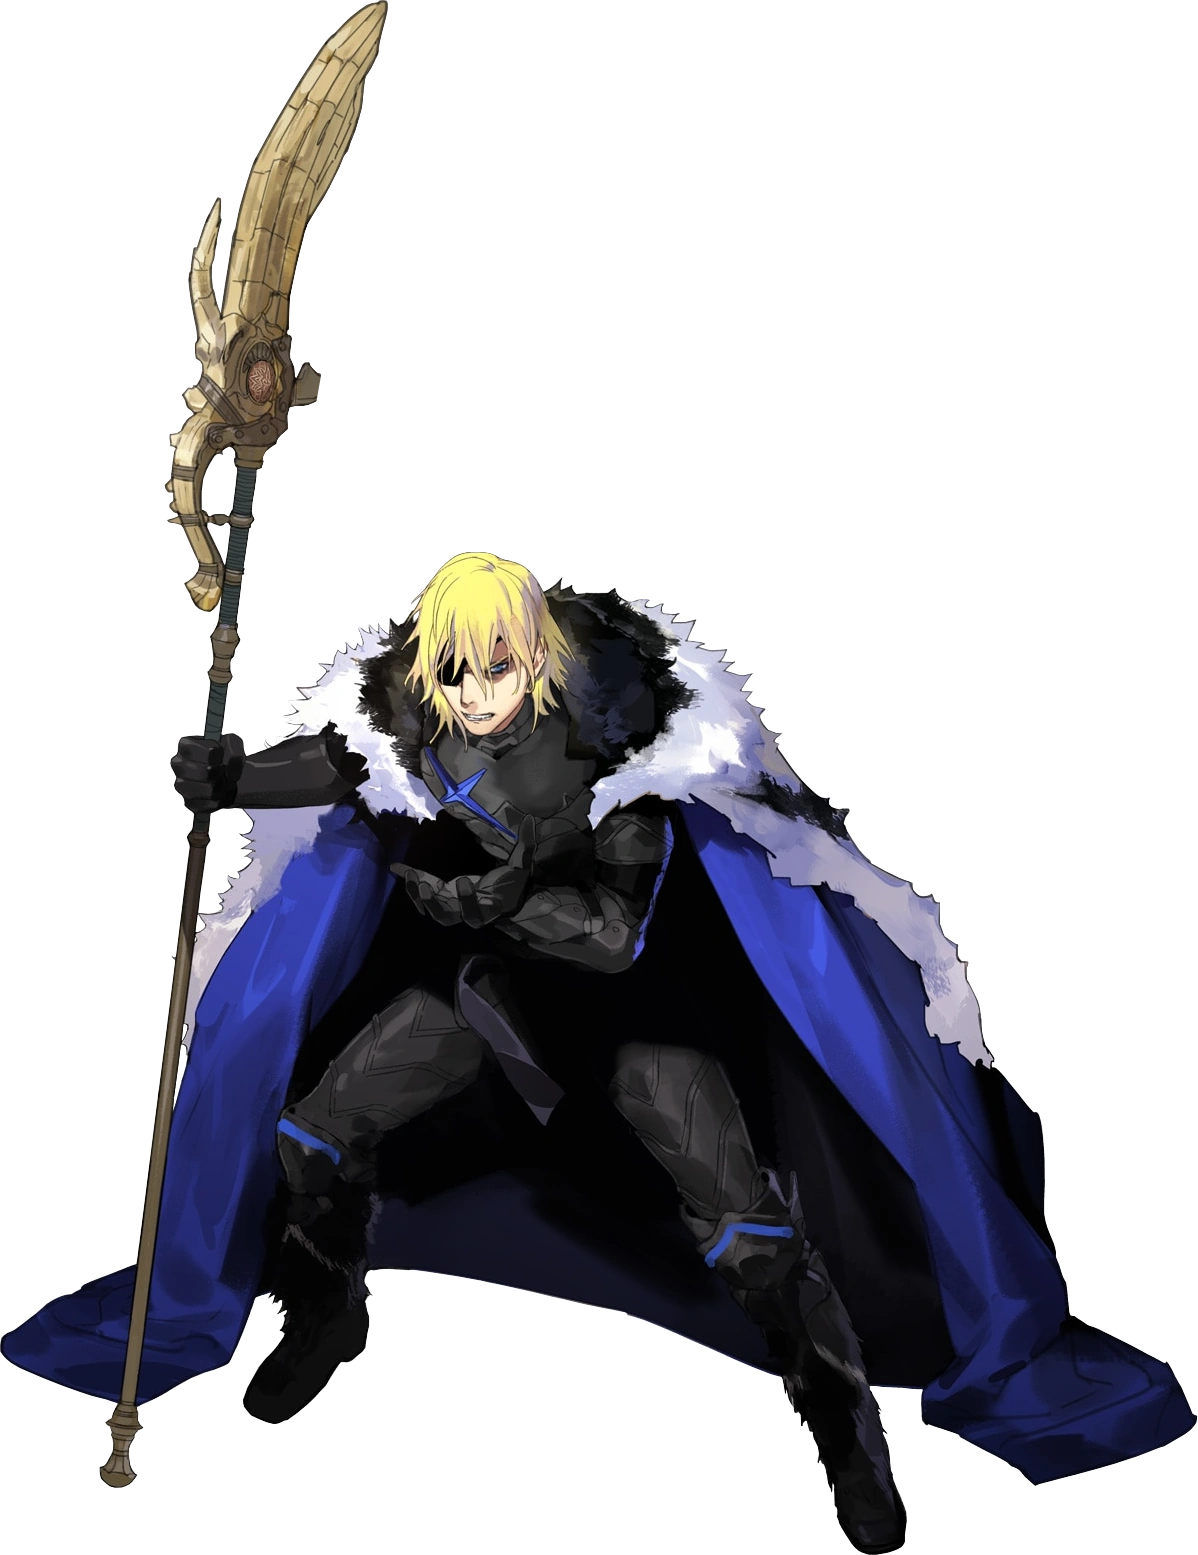
|
Primary (Shield) | ★★★☆ (Ace) | 2 | Hyper Smash Attacks |
- Spirit Battle
| Spirit | Enemy Fighter(s) | Type | Power/Class | Stage | Rules | Conditions | Music |
|---|---|---|---|---|---|---|---|
No. 1,384 Dimitri (Fire Emblem) |
•Byleth •Ganondorf |
Shield | 5,000 / ★★☆☆ (Advanced) | Distant Planet (Omega) | None | •Stamina battle •The enemy has increased attack power |
"Between Heaven and Earth" |
WarioWare: Get It Together!
Dimitri appears in WarioWare: Get It Together! as a background character in the Nintendo Classics microgame "Fire Emblem: Three Houses". The player engages in a Tea Party session with either Edelgard, Dimitri or Claude and must successfully choose the correct prompt. Dimitri's three prompts are always "You're great!" but the incorrect prompts include typos.
Fire Emblem 0 (Cipher)
Dimitri is illustrated in the trading card game Fire Emblem Cipher with the following cards:


Choose Your Legends Placement History
| Round | Placement | Character Version | Votes |
|---|
| CYL1 - CYL3 | N/A | ||||
| CYL4 | Winner 2 |
 Three Houses |
69,448 |
| CYL5 onward | Ineligible | ||||
Etymology
Dimitri (/dɪmit.ɹi/) is a male given name. It is the French, Italian, Dutch, Finnish, and Church Slavic variant of the Greek name Demetrios ("devoted to Demeter," the goddess of fertility, agriculture, and sacred law). Alexandre is the French, Portuguese, Catalan, and Galician form of Alexander, meaning "defender of the people" in Greek. Blaiddyd is the moniker of a legendary Brittonic king who encouraged the practice of necromancy, the name means "Wolf-lord" in Welsh.
Trivia
- Dimitri shares his English voice actor, Chris Hackney, with Boey in Echoes and Heroes, as well as Quan in Heroes.
- Due to House Riegan being a cadet branch of the Blaiddyd royal family, Dimitri is distantly related to Claude.
- Dimitri shares the alias "Tempest King" with Joshua from The Sacred Stones.
- Dimitri is the only house leader to have two playable retainers — Dedue and Gilbert, though the latter is only playable after the timeskip.
- As a Lord in the Academy phase, Dimitri's eyes on his sprite will change color to match his affiliation — blue as a player unit, red as an enemy, and yellow as a third army enemy. This quirk is not present for Edelgard or Claude and stops for Dimitri after the timeskip.
- Dimitri uses blue colors for his classes.
- In Chapter 17 of Crimson Flower, Dimitri's sprite depicts him with an eyepatch, even though he does not lose his right eye.
- Despite this, an unused sprite exists in the game's code that depicts Dimitri as a Great Lord, but without his eyepatch.
- Dimitri has the most portraits in the game. In Azure Moon, Verdant Wind, and Silver Snow, Dimitri has bags under his eyes that disappear after Chapter 17 of Azure Moon as well as a childhood portrait during a flashback in Chapter 21. However, in Crimson Flower, he still has his right eye.
- Game director Toshiyuki Kusakihara stated in an interview that Dimitri was not initially going to have an eyepatch after the timeskip. The decision to give him one was taken later in development and was meant to communicate that he underwent certain hardships in the other routes.
- On a technical note, Dimitri's battle model as an enemy in Gronder Field in Verdant Wind lacks the bags under his eyes while keeping his pre-chapter 18 voice clips at the same time.
- Game director Toshiyuki Kusakihara stated in an interview that Dimitri was not initially going to have an eyepatch after the timeskip. The decision to give him one was taken later in development and was meant to communicate that he underwent certain hardships in the other routes.
- Dimitri has the highest amount of critical hit quotes in the series at 18. Four during the Academy Phase, four when facing a named enemy in the Academy Phase, Four between Chapters 13 and 17, four from Chapter 18 onwards, and two when facing a named enemy in the War Phase post-Chapter 18.
- In Three Houses, due to Dimitri having ageusia, he has the least amount of disliked dishes with only 1 disliked dish while also having the least amount of favorite dishes with only 6 in total.
- In Super Smash Bros. Ultimate, Byleth's Dimitri costume is the only one where the dagger is recolored. The color scheme matches the dagger Dimitri gave to Edelgard.
- Dimitri's artwork from the Academy Phase depicts him wielding a Silver Lance, while his one from the War Phase depicts him wielding Areadbhar.
- In a survey conducted by Nintendo DREAM Magazine, Dimitri won 1st place in the character popularity poll for Three Houses. The male-female vote ratio was 1:2. He ranked 1st with 30.2% of the vote among those who completed the game and 32.4% overall.
- In the second survey, he won 1st place in the character popularity poll. The male-female vote ratio was 1:3. He ranked 1st among those who completed the game with 415 points.
- In the third survey, he won 1st place in the character popularity poll. The male-female vote ratio was 1:3. He ranked 1st among those who completed the game with 310 points.
- In the fourth survey, he won 1st place in the character popularity poll. The male-female vote ratio was 1:4. He ranked 1st among those who completed the game with 213 points.
- In the fifth survey, he won 1st place in the character popularity poll. The male-female vote ratio was 1:4. He ranked 1st among those who completed the game with 36.7% of the vote.
- In the December 2019 issue of Nintendo DREAM Magazine, Dimitri ranked 8th in the character popularity poll for most favorite Nintendo character.
- In the January 2020 issue, he ranked 4th in the character popularity poll for most favorite Nintendo character.
- In the February 2020 issue, he ranked 8th in the character popularity poll for most favorite Nintendo character.
- In the March 2020 issue, he ranked 8th in the character popularity poll for most favorite Nintendo character.
- In a survey conducted by Famitsu Magazine, Dimitri won 1st place in the character popularity poll for Three Houses. He ranked 1st for males and 1st overall with 1,335 votes. He also placed 1st among S-Supports chosen in the first playthrough with 596 votes.
- In the fourth Fire Emblem Heroes: Choose Your Legends popularity poll, Dimitri won 1st place for males and 2nd place overall with 69,448 votes.
- Dimitri won the 39th Voting Gauntlet (Brave Reprisals) in Heroes.
- Dimitri won the 62nd Voting Gauntlet (Sea-Spray Skirmish) in Heroes.
Gallery
- See main article: Dimitri/Gallery.