(Adding categories) |
(Fixed typo.) Tag: Visual edit |
||
| (13 intermediate revisions by 8 users not shown) | |||
| Line 14: | Line 14: | ||
|race =[[Beorc]] |
|race =[[Beorc]] |
||
|relatives = |
|relatives = |
||
| + | |occupation(s) = Member of the Greil Mercenaries |
||
| + | |faction(s) = [[Greil Mercenaries]] |
||
|game =[[Fire Emblem: Path of Radiance]]<br> |
|game =[[Fire Emblem: Path of Radiance]]<br> |
||
[[Fire Emblem: Radiant Dawn]]<br> |
[[Fire Emblem: Radiant Dawn]]<br> |
||
| Line 36: | Line 38: | ||
==Profile== |
==Profile== |
||
| − | In ''Path of Radiance'', Mia is a mercenary hired by [[Crimea]], and is captured by [[Daein]] soldiers. As a result of being set free by [[Greil]], she joins his mercenary band to pay off her debt, but remained with the mercenaries. Mia's training tends to be rather extreme, with her attempts to spar with others being rather aggressive in nature, whereupon she convinces [[Rhys]] to stand by |
+ | In ''Path of Radiance'', Mia is a mercenary hired by [[Crimea]], and is captured by [[Daein]] soldiers. As a result of being set free by [[Greil]], she joins his mercenary band to pay off her debt, but remained with the mercenaries. Mia's training tends to be rather extreme, with her attempts to spar with others being rather aggressive in nature, whereupon she convinces [[Rhys]] to stand by her side in order to heal any wounds she may receive. She is most likely Ike's preferred sparring partner, as she tends to not complain about the fact that he never holds back during their training sessions, even seeming to enjoy them. After the defeat of [[Ashera]], Mia sets off on a journey around [[Tellius]] in search of new opponents, occasionally stopping by Greil's retreat to rest. |
==Personality== |
==Personality== |
||
| Line 105: | Line 107: | ||
====Overall==== |
====Overall==== |
||
| + | {{Subjective}} |
||
| − | Mia joins relatively early on, and her high base speed practically guarantees she will be doubling all but the fastest enemies. However, she is held back by her relatively low strength, as well as her bad class. She will often not do much damage to enemies even with 2 attacks. While a 40% growth is by no means bad, it's low enough where it has trouble salvaging her base, meaning she will continue to have lackluster attacking prowess through out the game. It also doesn't help that she only starts with D swords, meaning she will struggle to hit C by the time Zihark joins with the killing edge. It also means that the most powerful weapon she has access to, the steel sword, weighs her down by 5 points unless weight is forged off of one. This means that early on she will often have to choose between double attacking and doing a notable amount of damage per hit. Being locked to swords in general can be crippling in a game like PoR. Since most combat happens on enemy phase, the inabilty to retaliate on and kill units with magic, bows, hand axes, or javelins can make certain maps take much longer than necessary. Her damage output flaws can be mitigated through the use of an energy drop, the adept skill, and/or the chapter 21 brave sword. However, considering she is not mounted and has no reliable 1-2 range, many will not consider her worth this investment. |
||
| + | Mia joins relatively early on, and her high base speed practically guarantees she will be doubling all but the fastest enemies. However, she is held back by her relatively low Strength, as well as her bad class. She will often not do much damage to enemies even with 2 attacks. While a 40% growth is by no means bad, it's low enough where it has trouble salvaging her base, meaning she will continue to have lackluster attacking prowess throughout the game. It also doesn't help that she only starts with D Swords, meaning she will struggle to hit C by the time Zihark joins with the Killing Edge. It also means that the most powerful weapon she has access to, the Steel Sword, weighs her down by 5 points unless weight is forged off of one. This means that early on she will often have to choose between double attacking and doing a notable amount of damage per hit. Being locked to swords in general can be crippling in a game like PoR. Since most combat happens on enemy phase, the inability to retaliate on and kill units with magic, bows, hand axes, or javelins can make certain maps take much longer than necessary. Her damage output flaws can be mitigated through the use of an Energy Drop, the Adept skill, and/or the chapter 21 Brave Sword. However, considering she is not mounted and has no reliable 1-2 range, many will not consider her worth this investment. |
||
===''[[Fire Emblem: Radiant Dawn]]''=== |
===''[[Fire Emblem: Radiant Dawn]]''=== |
||
| Line 212: | Line 215: | ||
====Overall==== |
====Overall==== |
||
| + | {{Subjective}} |
||
| − | Mia's Strength and [[Defense]] growths are well balanced in ''Radiant Dawn'', and her Skill, Speed and HP are by far her best stats. Her luck is also decent, but due to the cap of 35 and the growth of 35% it will most likely not cap. She'll have an easy time capping HP, Skill, and Speed, giving her great Bonus Experience potential, allowing her to improve her already decent Strength and Defense. Curiously (and also somewhat funny) is that if she caps Defense as a Swordmaster, the +3 promotion bonus will cause it to be immediately capped as a Trueblade. This gives her inherent bonus experience potential as a Trueblade, and will cap HP soon after, and Speed and Skill following shortly after as well, allowing her to improve her Strength, Luck, and Resistance, which all have decent to high caps. Overall, Mia, due to her high availability and high growths, is the best of the Trueblades, with a trained Edward or Zihark being her most prominent competition. Lucia usually is worse in every stat except Skill and Resistance in comparison to Mia, and the skill is only marginally higher. Mia can be brought into the tower of guidance and can wield the Vague Katti, and due to her dodging capabilities and decent durability, will be a useful asset throughout the game. |
||
| + | Mia's Strength and [[Defense (stat)|Defense]] growths are well balanced in ''Radiant Dawn'', and her Skill, Speed and HP are by far her best stats. Her Luck is also decent, but due to the cap of 35 and the growth of 35% it will most likely not cap. She'll have an easy time capping HP, Skill, and Speed, giving her great Bonus Experience potential, allowing her to improve her already decent Strength and Defense. Curiously (and also somewhat funny) is that if she caps Defense as a Swordmaster, the +3 promotion bonus will cause it to be immediately capped as a Trueblade. This gives her inherent bonus experience potential as a Trueblade, and will cap HP soon after, and Speed and Skill following shortly after as well, allowing her to improve her Strength, Luck, and Resistance, which all have decent to high caps. Overall, Mia, due to her high availability and high growths, is the best of the Trueblades, with a trained Edward or Zihark being her most prominent competition. Lucia usually is worse in every stat except Skill and Resistance in comparison to Mia, and the skill is only marginally higher. Mia can be brought into the Tower of Guidance and can wield the Vague Katti, and due to her dodging capabilities and decent durability, will be a useful asset throughout the game. |
||
===''[[Fire Emblem Awakening]]''=== |
===''[[Fire Emblem Awakening]]''=== |
||
| Line 236: | Line 240: | ||
===''[[Fire Emblem Heroes]]''=== |
===''[[Fire Emblem Heroes]]''=== |
||
| + | {{Padding|feh}} |
||
<tabber> |
<tabber> |
||
|-|Original= |
|-|Original= |
||
| Line 258: | Line 263: | ||
====Skills==== |
====Skills==== |
||
| + | {{CharSkills |
||
| − | ====='''Weapon'''===== |
||
| + | |weapon 1 = [[Iron Sword]] * - * - * - |
||
| − | {| class="wikitable" style="text-align: center;" |
||
| + | |weapon 2 = [[Steel Sword]] * - * - * - |
||
| − | !Name |
||
| + | |weapon 3 = [[Wo Dao]] * - * - * - |
||
| − | !Prerequisite |
||
| + | |weapon 4 = [[Resolute Blade]] * - * 5 * - |
||
| − | !Might |
||
| + | |special 1 = [[New Moon]] * - * 5 * - |
||
| − | !Range |
||
| + | |special 2 = [[Luna (Skill)|Luna]] * [[New Moon]] * - * 5 |
||
| − | !Effects |
||
| + | |passive A 1 = [[Dancing Blade|Flashing Blade 1]] * - * - * - |
||
| − | !SP Cost |
||
| + | |passive A 2 = [[Dancing Blade|Flashing Blade 2]] * [[Dancing Blade|Flashing Blade 1]] * - * - |
||
| − | !Default |
||
| + | |passive A 3 = [[Dancing Blade|Flashing Blade 3]] * [[Dancing Blade|Flashing Blade 2]] * - * 5 |
||
| − | !Unlocked |
||
| + | |passive B 1 = [[Vantage|Vantage 1]] * - * - * - |
||
| − | |- |
||
| + | |passive B 2 = [[Vantage|Vantage 2]] * [[Vantage|Vantage 1]] * - * - |
||
| − | |[[File:FEH skill offense.png|20px]] [[Iron Sword]] |
||
| + | |passive B 3 = [[Vantage|Vantage 3]] * [[Vantage|Vantage 2]] * - * 5 |
||
| − | | - |
||
| + | }} |
||
| − | |6 |
||
| − | |1 |
||
| − | | - |
||
| − | |50 |
||
| − | | - |
||
| − | | - |
||
| − | |- |
||
| − | |[[File:FEH skill offense.png|20px]] [[Steel Sword]] |
||
| − | | - |
||
| − | |8 |
||
| − | |1 |
||
| − | | - |
||
| − | |100 |
||
| − | | - |
||
| − | | - |
||
| − | |- |
||
| − | |[[File:FEH skill offense.png|20px]] [[Wo Dao]] |
||
| − | | - |
||
| − | |9 |
||
| − | |1 |
||
| − | |Grants +10 to damage when Special triggers. |
||
| − | |200 |
||
| − | | - |
||
| − | | - |
||
| − | |- |
||
| − | |[[File:FEH skill offense.png|20px]] [[Resolute Blade]] |
||
| − | | - |
||
| − | |16 |
||
| − | |1 |
||
| − | |Grants Atk +3. Grants +10 to damage when Special triggers. |
||
| − | |400 |
||
| − | |[[File:FEH Star Rarity 5.png|60px]] |
||
| − | | - |
||
| − | |} |
||
| − | |||
| − | ====='''Special'''===== |
||
| − | {| class="wikitable" style="text-align: center;" |
||
| − | !Name |
||
| − | !Prerequisite |
||
| − | !Effects |
||
| − | !Charge Cost |
||
| − | !SP Cost |
||
| − | !Default |
||
| − | !Unlocked |
||
| − | |- |
||
| − | |[[File:FEH skill special.png|20px]] [[New Moon]] |
||
| − | | - |
||
| − | |Resolves combat as if foe suffered Def/Res -30%. |
||
| − | |3 |
||
| − | |100 |
||
| − | |[[File:FEH Star Rarity 5.png|60px]] |
||
| − | | - |
||
| − | |- |
||
| − | |[[File:FEH skill special.png|20px]] [[Luna]] |
||
| − | |[[File:FEH skill special.png|20px]] [[New Moon]] |
||
| − | |Resolves combat as if foe suffered Def/Res -50%. |
||
| − | |3 |
||
| − | |200 |
||
| − | | - |
||
| − | |[[File:FEH Star Rarity 5.png|60px]] |
||
| − | |} |
||
| − | |||
| − | ====='''Passive'''===== |
||
| − | {| class="wikitable" style="text-align: center;" |
||
| − | !Name |
||
| − | !Prerequisite |
||
| − | !Effects |
||
| − | !SP Cost |
||
| − | !Unlocked |
||
| − | !Type |
||
| − | |- |
||
| − | |[[File:FEH Flashing Blade 1.png|25px]] [[Dancing Blade|Flashing Blade 1]] |
||
| − | | - |
||
| − | |If unit's Spd - foe's Spd > 5, unit gaints Special cooldown charge +1 per attack.<br>If using other similar skills, only highest value applied.) |
||
| − | |60 |
||
| − | | - |
||
| − | |A |
||
| − | |- |
||
| − | |[[File:FEH Flashing Blade 2.png|25px]] [[Dancing Blade|Flashing Blade 2]] |
||
| − | |[[File:FEH Flashing Blade 1.png|25px]] [[Dancing Blade|Flashing Blade 1]] |
||
| − | |If unit's Spd - foe's Spd > 3, unit gaints Special cooldown charge +1 per attack.<br>If using other similar skills, only highest value applied.) |
||
| − | |120 |
||
| − | | - |
||
| − | |A |
||
| − | |- |
||
| − | |[[File:FEH Flashing Blade 3.png|25px]] [[Dancing Blade|Flashing Blade 3]] |
||
| − | |[[File:FEH Flashing Blade 2.png|25px]] [[Dancing Blade|Flashing Blade 2]] |
||
| − | |If unit's Spd - foe's Spd > 5, unit gaints Special cooldown charge +1 per attack.<br>If using other similar skills, only highest value applied.) |
||
| − | |240 |
||
| − | |[[File:FEH Star Rarity 5.png|60px]] |
||
| − | |A |
||
| − | |- |
||
| − | |[[File:FEH Vantage 1.png|25px]] [[Vantage|Vantage 1]] |
||
| − | | - |
||
| − | |Unit counterattacks first when attacked at HP <25%. |
||
| − | |50 |
||
| − | | - |
||
| − | |B |
||
| − | |- |
||
| − | |[[File:FEH Vantage 2.png|25px]] [[Vantage|Vantage 2]] |
||
| − | |[[File:FEH Vantage 1.png|25px]] [[Vantage|Vantage 1]] |
||
| − | |Unit counterattacks first when attacked at HP <50%. |
||
| − | |100 |
||
| − | | - |
||
| − | |B |
||
| − | |- |
||
| − | |[[File:FEH Vantage 3.png|25px]] [[Vantage|Vantage 3]] |
||
| − | |[[File:FEH Vantage 2.png|25px]] [[Vantage|Vantage 2]] |
||
| − | |Unit counterattacks first when attacked at HP <75%. |
||
| − | |200 |
||
| − | |[[File:FEH Star Rarity 5.png|60px]] |
||
| − | |B |
||
| − | |} |
||
|-|The Land's Bounty= |
|-|The Land's Bounty= |
||
| Line 406: | Line 299: | ||
====Skills==== |
====Skills==== |
||
| + | {{CharSkills |
||
| − | ====='''Weapon'''===== |
||
| + | |weapon 1 = [[Assault]] * - * - * - |
||
| − | {| class="wikitable" style="text-align: center;" |
||
| + | |weapon 2 = [[Witchy Wand]] * - * - * - |
||
| − | !Name |
||
| + | |weapon 3 = [[Witchy Wand|Witchy Wand+]] * - * - * 5 |
||
| − | !Prerequisite |
||
| + | |assist 1 = [[Heal]] * - * - * - |
||
| − | !Might |
||
| + | |assist 2 = [[Mend]] * - * - * - |
||
| − | !Range |
||
| + | |assist 3 = [[Recover (Staff)|Recover]] * - * 5 * - |
||
| − | !Effects |
||
| + | |assist 4 = [[Recover (Staff)|Recover+]] * - * - * 5 |
||
| − | !SP Cost |
||
| + | |special 1 = [[Imbue]] * - * - * - |
||
| − | !Default |
||
| + | |special 2 = [[Heavenly Light]] * - * 5 * - |
||
| − | !Unlocked |
||
| + | |passive A 1 = [[Speed Resistance Bond|Spd/Res Bond 1]] * - * - * - |
||
| − | |- |
||
| + | |passive A 2 = [[Speed Resistance Bond|Spd/Res Bond 2]] * [[Speed Resistance Bond|Spd/Res Bond 1]] * - * - |
||
| − | |[[File:FEH skill offense.png|20px]] [[Assault]] |
||
| + | |passive A 3 = [[Speed Resistance Bond|Spd/Res Bond 3]] * [[Speed Resistance Bond|Spd/Res Bond 2]] * - * 5 |
||
| − | | - |
||
| + | |passive C 1 = [[Hone Speed|Hone Spd 1]] * - * - * - |
||
| − | |10 |
||
| + | |passive C 2 = [[Hone Speed|Hone Spd 2]] * [[Hone Speed|Hone Spd 1]] * - * - |
||
| − | |2 |
||
| + | |passive C 3 = [[Hone Speed|Hone Spd 3]] * [[Hone Speed|Hone Spd 2]] * - * 5 |
||
| − | | - |
||
| + | }} |
||
| − | |50 |
||
| − | | - |
||
| − | | - |
||
| − | |- |
||
| − | |[[File:FEH skill offense.png|20px]] [[Witchy Wand]] |
||
| − | | - |
||
| − | |5 |
||
| − | |2 |
||
| − | |After combat, if unit attacked, resets Special cooldown of target and foes within 2 spaces of target, and inflicts the following status on target and foes within 2 spaces of target through their next actions: "Inflicts Special cooldown charge -1 per attack during combat. (Only highest value applied. Does not stack.)" (Neutralizes Special cooldown count reductions after combat, but skills that Accelerate and Slow Special are still effective.) |
||
| − | |150 |
||
| − | | - |
||
| − | | - |
||
| − | |- |
||
| − | |[[File:FEH skill offense.png|20px]] [[Witchy Wand|Witchy Wand+]] |
||
| − | |[[File:FEH skill offense.png|20px]] [[Witchy Wand]] |
||
| − | |5 |
||
| − | |2 |
||
| − | |After combat, if unit attacked, resets Special cooldown of target and foes within 2 spaces of target, and inflicts the following status on target and foes within 2 spaces of target through their next actions: "Inflicts Special cooldown charge -1 per attack during combat. (Only highest value applied. Does not stack.)" (Neutralizes Special cooldown count reductions after combat, but skills that Accelerate and Slow Special are still effective.) |
||
| − | |300 |
||
| − | | - |
||
| − | |[[File:FEH Star Rarity 5.png|60px]] |
||
| − | |} |
||
| − | |||
| − | ====='''Assist'''===== |
||
| − | {| class="wikitable" style="text-align: center;" |
||
| − | !Name |
||
| − | !Prerequisite |
||
| − | !Range |
||
| − | !Effects |
||
| − | !SP Cost |
||
| − | !Default |
||
| − | !Unlocked |
||
| − | |- |
||
| − | |[[File:FEH skill support.png|20px]] [[Heal]] |
||
| − | | - |
||
| − | |1 |
||
| − | |Restores 5 [[HP]]. |
||
| − | |50 |
||
| − | | - |
||
| − | | - |
||
| − | |- |
||
| − | |[[File:FEH skill support.png|20px]] [[Mend]] |
||
| − | | - |
||
| − | |1 |
||
| − | |Restores 10 HP. |
||
| − | |100 |
||
| − | | - |
||
| − | | - |
||
| − | |- |
||
| − | |[[File:FEH skill support.png|20px]] [[Recover]] |
||
| − | | - |
||
| − | |1 |
||
| − | |Restores 15 HP. Slows Special trigger (cooldown count +1). |
||
| − | |200 |
||
| − | |[[File:FEH Star Rarity 5.png|60px]] |
||
| − | | - |
||
| − | |- |
||
| − | |[[File:FEH skill support.png|20px]] [[Recover|Recover+]] |
||
| − | | - |
||
| − | |1 |
||
| − | |Restores HP = 50% of Atk +10.<br>(Minimum of 15 HP.) |
||
| − | |300 |
||
| − | | - |
||
| − | |[[File:FEH Star Rarity 5.png|60px]] |
||
| − | |} |
||
| − | |||
| − | ====='''Special'''===== |
||
| − | {| class="wikitable" style="text-align: center;" |
||
| − | !Name |
||
| − | !Prerequisite |
||
| − | !Effects |
||
| − | !Charge Cost |
||
| − | !SP Cost |
||
| − | !Default |
||
| − | !Unlocked |
||
| − | |- |
||
| − | |[[File:FEH skill special.png|20px]] [[Imbue]] |
||
| − | | - |
||
| − | |When healing an ally with a staff, increases recovered HP by 10. |
||
| − | |1 |
||
| − | |50 |
||
| − | | - |
||
| − | | - |
||
| − | |- |
||
| − | |[[File:FEH skill special.png|20px]] [[Heavenly Light]] |
||
| − | |[[File:FEH skill special.png|20px]] [[Imbue]] |
||
| − | |When healing an ally with a staff, all other allies recover 10 HP. |
||
| − | |2 |
||
| − | |150 |
||
| − | | - |
||
| − | |[[File:FEH Star Rarity 5.png|60px]] |
||
| − | |} |
||
| − | |||
| − | ====='''Passive'''===== |
||
| − | {| class="wikitable" style="text-align: center;" |
||
| − | !Name |
||
| − | !Prerequisite |
||
| − | !Effects |
||
| − | !SP Cost |
||
| − | !Unlocked |
||
| − | !Type |
||
| − | |- |
||
| − | |[[File:FEH Spd Res Bond 1.png|25px]] [[Spd/Res Bond|Spd/Res Bond 1]] |
||
| − | | - |
||
| − | |Grants Spd/Res +3 to this unit during combat if unit is adjacent to an ally. |
||
| − | |60 |
||
| − | | - |
||
| − | |A |
||
| − | |- |
||
| − | |[[File:FEH Spd Res Bond 2.png|25px]] [[Spd/Res Bond|Spd/Res Bond 2]] |
||
| − | |[[File:FEH Spd Res Bond 1.png|25px]] [[Spd/Res Bond|Spd/Res Bond 1]] |
||
| − | |Grants Spd/Res +4 to this unit during combat if unit is adjacent to an ally. |
||
| − | |120 |
||
| − | | - |
||
| − | |A |
||
| − | |- |
||
| − | |[[File:FEH Spd Res Bond 3.png|25px]] [[Spd/Res Bond|Spd/Res Bond 3]] |
||
| − | |[[File:FEH Spd Res Bond 2.png|25px]] [[Spd/Res Bond|Spd/Res Bond 2]] |
||
| − | |Grants Spd/Res +5 to this unit during combat if unit is adjacent to an ally. |
||
| − | |240 |
||
| − | |[[File:FEH Star Rarity 5.png|60px]] |
||
| − | |A |
||
| − | |- |
||
| − | |[[File:FEH Hone Spd 1.png|25px]] [[Hone Speed|Hone Spd 1]] |
||
| − | | - |
||
| − | |Grants adjacent allies Spd +2 through their next actions at the start of each turn. |
||
| − | |50 |
||
| − | | - |
||
| − | |C |
||
| − | |- |
||
| − | |[[File:FEH Hone Spd 2.png|25px]] [[Hone Speed|Hone Spd 2]] |
||
| − | |[[File:FEH Hone Spd 1.png|25px]] [[Hone Speed|Hone Spd 1]] |
||
| − | |Grants adjacent allies Spd +3 through their next actions at the start of each turn. |
||
| − | |100 |
||
| − | | - |
||
| − | |C |
||
| − | |- |
||
| − | |[[File:FEH Hone Fliers.png|25px]] [[Hone Fliers]] |
||
| − | |[[File:FEH Hone Spd 2.png|25px]] [[Hone Speed|Hone Spd 2]] or [[File:FEH Hone Atk 2.png|25px]] [[Hone Attack|Hone Atk 2]] |
||
| − | |Grants adjacent flying allies Atk/Spd +6 through their next actions at the start of each turn. |
||
| − | |200 |
||
| − | |[[File:FEH Star Rarity 5.png|60px]] |
||
| − | |C |
||
| − | |} |
||
| − | |||
</tabber> |
</tabber> |
||
| Line 590: | Line 339: | ||
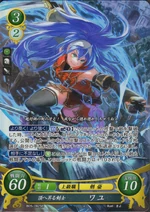
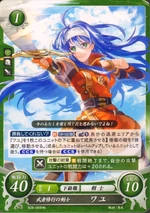
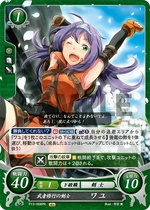
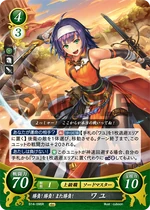
===''[[Fire Emblem 0 (Cipher)]]''=== |
===''[[Fire Emblem 0 (Cipher)]]''=== |
||
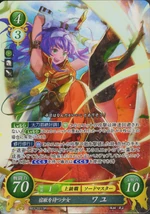
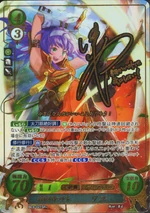
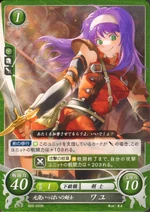
Mia is illustrated in the trading card game ''Fire Emblem Cipher'' with the following cards: |
Mia is illustrated in the trading card game ''Fire Emblem Cipher'' with the following cards: |
||
| − | + | {{CardLink|B03-021SR}} |
|
| − | + | {{CardLink|B03-021SR+}} |
|
| − | + | {{CardLink|B03-022N}} |
|
| − | + | {{CardLink|B05-092SR}} |
|
| − | + | {{CardLink|B05-093HN}} |
|
| − | + | {{CardLink|P13-008PR}} |
|
| − | + | {{CardLink|B14-096R}} |
|
| − | + | {{CardLink|B14-096R+}} |
|
==Trivia== |
==Trivia== |
||
| Line 608: | Line 357: | ||
*If Mia supports Ike in ''Radiant Dawn'', she will refer to him as "boss" instead of Ike. |
*If Mia supports Ike in ''Radiant Dawn'', she will refer to him as "boss" instead of Ike. |
||
| − | ==Gallery |
+ | ==Gallery== |
{{SeeMain|gallery}} |
{{SeeMain|gallery}} |
||
| Line 616: | Line 365: | ||
{{Cipher}} |
{{Cipher}} |
||
{{FEH}} |
{{FEH}} |
||
| − | [[ |
+ | [[de:Mia]] |
| + | [[es:Mia]] |
||
[[Category:Playable characters]] |
[[Category:Playable characters]] |
||
[[Category:Fire Emblem: Path of Radiance characters]] |
[[Category:Fire Emblem: Path of Radiance characters]] |
||
Revision as of 08:33, 22 February 2020
—Mia, in her supports with Largo in Path of Radiance.
Mia is a playable character from Fire Emblem: Path of Radiance and Fire Emblem: Radiant Dawn. She is one of the members of the Greil Mercenaries, and works as a sell-sword.
Profile
In Path of Radiance, Mia is a mercenary hired by Crimea, and is captured by Daein soldiers. As a result of being set free by Greil, she joins his mercenary band to pay off her debt, but remained with the mercenaries. Mia's training tends to be rather extreme, with her attempts to spar with others being rather aggressive in nature, whereupon she convinces Rhys to stand by her side in order to heal any wounds she may receive. She is most likely Ike's preferred sparring partner, as she tends to not complain about the fact that he never holds back during their training sessions, even seeming to enjoy them. After the defeat of Ashera, Mia sets off on a journey around Tellius in search of new opponents, occasionally stopping by Greil's retreat to rest.
Personality
Mia can be described as energetic and quirky. She is obsessed when it comes to proving the strength of her mettle, a fact that surfaces prominently in her support conversations, where she will often run around and challenge the first person she sees to duels. Despite her eccentricities, she has a heart of gold, willing to lend her aid to people who need it. For instance, her supports with Ilyana sees her attempting to look after the mage because the latter is fatigued from her usual hunger spells. Also, one of her training sessions with Rhys has her ardently forbidding him from practicing with swords when she sees that doing so makes him ill.
Mia is stalwartly opposed to the backdated viewpoint of women being unsuited for the battlefield, training rigorously every day to disprove this notion. This belief of Mia's has had a major influence on her being quick to accuse male duelists of going easy on her or assuming that her prowess as a swordswoman is inferior due to her gender. This is proven through her supports with Largo, where she takes deep offense over the man suggesting that she is better suited to doing something domestic instead of taking to the battlefield with a sword in hand.
In-Game
Fire Emblem: Path of Radiance
Recruitment
- Chapter 7: Have Ike speak to her.
Base Stats
| Starting Class | Affinity | ||||||||||
|---|---|---|---|---|---|---|---|---|---|---|---|
| Level | HP | Str | Mag | Skl | Spd | Lck | Def | Res | Con | Wt | Mov |
| 6 | 21 | 7 | 0 | 10 | 13 | 6 | 7 | 2 | 6 | 6 | 6 |
| Skills | Weapon | Starting Items | |||||||||
Growth Rates
| HP | Str | Mag | Skl | Spd | Lck | Def | Res |
|---|---|---|---|---|---|---|---|
| 50% | 40% | 30% | 45% | 60% | 45% | 20% | 25% |
Support Conversations
- See also: Mia/Supports
Promotion Gains
| Item Required | Promoted Class | ||||||||
|---|---|---|---|---|---|---|---|---|---|
| ( |
|||||||||
| 1 | +4 | +1 | +2 | +2 | +2 | +2 | +2 | +1 | +1 |
Overall
Subjective: The following part of this article is based upon the editor's personal experiences and opinions, and therefore may not be applicable for all readers.
|
Mia joins relatively early on, and her high base speed practically guarantees she will be doubling all but the fastest enemies. However, she is held back by her relatively low Strength, as well as her bad class. She will often not do much damage to enemies even with 2 attacks. While a 40% growth is by no means bad, it's low enough where it has trouble salvaging her base, meaning she will continue to have lackluster attacking prowess throughout the game. It also doesn't help that she only starts with D Swords, meaning she will struggle to hit C by the time Zihark joins with the Killing Edge. It also means that the most powerful weapon she has access to, the Steel Sword, weighs her down by 5 points unless weight is forged off of one. This means that early on she will often have to choose between double attacking and doing a notable amount of damage per hit. Being locked to swords in general can be crippling in a game like PoR. Since most combat happens on enemy phase, the inability to retaliate on and kill units with magic, bows, hand axes, or javelins can make certain maps take much longer than necessary. Her damage output flaws can be mitigated through the use of an Energy Drop, the Adept skill, and/or the chapter 21 Brave Sword. However, considering she is not mounted and has no reliable 1-2 range, many will not consider her worth this investment.
Fire Emblem: Radiant Dawn
Availability
| Part 1 | Part 2 | Part 3 | Part 4 | Endgame | ||||||||||||||||||||||||||||||||||||||
|---|---|---|---|---|---|---|---|---|---|---|---|---|---|---|---|---|---|---|---|---|---|---|---|---|---|---|---|---|---|---|---|---|---|---|---|---|---|---|---|---|---|---|
| P | 1 | 2 | 3 | 4 | 5 | 6 | 7 | 8 | 9 | E | P | 1 | 2 | 3 | E | P | 1 | 2 | 3 | 4 | 5 | 6 | 7 | 8 | 9 | 10 | 11 | 12 | 13 | E | P | 1 | 2 | 3 | 4 | 5 | E | A1 | A2 | A3 | A4 | A5 |
| ◎ | ◎ | ○ | ○ | ○ | ○ | ○ | ○ | ○ | ○ | ○ | □ | □ | □ | □ | □ | □ | □ | □ | □ | □ | □ | □ | □ | |||||||||||||||||||
◎=Forced ○=Available □=Available for selected △=Reinforcement
Base Stats
| Starting Class | Affinity | ||||||||||
|---|---|---|---|---|---|---|---|---|---|---|---|
 Swordmaster Swordmaster | |||||||||||
| Level | HP | Str | Mag | Skl | Spd | Lck | Def | Res | Con | Wt | Mov |
| 7 | 34 | 17 | 5 | 26 | 28 | 18 | 13 | 8 | 7 | 7 | 7 |
| Skills | Weapon | Starting Items | |||||||||
Growth Rates
| HP | Str | Mag | Skl | Spd | Lck | Def | Res |
|---|---|---|---|---|---|---|---|
| 70% | 45% | 15% | 60% | 65% | 35% | 40% | 25% |
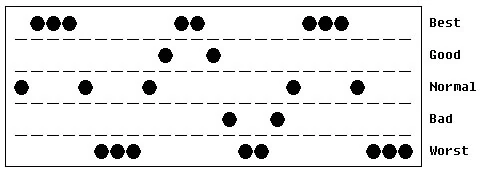
Biorhythm
Promotion Gains
| Item Required | Promoted Class | ||||||||
|---|---|---|---|---|---|---|---|---|---|
| ( |
 Trueblade Trueblade
| ||||||||
| 1 | +4 | +3 | +4 | +2 | +2 | +3 | +4 | +0 | +0 |
| Skills | |||||||||
Overall
Subjective: The following part of this article is based upon the editor's personal experiences and opinions, and therefore may not be applicable for all readers.
|
Mia's Strength and Defense growths are well balanced in Radiant Dawn, and her Skill, Speed and HP are by far her best stats. Her Luck is also decent, but due to the cap of 35 and the growth of 35% it will most likely not cap. She'll have an easy time capping HP, Skill, and Speed, giving her great Bonus Experience potential, allowing her to improve her already decent Strength and Defense. Curiously (and also somewhat funny) is that if she caps Defense as a Swordmaster, the +3 promotion bonus will cause it to be immediately capped as a Trueblade. This gives her inherent bonus experience potential as a Trueblade, and will cap HP soon after, and Speed and Skill following shortly after as well, allowing her to improve her Strength, Luck, and Resistance, which all have decent to high caps. Overall, Mia, due to her high availability and high growths, is the best of the Trueblades, with a trained Edward or Zihark being her most prominent competition. Lucia usually is worse in every stat except Skill and Resistance in comparison to Mia, and the skill is only marginally higher. Mia can be brought into the Tower of Guidance and can wield the Vague Katti, and due to her dodging capabilities and decent durability, will be a useful asset throughout the game.
Fire Emblem Awakening
SpotPass
| Starting Class | |||||||||
|---|---|---|---|---|---|---|---|---|---|
| Level | HP | Str | Mag | Skl | Spd | Lck | Def | Res | Mov |
| 14 | 25 | 10 | 3 | 15 | 19 | 12 | 9 | 4 | 5 |
| Skills | Weapon | Starting Items | |||||||
*Enemy only; joins unequipped
Fire Emblem Heroes
- Lady of Blades
- A mercenary fighting to improve her sword skills. In life, she doesn't sweat the details. Appears in Fire Emblem: Path of Radiance.
Base Stats
Rarity: ✯✯✯✯✯
 | Title | ||||
|---|---|---|---|---|---|
| Lady of Blades | |||||
| Group | |||||
| Level | HP | Atk | Spd | Def | Res |
| 1 40 | 15/16/17 34/38/41 | 7/8/9 29/32/35 | 11/12/13 37/40/43 | 5/6/7 24/28/31 | 5/6/7 22/25/29 |
| Skills | Weapon | ||||
Skills
| Type | Name | Prerequisite | Default | Unlocked |
|---|---|---|---|---|
| Iron Sword | - | - | - | |
| Steel Sword | - | - | - | |
| Wo Dao | - | - | - | |
| Resolute Blade | - | - | ||
| New Moon | - | - | ||
| Luna | New Moon | - | ||
| A | - | - | ||
| - | ||||
| B | - | - | ||
| - | ||||
- Moonlit Witch
- A mercenary fighting to improve her sword skills. She can't wait to get to the harvest festival. Appears in Fire Emblem: Radiant Dawn.
Base Stats
Rarity: ✯✯✯✯✯
 | Title | ||||
|---|---|---|---|---|---|
| Moonlit Witch | |||||
| Group | |||||
| Level | HP | Atk | Spd | Def | Res |
| 1 40 | 16/17/18 33/36/40 | 5/6/7 27/30/33 | 9/10/11 31/34/37 | 4/5/6 19/22/25 | 5/6/7 24/28/31 |
| Skills | Weapon | ||||
Skills
| Type | Name | Prerequisite | Default | Unlocked |
|---|---|---|---|---|
| Assault | - | - | - | |
| Witchy Wand | - | - | - | |
| Witchy Wand+ | - | - | ||
| Heal | - | - | - | |
| Mend | - | - | - | |
| Recover | - | - | ||
| Recover+ | - | - | ||
| Imbue | - | - | - | |
| Heavenly Light | - | - | ||
| A | - | - | ||
| - | ||||
| C | - | - | ||
| - | ||||
Quotes
—Mia's death quote as an NPC unit in Path of Radiance.
—Mia's death quote in Path of Radiance.
—Mia's death quote in Radiant Dawn.
Heroes
Possible Endings
Path of Radiance
"Heya, Boss! We did it! Whooo-hooo! You know, I am completely in love with your fighting style. If I could train under you, it would be great! So let me stick around for a while. All right?"
Radiant Dawn
Aspiring Lady of the Blades (頂へ昇る剣士 Itadaki e Noboru Kenshi, lit. The Rising to the Top Swordsman)
- Mia set off in search of new opponents. She traveled the whole continent, but sometimes rested at the Greil's retreat.
Non-Canon Appearances
Fire Emblem 0 (Cipher)
Mia is illustrated in the trading card game Fire Emblem Cipher with the following cards:
Trivia
- Mia's Radiant Dawn incarnation came in 16th place for females in the Fire Emblem Heroes Choose Your Legends popularity poll, with 8,946 votes. Her Path of Radiance incarnation came in 37th place for females, and had 4,408 votes.
- Mia, alongside most of the Greil Mercenaries, is given a voice in a cutscene of Radiant Dawn. Alongside Micaiah and Rolf, is voiced by Lani Minella.
- Mia is the only one of these characters to retain Lani Minella as a voice actress in Fire Emblem Heroes.
- In Fire Emblem: The Sacred Stones, Forde mentions that Kyle has a sister named Mia in their B support. However neither character's name is Mia in the Japanese versions.
- Throughout the Tellius series, Mia searches for her rival "clad in white", accusing several unlikely characters of being this person. Strangely enough she never seems to take notice of Lucia, who serves in the same army as her in both games and is a Swordmaster in white garb.
- Mia has cut supports with Marcia and Nephenee in the data for Path of Radiance.
- If Mia supports Ike in Radiant Dawn, she will refer to him as "boss" instead of Ike.
Gallery
- See main article: Mia/Gallery.