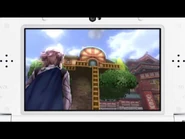
My Castle (マイキャッスル Mai kyassuru) is a gameplay element in Fire Emblem Fates.
Story
After the battle at the Bottomless Canyon N., Hans betrays the Avatar by attacking Gunther, causing him to fall into the Bottomless Canyon. Enraged, the Avatar discovers their Dragon Fang ability and attacks him. However, the Ganglari flings them into the Infinite Chasm. As they fall to their presumed death, Lilith appears, changes into her dragon form and rescues them by sending them both to the Astral Realm. After explaining the nature of the area and building the Avatar's Personal Quarters, she sends them back to the Bottomless Canyon N., but warns them that they should be careful of enemy ambushes.
Later, after the events of Chapter 6 in any path, Lilith brings the Avatar and either Felicia or Jakob depending on the Avatar's gender into the Astral Realm where they decided that the area will be used as the Avatar's main base when not in combat.
Overview
My Castle is a customizable base of operation available in all routes of Fates. Like the Barracks in Awakening, My Castle is a gathering place for the player's army and certain events can be triggered by the characters there. My Castle is mainly viewed from the top down view with the Avatar portrayed by their map sprite, however, they can toggle their view to see the base from a 3-D third person perspective. Characters in the Player's army can also be found wandering in the area and can be interacted with for a variety of events as well as unique dialogue depending on the time of day. In order to build and upgrade facilities, players need to acquire Dragon Vein Points by participating in battles or visiting other My Castles. All features and upgrades requires that the player reach a certain chapter in game in order to use.
My Castle also serves as the main hub for StreetPass. Players are given a Ranking, similar to Renown in Awakening, but divided into a Battle and Visitor Ranking. Anytime a player StreetPasses any player with any version of Fates, they will receive a visitor Avatar. Players can then visit their My Castle and make usage of their facilities, including their Shops and Resources. Alternatively, players may engage the StreetPass Avatar in a battle. Players assign 10 units to defend their base and can freely position their units on the map, including positioning them for Guard Stances and Attack Stances. Buildings may be destroyed during a My Castle battle and can serve as extra protection, but there is not negative cost for having a building destroyed. To clear a StreetPass battle, the player must either rout all enemies or capture their My Castle by seizing the throne. Winning a My Castle battle allows the player to either recruit anyone of the 10 units used in the battle or to purchase a skill on that unit, including route locked story characters like Takumi and Leo. Recruiting a unit works similarly to StreetPass/SpotPass Avatars from Awakening where players are allowed to train them and change their class and weapons. They cannot form Supports with any army members, even if they have the capability normally. Skill wise, players can purchased any skills equipped skills on a unit onto the same unit in the player's army. Hence, buying Luna off of a Camilla will give Luna to Camilla of the Player's army only. Prices of the skills varies and will cost a decent amount of gold.
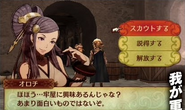
Several of the buildings in My Castle are also used to recruit several characters in-game. In the Birthright and Revelation routes, upgrading any of the puppets to level 3 will allow the player to recruit Yukimura. In the Conquest and Revelation routes, upgrading any of the turrets to level 3 will allow the player to recruit Flora. In the Conquest and Birthright routes, upgrading the bath house to level 3 will allow the player to recruit Izana while Fuga replaces him in Revelation due to the storyline.
The player's castle can also be used as one of the options in Wireless Battles; in this case, building effects are negated and any puppets/golems in the castle are not deployed.
Advisors and customization
Players can customize My Castle through their advisors. Initially, the player starts out with Felicia or Jakob as their advisor, depending on their gender. When Gunter and Flora are unlocked, they may be used as advisers as well. Generic units, ranging from villagers to Faceless, are also available to be used as advisors once certain conditions are met.
Advisors offer options to build, move, or upgrade facilities, as well as change the fort's name, the background music that plays, and its overall style. There are six available styles for My Castle, three each for Birthright and Conquest; Revelation allows players to choose from all six.
- Birthright styles:
- Hoshidan - a castle with blossoming cherry trees
- Wind Tribe - an arid mountain hold split by a chasm
- Izumite - a castle built around a large rock
- Conquest styles:
Buildings
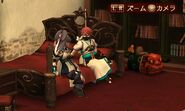
- Private Quarters - A room reserved for the Avatar. If the Avatar has a spouse, they will be found in this room as they will share the room with them. This building increases damage dealt by allied units during a Castle Battle.
- Player's can freely alter their Avatar's hairstyle.
- Dialogue may also change between several characters if the Avatar is married when they are invited in.
- Players invite characters that they have formed supports into their room. After a small dialogue given by the invited character, the Avatar's support with that character will be boosted. For an Avatar's spouse, they will say different dialogue and can have special events such as blowing into the Nintendo 3DS' microphone to "cool them off" and waking them up if they are sleeping.
- In the Japanese version, players are given a Pokémon Amie styled mini-game where they perform a "skin ship" with the character by rubbing the touch screen. Dialogue changes depending on the character's relationship with the player.
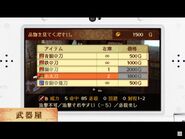
- Armory/Vendor - Two shops to buy weapons and healing items. Stocked items and stocked amounts are determined by the shop's rank. There are two versions of both shops, one for Hoshido and one for Nohr. Shop discounts may occur from time to time and are determined by who is running the shop out of the allied army units.
- Forge - A building to forge weapons. Forging costs Gemstones. A higher level forge means that weapons can be forged to be even stronger.
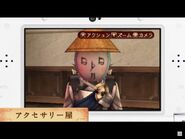
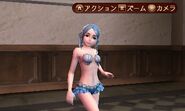
- Accessory Room - A shop to buy special hats, masks, clothes, and gloves to wear, which have a variety of stat boosts during My Castle battles. These accessories can be worn in normal and My Castle battles. They can be seen in normal cutscenes (e.g chapter introduction), but not in special cutscenes (e.g film shots). The accessories cost either gems or foodstuffs in order to purchase. You can also change the accessories between characters and they can be broken during battle cutscenes, but will return at the end of the battle. This building also provides an increase in critical evasion. Some accessories also can increase the chances of the wearer taking a shift at a specific area (these only apply for the storyline units and not captured ones).
- In the English version only the Bath towel and Love swimsuit outfits are available although the other swimsuit is shown in that versions Hot Spring building.
- Mess Hall - Players can cook meals to feed your units. The character serving as the chef during your visit will affect the outcome of the dish. The foodstuffs used will determine what stats it will give to your army. A higher level mess hall increases the amount of ingredients you can put in a dish and give more buffs in one go. Having this building in your My Castle boosts your unit's Hit Rate during Castle battles.
- Prison - A prison to hold units that were captured in a previous battle. A higher level prison expands the amount of prisoners it can hold at one time. Having a this building in your My Castle boosts your unit's Critical Hit rate during Castle Battles.
- Arena - Players can gamble resources by participating in classic Arena style battles. Winning nets you additional resources while losing causes you to lose your wager. No experience or gold is earned in this feature and units defeated in the Arena are not killed. Units may appear alone, or a second unit may appear, making the Arena battle an Attack Stance battle for both sides. Players can choose which one is the lead unit. Higher leveled arenas allow for consecutive rounds where the rewards are doubled if that round is passed.
- Card Shop - A shop where you can buy Outrealm units. Higher level card shops mean that the player can buy more cards. Having this building in your My Castle boosts your unit's Avoid during a Castle battle.
- Records Hall - A building to utilize the Hubba Tester to check on the army's "compatibility" and to peruse ancient texts. Higher level Museums unlocks Fates soundtest. Having this building in your My Castle decreases damage taken during Castle battles.
- Lottery Shop - Players can use the Dawn Lottery (Birthright) or Dusk Lottery to spin a lottery once a day for random rewards, ranging from resources to weapons and seals.
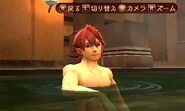
- Hot Springs - The Hot Springs are an area for the Avatar to have special interactions with the player's army. Higher bath level allows more characters to appear in the spring at one time. If the Avatar is married, they may spend time with their spouse and/or children in this building. The "R" button on the Nintendo 2/3DS will show the player who is in the hot springs at the moment.
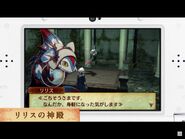
- Lilith's Shrine - A small shrine housing an azure dragon named Lilith. As Lilith is fed, she will level up and the food she is fed will influence her stat growths.
- Travelers' Plaza - A special gathering area for StreetPass Avatars, DLC, and amiibo characters.
- Players can visit other player's My Castles and peruse their set up.
Installations
Players can add numerous purely defensive features in their My Castle for usage during StreetPass defense battles. All Installations are determined by the route being played, however all players that are playing the Revelation are given access to all Installations.
Birthright Installations
- Dawn Dragon Statue — Heals the defending army each turn. Health recovered is by 10, 15 and 20% of their maximum health respectively.
- Puppet —Summons a Puppet unit as an extra battle unit. There are three types of Puppets: Heaven, Earth, and Man. Higher rank puppets have higher stats and better weaponry. The rank 3 Puppets also have the Seal Strength skill. Puppets use both Yumi and Saws to assist them in battle, and will attack nearby targets. If there are no targets within range, they will return to the spot where they were deployed in.
- Shuriken Turret — A fixed turret that shoots Shurikens at enemies. Can only be used by Hidden Weapons users. Damage and accuracy increases with rank.
- Ballista — A fixed turret that shoots arrows. Can only be used by bow users. Damage and accuracy increases with rank.
- Resource nodes — There are two different nodes a player can make exclusive to Birthright; one food and one gemstone node; see the resources table for more details. Higher leveled nodes give more resources.
Conquest Installations
- Dusk Dragon Statue—Damages the attacking army each turn. Damage dealt is by 10, 15 and 20% of their maximum health respectively. Will never kill opponents.
- Stoneborn— Summons a Stoneborn unit as an extra battle unit. There are three types of Stoneborn: A, B, and C class. Stoneborns cannot move but throw powerful rocks at their opponents. The higher the rank, the better the Stoneborn's stats are and use more powerful rocks. Stoneborns have a 1-5 attack range, but unlike the enemy Stoneborns found in the storyline, cannot move. The rank 3 Steonborns come with the Wary Fighter skill.
- Magic Turret —A fixed turret that launches Magic. Can only be used by magic users. Damage and accuracy increases with rank.
- Resource nodes — There are two different nodes a player can make exclusive to Conquest; one food and one gemstone node; see the resources table for more details. Higher leveled nodes give more resources.
Resources
Every My Castle houses Gathering Spots, a daily intractable area to gather resources. The type of Gathering Spots available in a My Castle is determined by the route the player is currently playing. If the player is playing either the Birthright or Conquest routes, they are given two Gathering Spots: one for Gemstones and one for Foodstuffs. If playing the Revelations route, the player is given one Hoshido Gemstone and Foodstuff spots and one Nohr Gemstone and Foodstuff spots for a total of four Gathering spots. When visiting other player's My Castles, the player may gather resources from that player's Gathering Spots.
Both resources can be gambled at the Arena and can be used to buy accessories from the Accessories Shop.
Gemstones
| Icon | Name | Forges | Side |
|---|---|---|---|
| Crystal | Swords | Conquest / Revelation | |
| Ruby | Lances | Conquest / Revelation | |
| Sapphire | Axes | Conquest / Revelation | |
| Onyx | Kunai | Conquest / Revelation | |
| Emerald | Bows | Conquest / Revelation | |
| Topaz | Tomes | Conquest / Revelation | |
| Pearl | Katanas | Birthright / Revelation | |
| Coral | Naginata | Birthright / Revelation | |
| Lapis | Clubs | Birthright / Revelation | |
| Quartz | Shuriken | Birthright / Revelation | |
| Jade | Yumi | Birthright / Revelation | |
| Amber | Scrolls | Birthright / Revelation |
Food Items
| Icon | Name | Stat | Side |
|---|---|---|---|
| Meat | Strength | Conquest / Revelation | |
| Milk | Speed | Conquest / Revelation | |
| Cabbage | Resistance | Conquest / Revelation | |
| Berries | Magic | Conquest / Revelation | |
| Wheat | Defense | Conquest / Revelation | |
| Soybeans | Strength | Birthright / Revelation | |
| Fish | Speed | Birthright / Revelation | |
| Daikon | Resistance | Birthright / Revelation | |
| Peach | Magic | Birthright / Revelation | |
| Rice | Defense | Birthright / Revelation |


